
I Am... How to Make Homemade Garganelli
Sometimes I feel like there are so many things out there that I want to make but never have the time to. But really, let’s be honest, I probably do have the time, I just don’t have the inclination. It takes a huge amount of interest to get me to actually follow through with my millions of plans so it came as a surprise to me when I finally made these homemade garganelli! I have made garganelli before, but the smooth kind, without the ridges. Garganelli are the cutest little pasta shape – essentially a tube that is formed from a flat square noodle. They kind of look like penne except penne are extruded and are a completely seamless cylinder. Garganelli on the other hand, have a delightful little flap where the seams are pressed together giving it a nice textural contrast between where the pasta is thicker and where it is thinner. Garganelli are super easy to make at home. Just make your pasta dough as per usual. If you don’t have a favorite pasta dough, I’ve included one below, but of course this will work with all and any pasta doughs. After your pasta dough has rested, it’s just a question of rolling it out into thin (but not too thin) sheets. I usually roll mine out to #5 or #6 which results in quite puffy giant pasta shapes. I like keeping it on the thicker side because I love chewy biteable pasta and I also find the the shapes hold up better when the pasta isn’t rolled too thick. Once your pasta is rolled into sheets, it’s just a question of cutting everything into squares. I use a ruler and cut squares about 1.25 inches but if you want to freehand it, you can do that too, just try to keep the squares a consistent size. From there, it’s a question of rolling. If you have a gnocchi board, you can make garganelli with ridges but if you don’t, you can just make smooth garganelli. The ones with ridges are great because sauce clings to them but the ones without are just as tasty and probably easier to make because you don’t need to worry about aligning the pasta squares. To make: place a square diagonally on your work surface (either a wooden cutting board or a gnocchi board). Pick up the corner closest to you and hold it against a wooden dowel or the end of a wooden spoon. Roll the pasta and the rod together firmly, pressing down when the two corner edges meet. Slide the tube off the dowel and let dry out on a lightly floured or cornmeal dusted surface. These little guys cook up super fast - just cook them until they float, then serve them up with your favorite sauce! We like them with: creamy cacio e pepe, lemon sauce, pasta alla norcina, or garlicky brown butter parmesan.
How to Make Homemade Garganelli
- 100 grams flour (plus extra for dusting)
- 1 large egg
- 1 extra egg yolk
Place 100 grams flour in a large bowl and make a well in the middle. Put the egg and egg yolk into the well and use a fork to whisk the eggs, slowly incorporating the flour, little by little, until a dough starts to form - alternately, use a food processor to bring the flour and eggs together until they resemble coarse bread crumbs. Turn out onto a lightly floured board and knead the dough until smooth and elastic, then wrap with plastic wrap and let rest for 1 hour.
After the pasta has rested for an hour, lightly dust with flour and press into a rectangle shape. Working in batches, roll out the dough, starting at the thickest setting, and dialing it down after roll. You can roll it to anywhere from between #5-#7 on the pasta roller. The thicker your roll it, the more likely it will be able to hold its shape after cooking, so keep that in mind.
Cut the pasta sheet into 1.25 inch squares, being sure to cover the extra pasta dough (and cut squares) with plastic wrap so it doesn’t dry out.
Take your gnocchi board and place a square diagonally on the board. Pick up the corner closest to use and wrap the pasta square around a dowel (I used the handle of a wooden spoon) and roll while pressing down to form the ridges. Press a bit more firmly to seal where the corner edges meet.
Slide off the dowel and set aside on a lightly floured or cornmeal dusted tray or work surface. You can let these dry out slightly once they’ve been formed, it will help them keep their shape while cooking. Repeat until you have used up all of your pasta dough.
I Am... Goi Ga – Vietnamese Chicken Salad Recipe
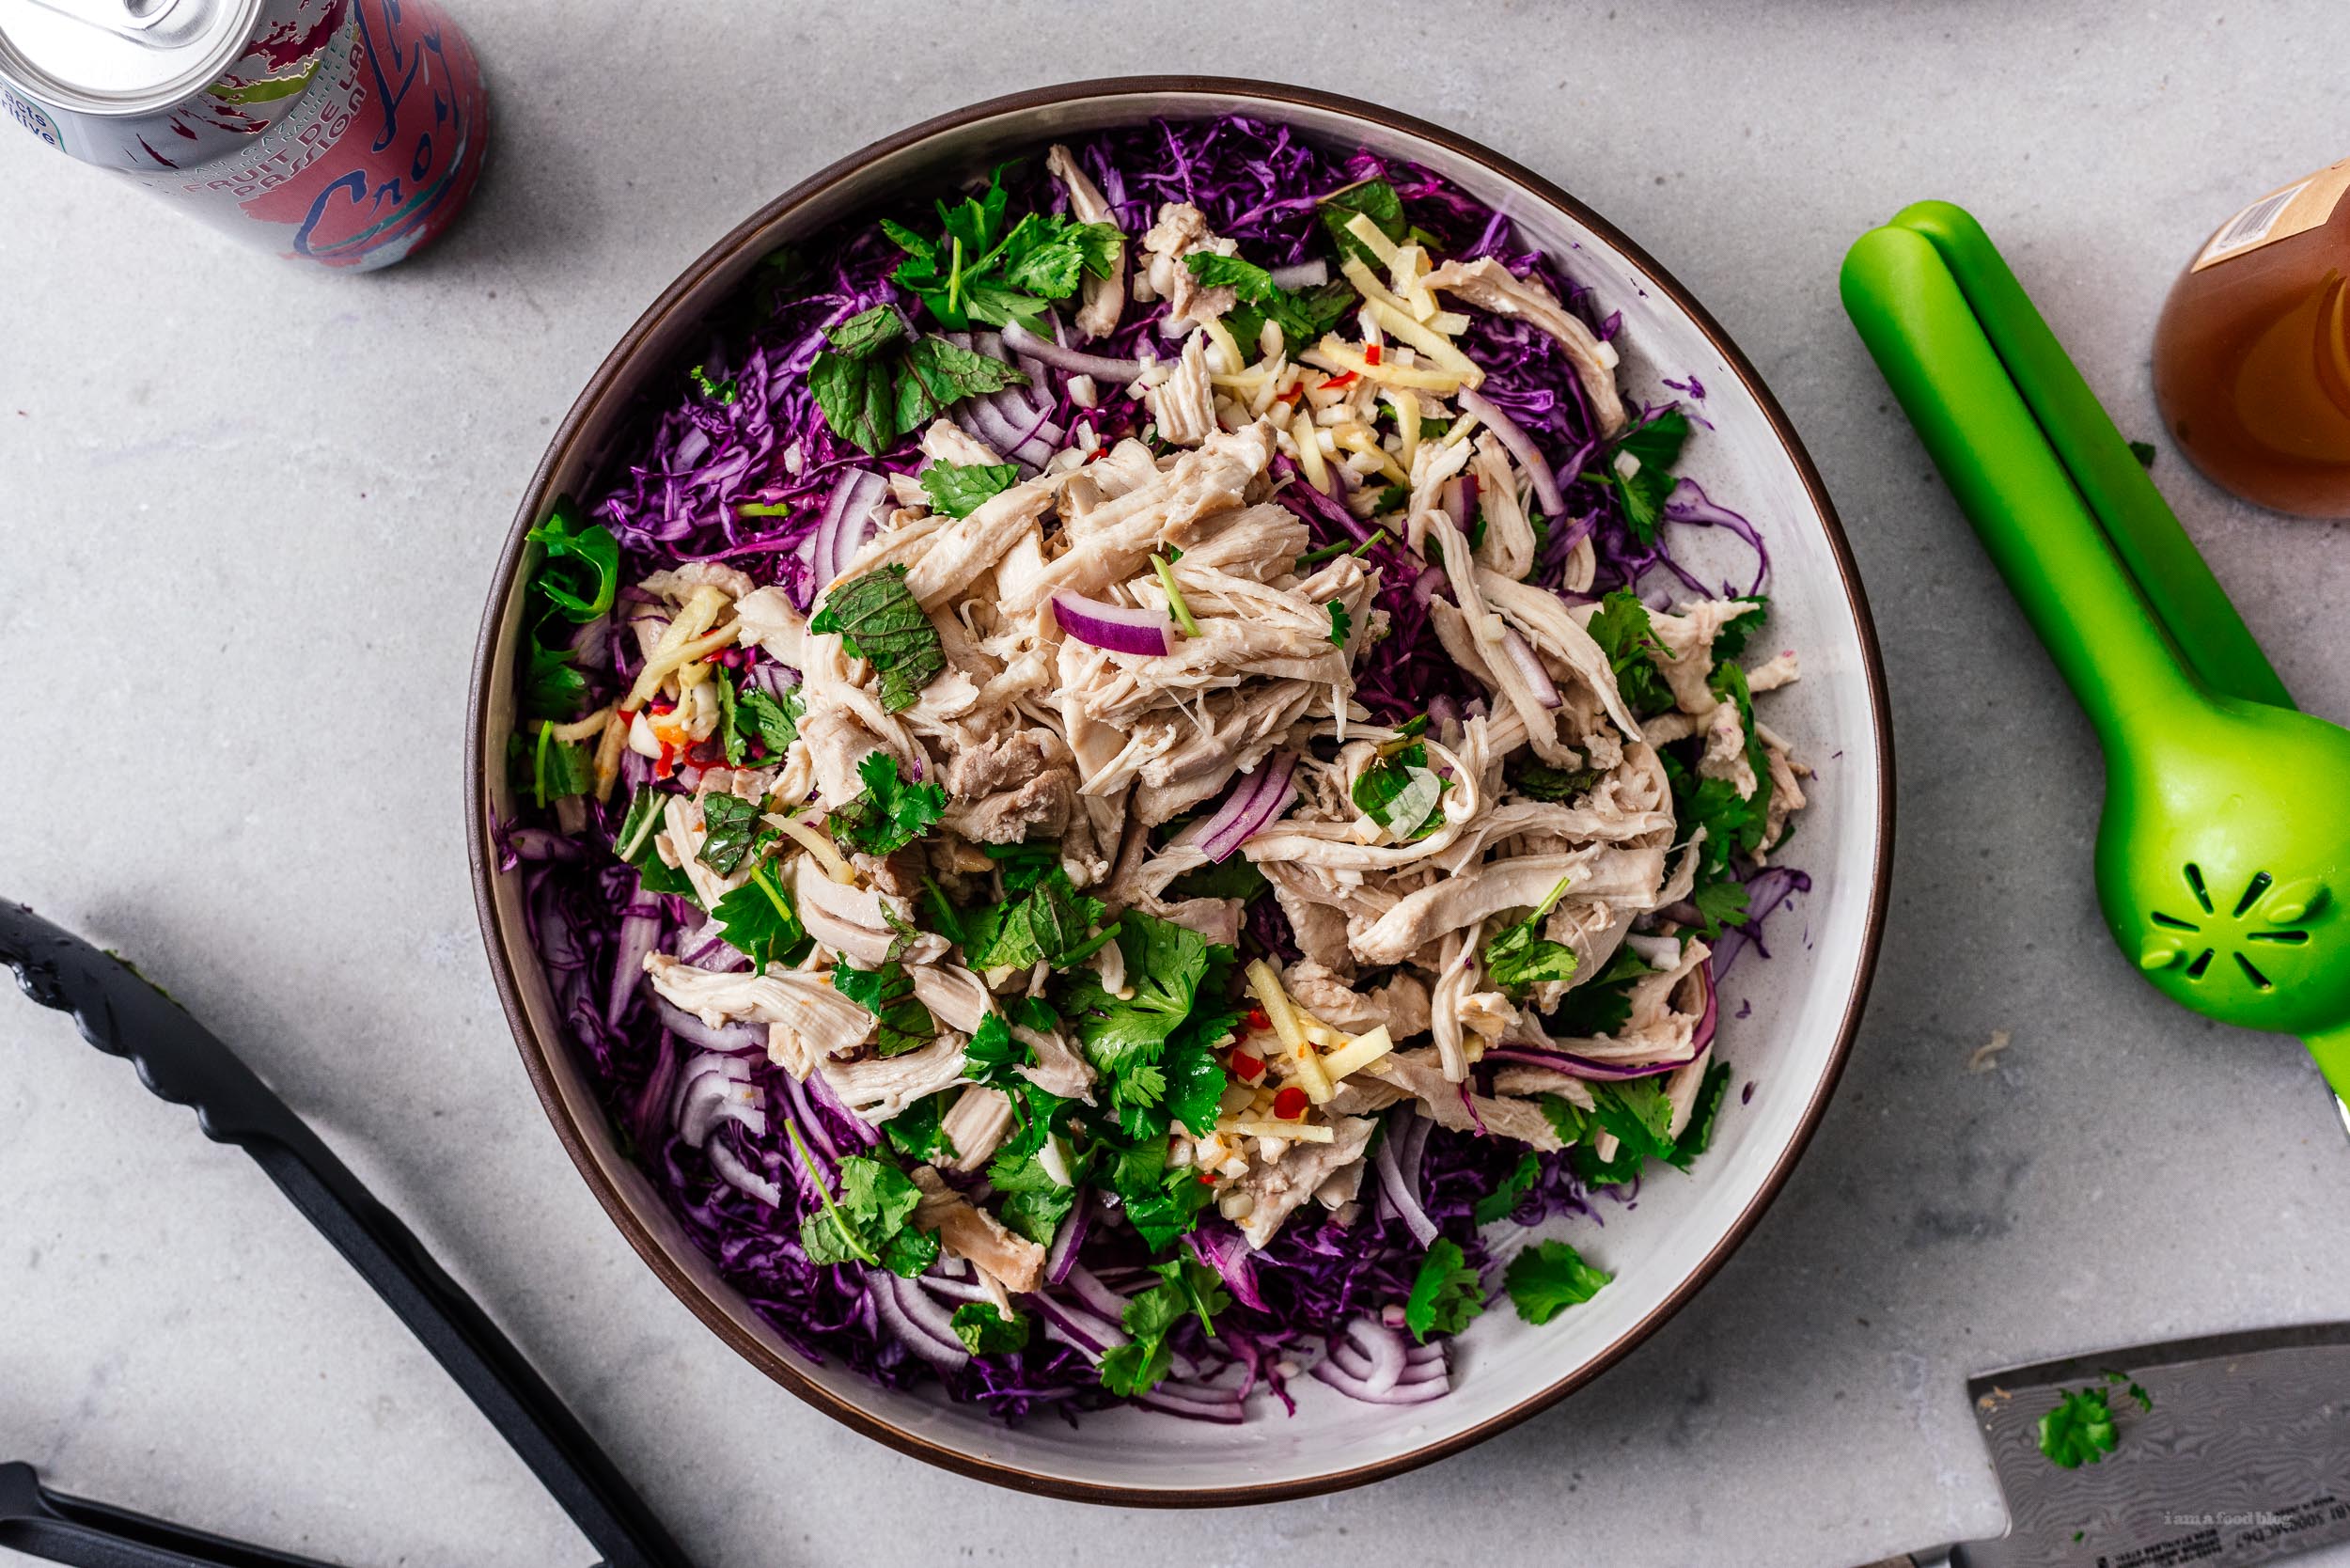
This Vietnamese chicken salad is perfect for summer; it’s bright, fresh, crisp, and just a tiny bit (optionally) spicy. It's so good on its own, as a side, or as a taco or burrito filling. This salad holds a special place in my heart because it’s one of the first things Steph ate at my parents house years ago at one of our first family dinners together. Confession: I don’t like pronouncing things in their native accent. When speaking in Vietnamese to my parents, I’ll say English words with a Vietnamese accent, and vice versa when speaking to my Vietnamese friends in English, I will say Vietnamese words with an English accent. Same goes with Japanese. It’s only after I "know" everyone is switching languages that I can switch accents. It’s a weird mental block I just can’t get over. But many people like to know how to pronounce foreign language words properly, especially when it comes to food. Goi ga means chicken salad, but pronouncing it can be a little finicky. Since Vietnamese is a tonal language, if you go one note too high with goi, you will be saying "chicken package" (not that bad), and if you go one note too low, you will be saying "call the chicken on the telephone" (pretty bad, mostly funny). So, how do you pronounce goi ga properly? Using the power of rhyme. To pronounce goi, you want to rhyme it exactly with how you’d intonate “Would you like some koi?” To pronouce ga, you want to rhyme and intonate it as with the last syllable in pizza. That's it. Back to the salad: this is a simple crisp raw cabbage salad with fresh herbs and lightly poached chicken. Traditionally the herbs are what my mom would refer to as rau song - fresh greens - which means lots of Vietnamese herbs like Vietnamese coriander, perilla, thai basil, mint, etc. We live 15 minutes drive from a large Vietnamese supermarket where those herbs are plentiful and under $1 a bag, but honestly, I’d much rather walk to the corner grocery store and buy whatever they have, which means just cilantro and mint. It’s just as good, and way less work, and much better for the environment. The chicken is poached Hainanese style, which is not a thing that’s done in Vietnam but I’ve loved it since being married to Steph, and it’s not extra work so it’s silly not to. It just means that you poach the chicken with ginger and green onions. The resulting broth is one of the best, easiest chicken broths around too, and you can use it to boost your Hainanese Chicken Rice game. If you hate cutting cabbage, we bought one of these cabbage peelers back in Japan and love it. They use it for making the massive amounts of cabbage you need for tonkatsu. It works perfectly here too. One note on purple cabbage, it’s very pretty but be careful of staining everything purple. We use a black cutting board on purpose when working with purple cabbage. Last but not least, this salad is wonderful as meal prep and also makes a perfect taco or burrito filling, as is, with no changes or sauces needed. Just fry up a couple of tortillas and go to town. The avocado isn't optional, by the way. Highly essential.
Goi Ga - Vietnamese Chicken Salad Recipe
- 1 green onion
- 1 inch ginger (cut into matchsticks)
- 12 ounces boneless skinless chicken thighs
For the dressing
- 2 cloves garlic (crushed)
- 1 Thai bird’s eye chili (sliced, optional)
- 1 tbsp sugar
- 1/4 cup fish sauce (see note)
- juice of 1 lime
For the salad
- 1 small cabbage (shaved or thinly sliced)
- 1/4 small onion (sliced)
- 1/4 cup fresh mint (roughly chopped)
- 1 cup cilantro (roughly chopped)
- 1 ripe avocado (cubed)
Bring 2 cups of very lightly salted water to a boil. When the water is boiling, add the green onions, half of the ginger, and the chicken. Add water as needed to cover your chicken. When the water comes back up to a boil, drop the heat to low and poach, keeping the liquid below a boil, for 25 minutes.
Meanwhile, make your dressing. Combine the garlic, chili, sugar, lime juice, and fish sauce in a jar, along with the remaining ginger and 1 cup of cold water. Stir or shake well to mix, then set aside.
When the chicken is done, remove the thighs to a bowl or cutting board. Save the chicken broth for another use. Shred the chicken.
In a large platter or salad bowl, combine your cabbage, onion, mint, cilantro, and shredded chicken. Top with the dressing, and then toss well. Top with your cubed avocado(es) before serving.
Look for fish sauce bottles labeled mam nhi (first press).
I also topped the salad with commercial fried onions/shallots.
I Am... The Easiest Falafel Recipe
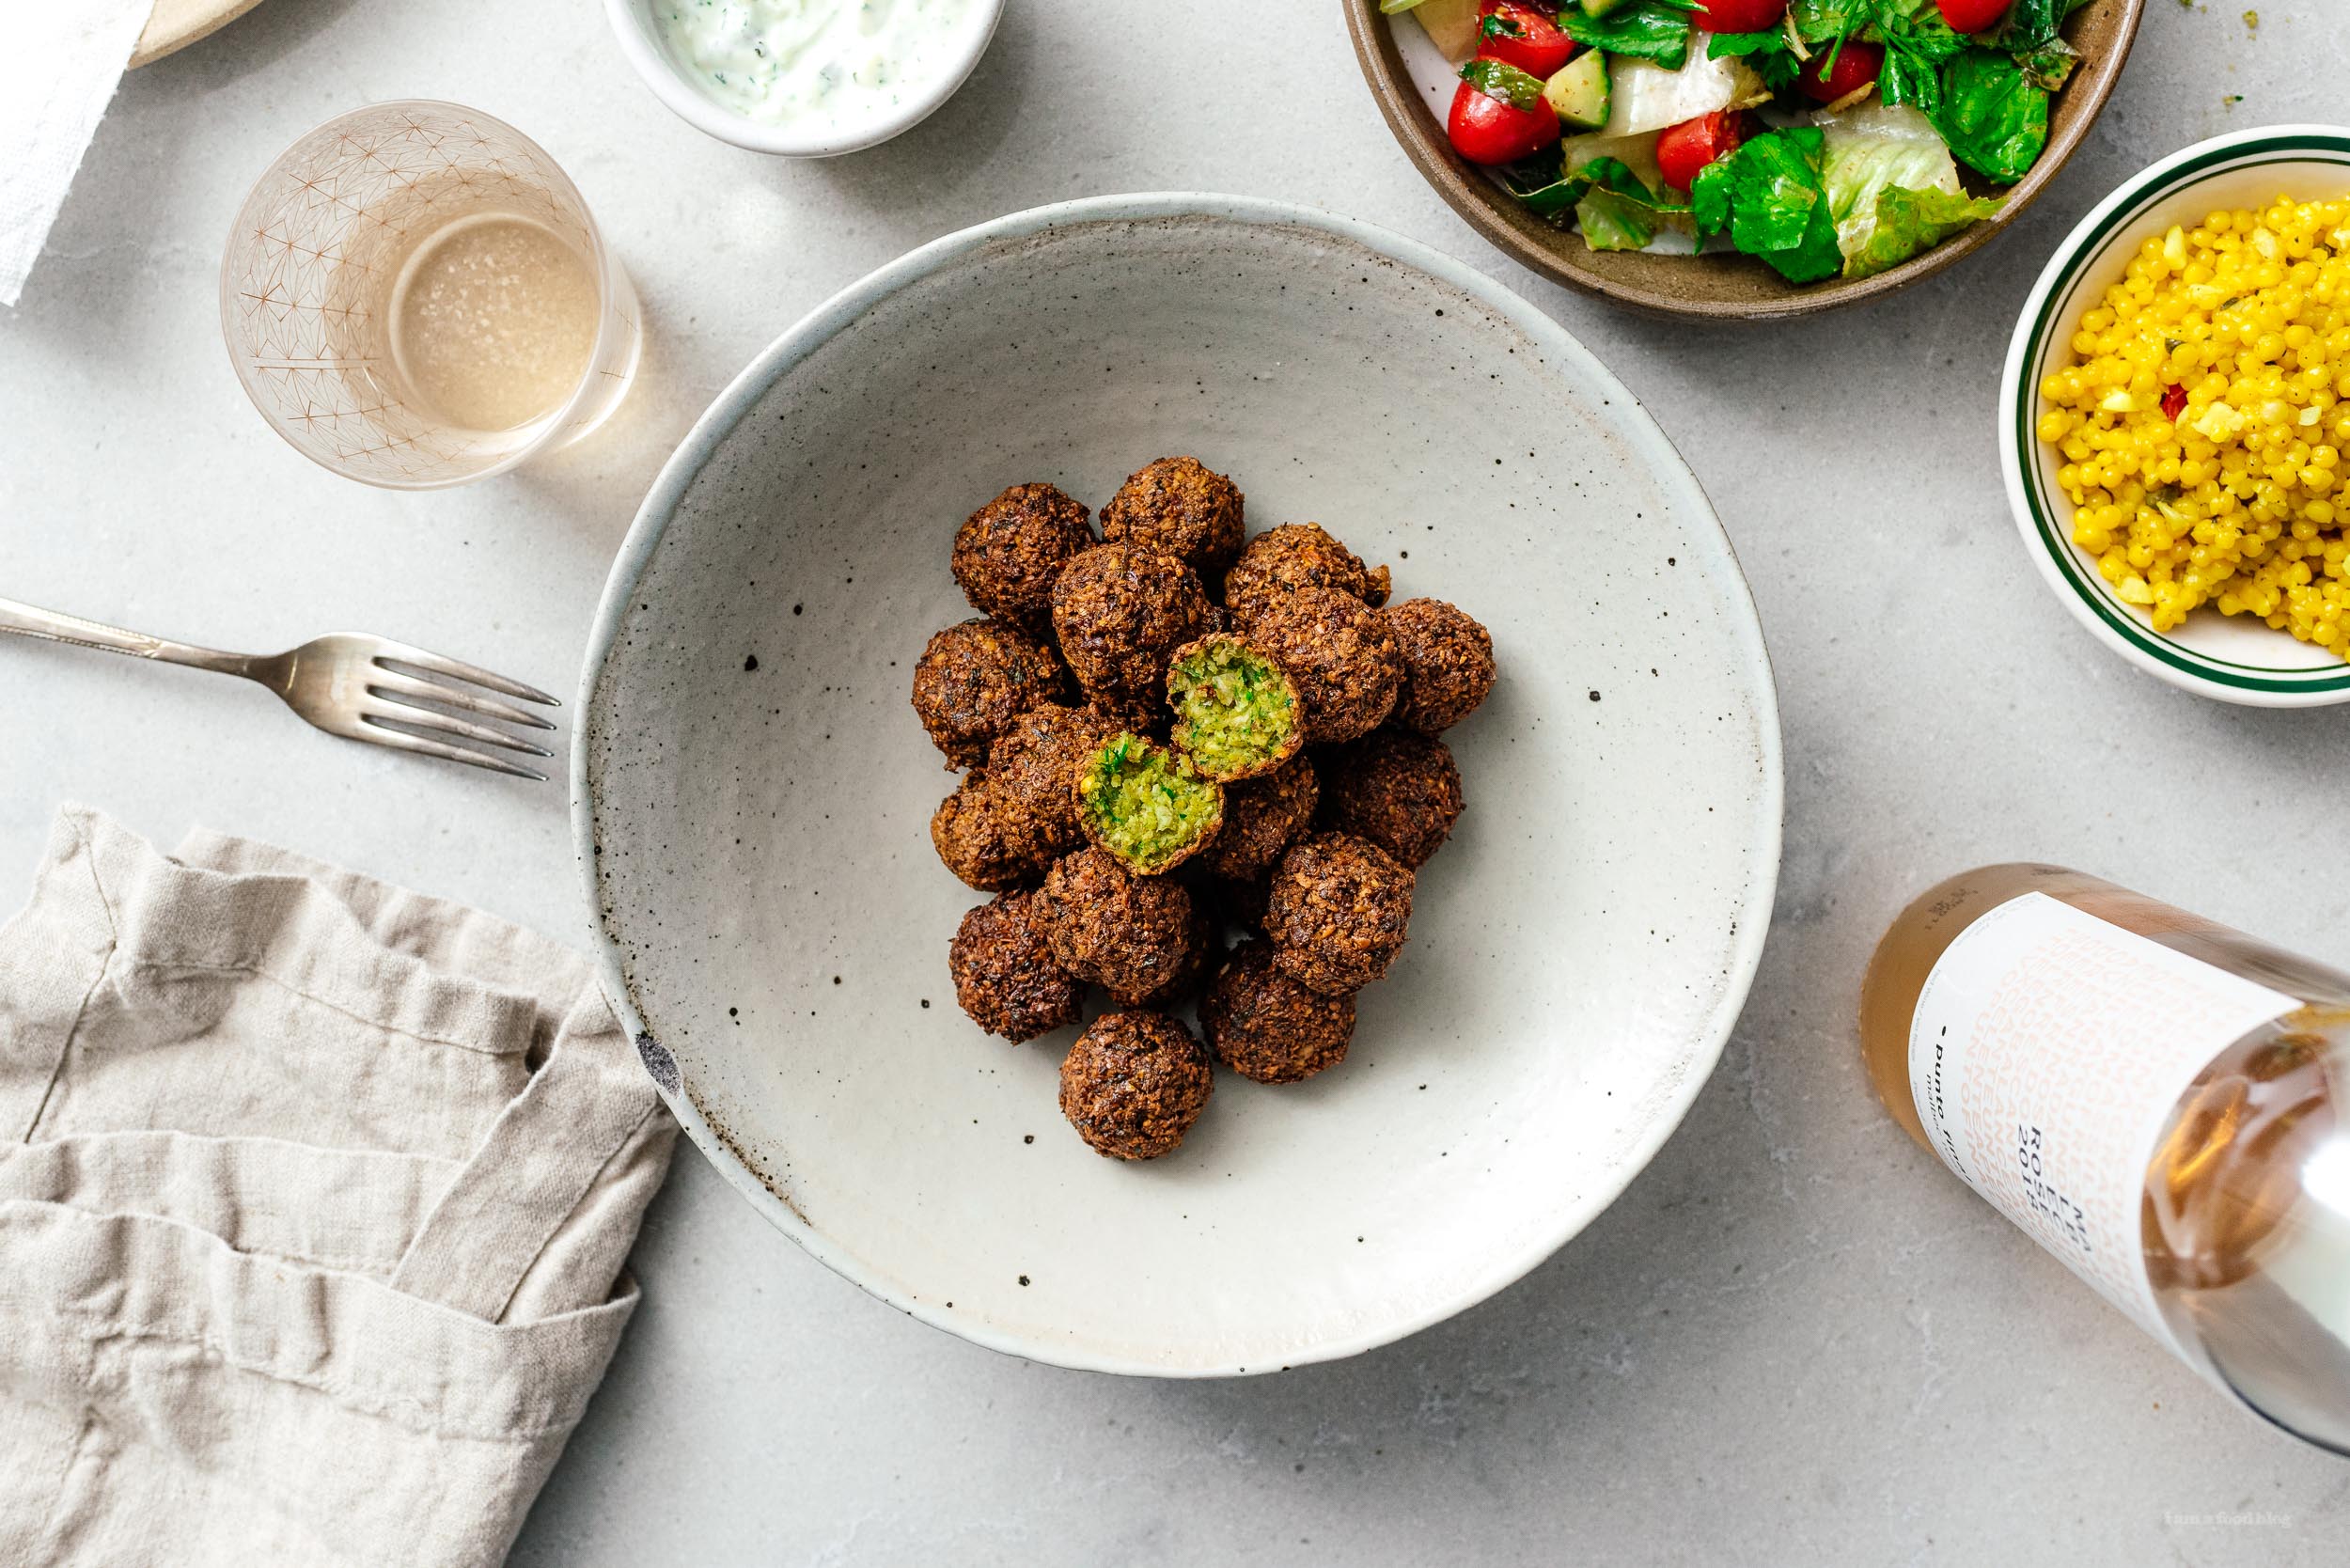
These falafels are everything a great falafel should be: crunchy on the outside, fluffy on the inside, nicely spiced, and very, very green. They’re totally vegan but, take it from an avowed lifetime carnivore kind of person, you’d never realize it or miss meat while eating these. Confession: I never had a falafel until I was 21. Hungry, drinking-filled late nights taught me a love for all night middle eastern foods, and to this day I stand by the statement that the best thing I ever ate is a chicken shawarma at 3 in the morning on the streets of old town Nice, a soft pita wrap filled with smoky spicy chicken and loads of falafels. I loved making these falafels. It was equal parts easy (just soak the chickpeas, blitz everything, and rest) and equal parts fun shaping them. I imagined I was an itamae – a Japanese nigiri sushi master – as I was shaping each fluffy little falafel. The best-sized balls turned out to be around the same size as a kyoto-style round sushi in fact: 1-inch wide, which I found to be the perfect combination of crunchy and fluffy. It turns out that, like pretty much anything deep fried, having falafels fresh from the fryer is better than you’d never expect. I fried these following basically none of the rules of deep frying, and it turns out falafels are the most forgiving thing ever to deep fry. I just used 12oz of oil in a very tiny pan, with no temperature measurement other than sticking the thermapen in now and again to make sure the oil was above 300ºF before I dropped in the falafels 3-4 at a time. The oil stayed clean and new in a way it never does when frying meats, and the falafels were crisp and not oily at all. If you’re looking to pair these up, our fattoush, moroccan lamb meatballs, and grilled moroccan pita bread are great options. Having a sauce to dip into is a must, and while a tahini based sauce is the traditional choice, this tzaziki is a super healthy alternative. These were so much fun to make and so delicious to eat. You won’t regret making these, I hope you give them a try, and let me know what you think! -Falafel out
The Easiest Falafel Recipe
- 2 cup dried chickpeas (don't used canned)
- 1 cup fresh parsley
- 1 cup fresh cilantro
- 1/2 cup fresh dill
- 1 small onion (quartered)
- 8 cloves garlic
Spice Mix
- 1 tbsp coriander seeds (see note)
- 1 tbsp ground cumin
- 1 tsp black pepper
- 1 tsp ground cayenne pepper
Soak the chickpeas overnight in at least 2 cups of water in a large covered container. The next day, remove and dry with paper towels.
Combine your chickpeas, herbs, onions, garlic, spice mix, and salt to taste in a food processor (in batches if necessary). Blitz into a fine crumbly paste. Rest, covered in the fridge, for 1-2 hours before frying.
Using wet hands, form into firm-ish 1-inch wide balls.
Deep fry at 300ºF for 2 minutes, in batches if necessary. Drain on a paper towel between batches.
Enjoy immediately.
I prefer to toast coriander in a dry pan and crush in a mortar and pestle, but ground coriander works as well.
Inspired by https://www.themediterraneandish.com/how-to-make-falafel/
I Am... Small Batch Sourdough Focaccia
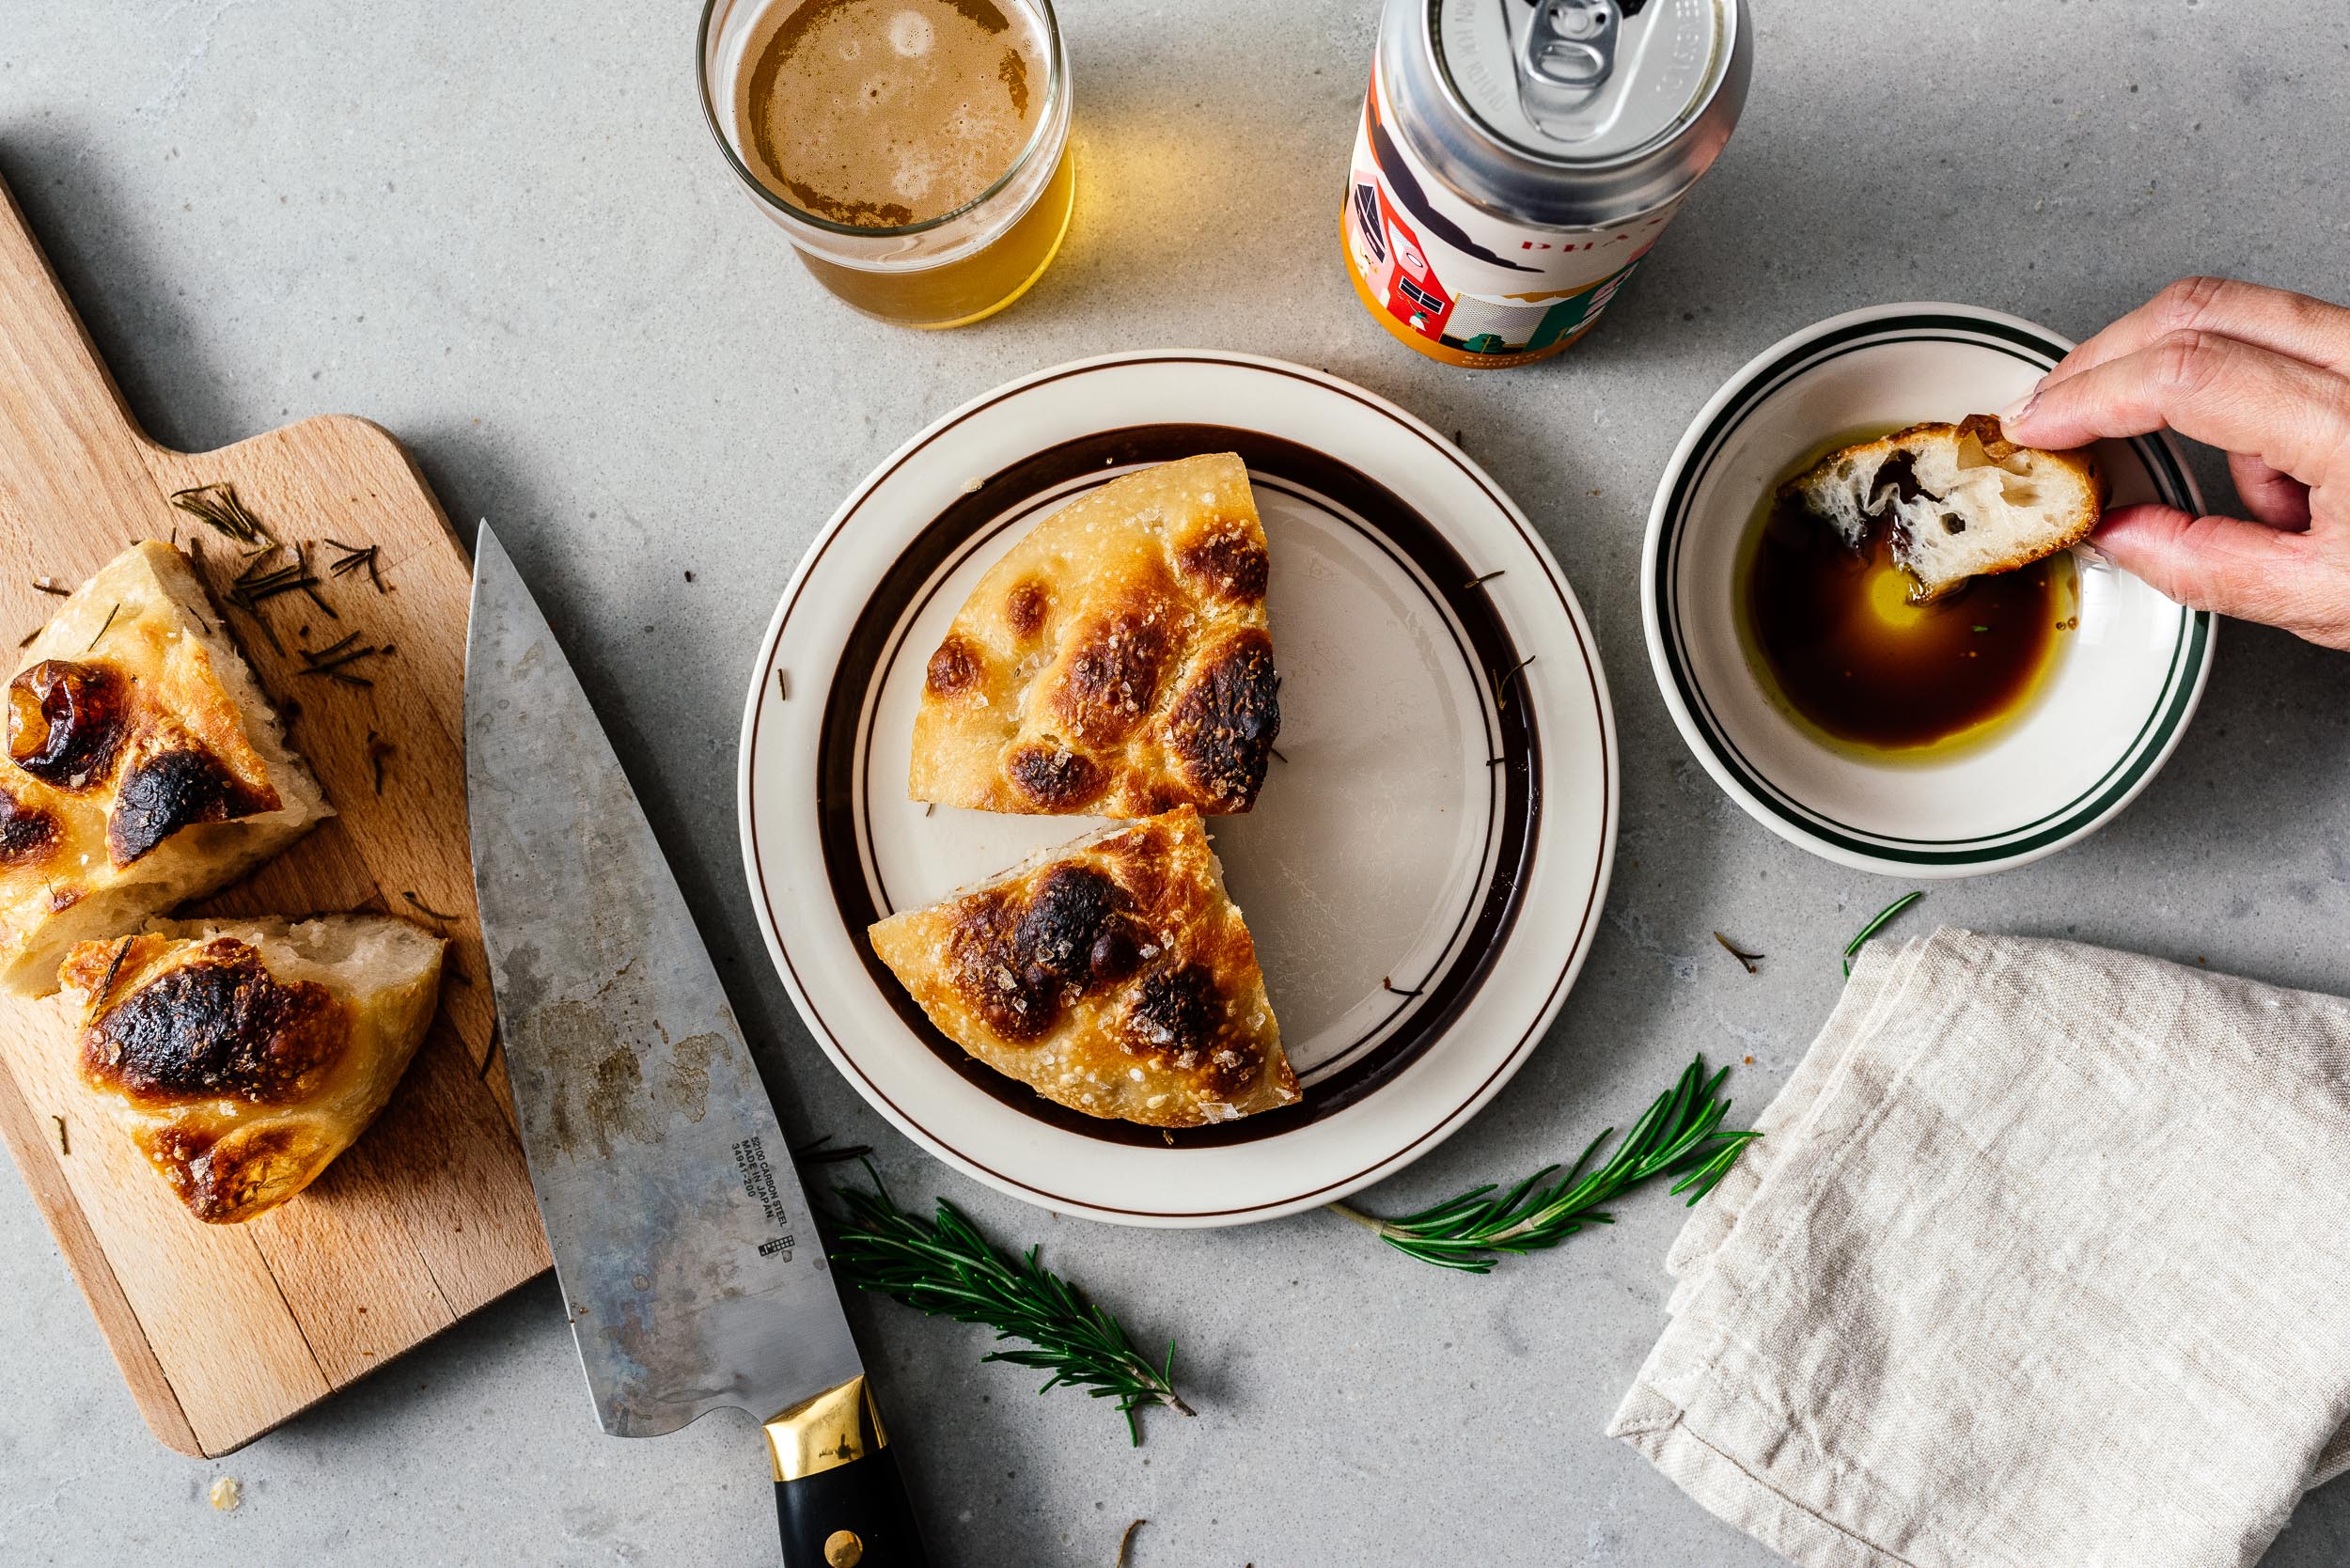
I love bread as much as everyone else and from what I can tell, bread loves me too because I’ve been packing on the pounds. With world events and all, I’ve been turning to comfort food more and more and there is nothing more comforting than carbs. I love carbs in all forms, but bread is especially good because it can be fluffy and crisp and just the best vehicle for other flavors. Focaccia happens to be one of the pillow-iest breads of them all so of course a sourdough focaccia was bound to happen sooner or later. This is a recipe for a petite small batch sourdough focaccia, just 6 inches across. It’s just the right amount for two or maybe even just one person who likes to eat bread. It’s crisp and fluffy, dimpled with pools of glossy olive oil and finished off with a generous snowing of flaky sea salt. Like most sourdough breads, this sourdough is made in two parts. The first day, the dough is mixed and left to bulk proof, then it’s placed in the fridge for a slow ferment to build flavor. The next day, the dough is proofed at room temp until it is impossibly bubbly and airy before being gently dimpled and drizzled with oil and baked. The result is phenomenal when warm from the oven and just as good at room temp. A couple of notes: the two day process is what gives the foccacia it’s flavor, allowing your sourdough starter to do it’s thing and impart it’s specific flavor notes to the dough, so it’s absolutely necessary. The other key to good focaccia is good olive oil. It’s a huge flavor profile of the bread so break out the good stuff that has fresh herbaceous grassy notes with a tiny hint of spiciness on the finish. You can finish your focaccia with fresh herbs, olives, or tomatoes, but I kept it simple with just a light sprinkling of rosemary.
Small Batch Sourdough Focaccia
- 24 grams mature starter (see note)
- 97.5 grams water
- 86 grams 00 flour (see note)
- 50 grams bread flour
- 2.5 grams sea salt (plus extra to finish)
- 3.5 grams extra virgin olive oil (plus extra to finish)
- rosemary (optional)
In the bowl of a stand mixer, mix together the starter and water, then stir in flour and salt. Mix on low until a shaggy ball forms, then mix with olive oil for 5 minutes until smooth and elastic. Shape the dough into a ball and place in an oiled bowl.
Let rise for two hours, completing stretch-and-folds four times, every half and hour. (To stretch and fold: lightly wet your hands and gather your dough at the top of the bowl and lift with two hands towards the ceiling, lifting and stretching enough so that you can fold the dough over on itself, tucking it into the opposite side. Repeat on all four sides.)
After two hours, grease a 6 inch round pan with olive oil and line with parchment. Using lightly oiled hands, round the dough into a ball and transfer to the pan, cover with plastic and let rest for two hours at room temperature - there won’t be much of a rise, more of a spreading out and loosening of the dough. Place in the fridge overnight.
The next day, 1-3 hours before you want to bake, proof at room temp for 1-3 hours until the dough rises and becomes quite airy looking.
Heat the oven 445°F. Drizzle on olive oil and dimple the dough with your fingers, pushing your fingers all the way down to the bottom of the pan. Sprinkle with flaky salt and fresh rosemary. Bake for 15 minutes, rotate and continue to bake for 10 more minutes. Remove and let cool slightly, then remove from the pan and enjoy!
Follow these instructions to make your own starter.
I used all purpose flour and added 1.5 g vital wheat gluten to give it a bit more strength, bringing the protein content of my flour up to a typical bread flour protein percentage.
You can also use all bread flour if you don’t have 00 - it will be a touch less soft.
Adapted from https://schoolnightvegan.com/home/sourdough-focaccia/
I Am... Moroccan Lamb Meatballs in Tomato Sauce
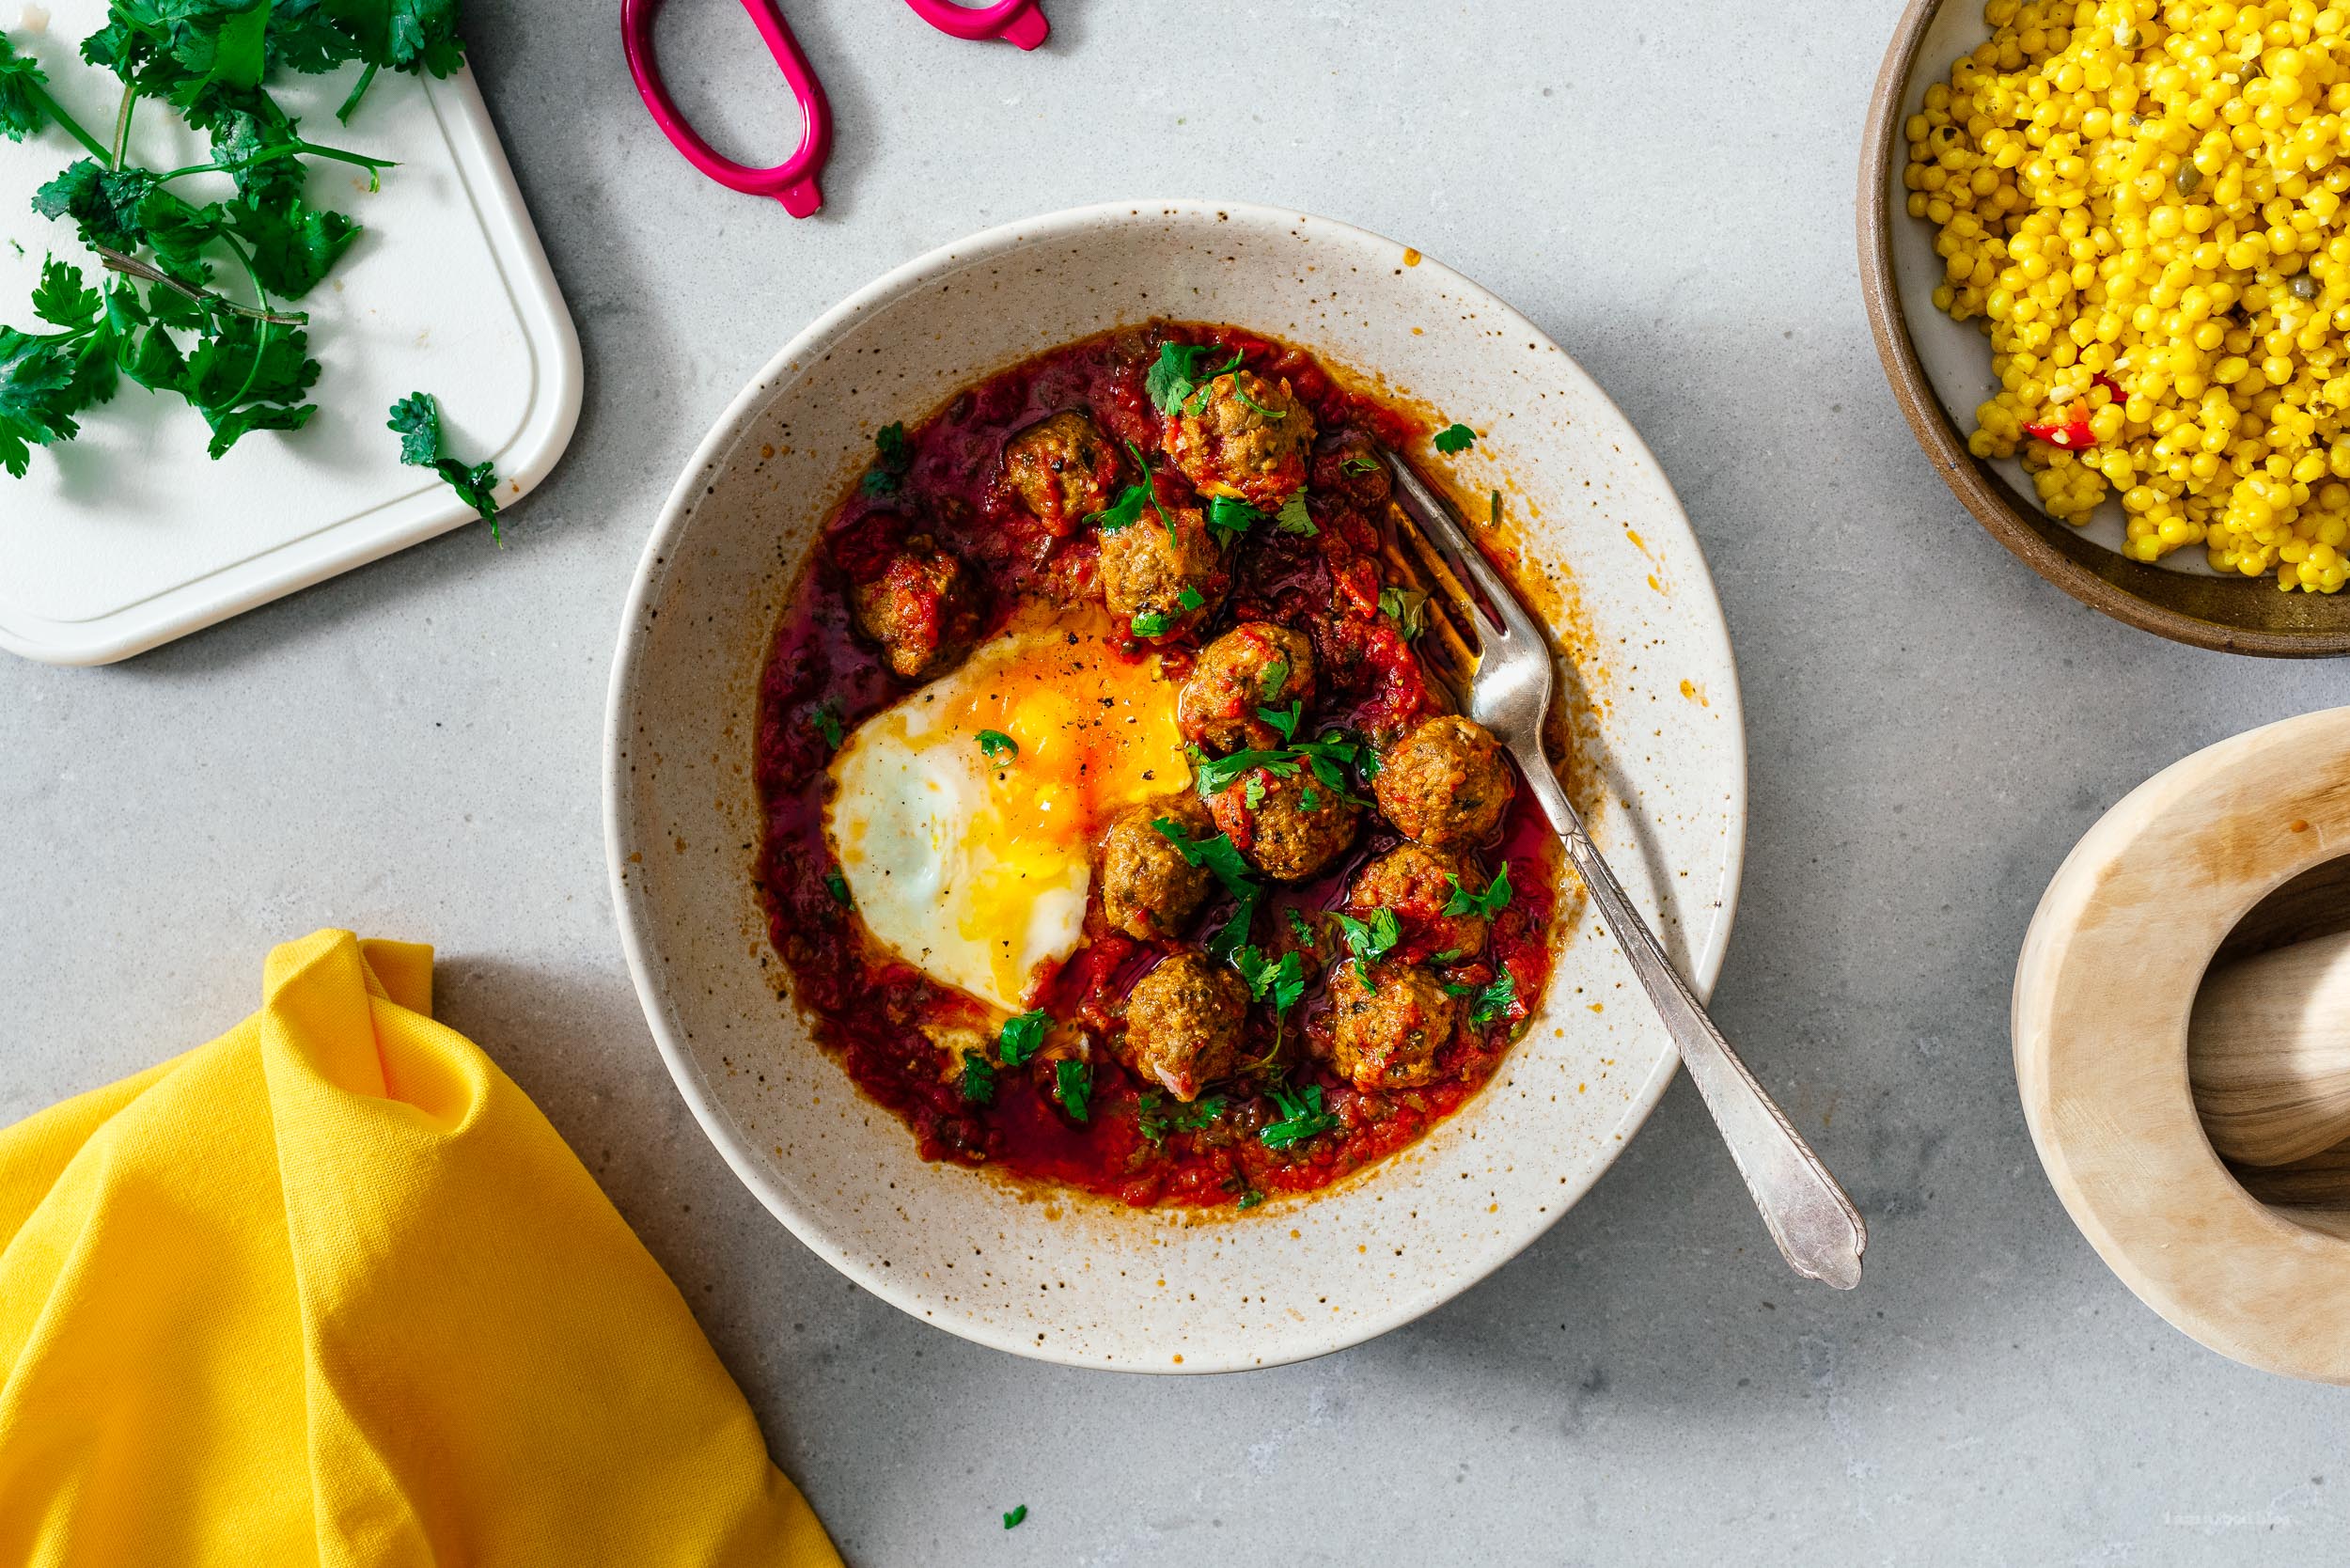
Moroccan lamb meatballs in tomato sauce with an egg is one of the best foods on the planet. You can’t beat how pretty this dish is and it tastes like a million dollars. It’s a great kinda-special weeknight dinner if you’re looking for something a little off the beaten path — although, this is actually one of Morocco’s most famous dishes. We have a rotating ‘family dinner’ thing among a small group of friends where each person takes on making a dinner for the group and we all just hang and chill. It’s like a dinner party but everyone involved needs to take a turn, which solves the usual dinner party problem of the best cook in the group taking on all the dinners. It’s a great way to bump up your cooking skills and cook for a larger table than you might normally be comfortable with. I think we’ve all turned into better cooks because of it. This week was my turn and with our local Moroccan place closed due to world events and all that, I thought it was high time to make these. From beginning to end this whole meatball dish only takes an hour or so to make. The meatballs are made small, Moroccan style, so it only takes 8 minutes to braise them in the tomato sauce. Because they don’t have any egg or breadcrumbs in them, this is a great dish if you (or any friends or family you are eating with) are on keto or gluten free. But, because they don’t have any egg or breadcrumbs, you do need to take care not to overcook the meatballs, unless you like chewy meatballs (which I actually do). It looks like a huge list of ingredients because I’ve broken them up into two parts, but the meatballs and the tomato sauce uses the exact same ingredients so you can prep for both parts at once as well as get the most out of any spices you need to buy. These meatballs were so much fun to make and even more fun to eat. We paired them with israeli couscous and falafels for a pan-mediterranean feast. They were so good I’m planning on putting them into heavy rotation for our weeknight dinners. If you like these flavors, try making Fattoush Salad, Roasted Red Pepper Dip, or Harissa Salmon too!
Moroccan Lamb Meatballs in Tomato Sauce Recipe
For the tomato sauce
- 1/4 cup olive oil
- 1 medium onion (chopped)
- 4 cloves garlic (crushed)
- 2 14oz cans of tomatoes (see note)
- 1 tsp smoked paprika
- 1 tsp ground cumin
- 1/2 tsp ground cayenne pepper
- 1 bay leaf
- 2 tbsp parsley (finely chopped)
- 2 tbsp cilantro (finely chopped)
For the meatballs
- 1 lb ground lamb
- 2 tbsp parsley (finely chopped)
- 2 tbsp cilantro (finely chopped)
- 2 cloves garlic (crushed)
- 2 tbsp coriander seed, crushed (see note)
- 1 tbsp ground cumin
- 1 tsp ground cinnamon
- 1 tsp cayenne pepper
Make the tomato sauce: Add the olive oil and onion to a big deep saute pan or pot over medium heat and cook until the onions are translucent and golden (about 5 minutes). Add the garlic and cook for another couple of minutes, stirring often so the garlic doesn’t burn.
Add the tomato sauce, herbs, and spices and reduce the heat down to low. Season with salt and pepper, then keep on the barest simmer while you make the meatballs. The sauce should simmer for at least half an hour.
Combine all the ingredients for the meatballs together. Season with salt and pepper, then mix really well. Form one sample meatball about an inch wide and drop it into the tomato sauce for 8 minutes.
Cut the sample meatball in half to ensure it’s fully cooked, then taste for seasoning. If the seasoning is good, form the rest of the meatballs.
Drop the meatballs into the sauce in batches if necessary to avoid crowding the pan. Add water if the sauce has reduced too much to cover the meatballs.
Serve immediately, topped with poached eggs (you can poach the egg directly in the tomato sauce) and chopped herbs.
Note 1: I used one can of Mutti polpa and one can of Mutti cherry tomatoes.
Note 2: Coriander can be bought ground, but toasting and crushing the seeds with a mortar and pestle is a lot of fun and makes for a much better end product.
Note 3: The meatballs are traditionally pretty heavily spiced. If you prefer less of a strong taste, halve the spices before making the sample meatball.
Inspired by taste of maroc
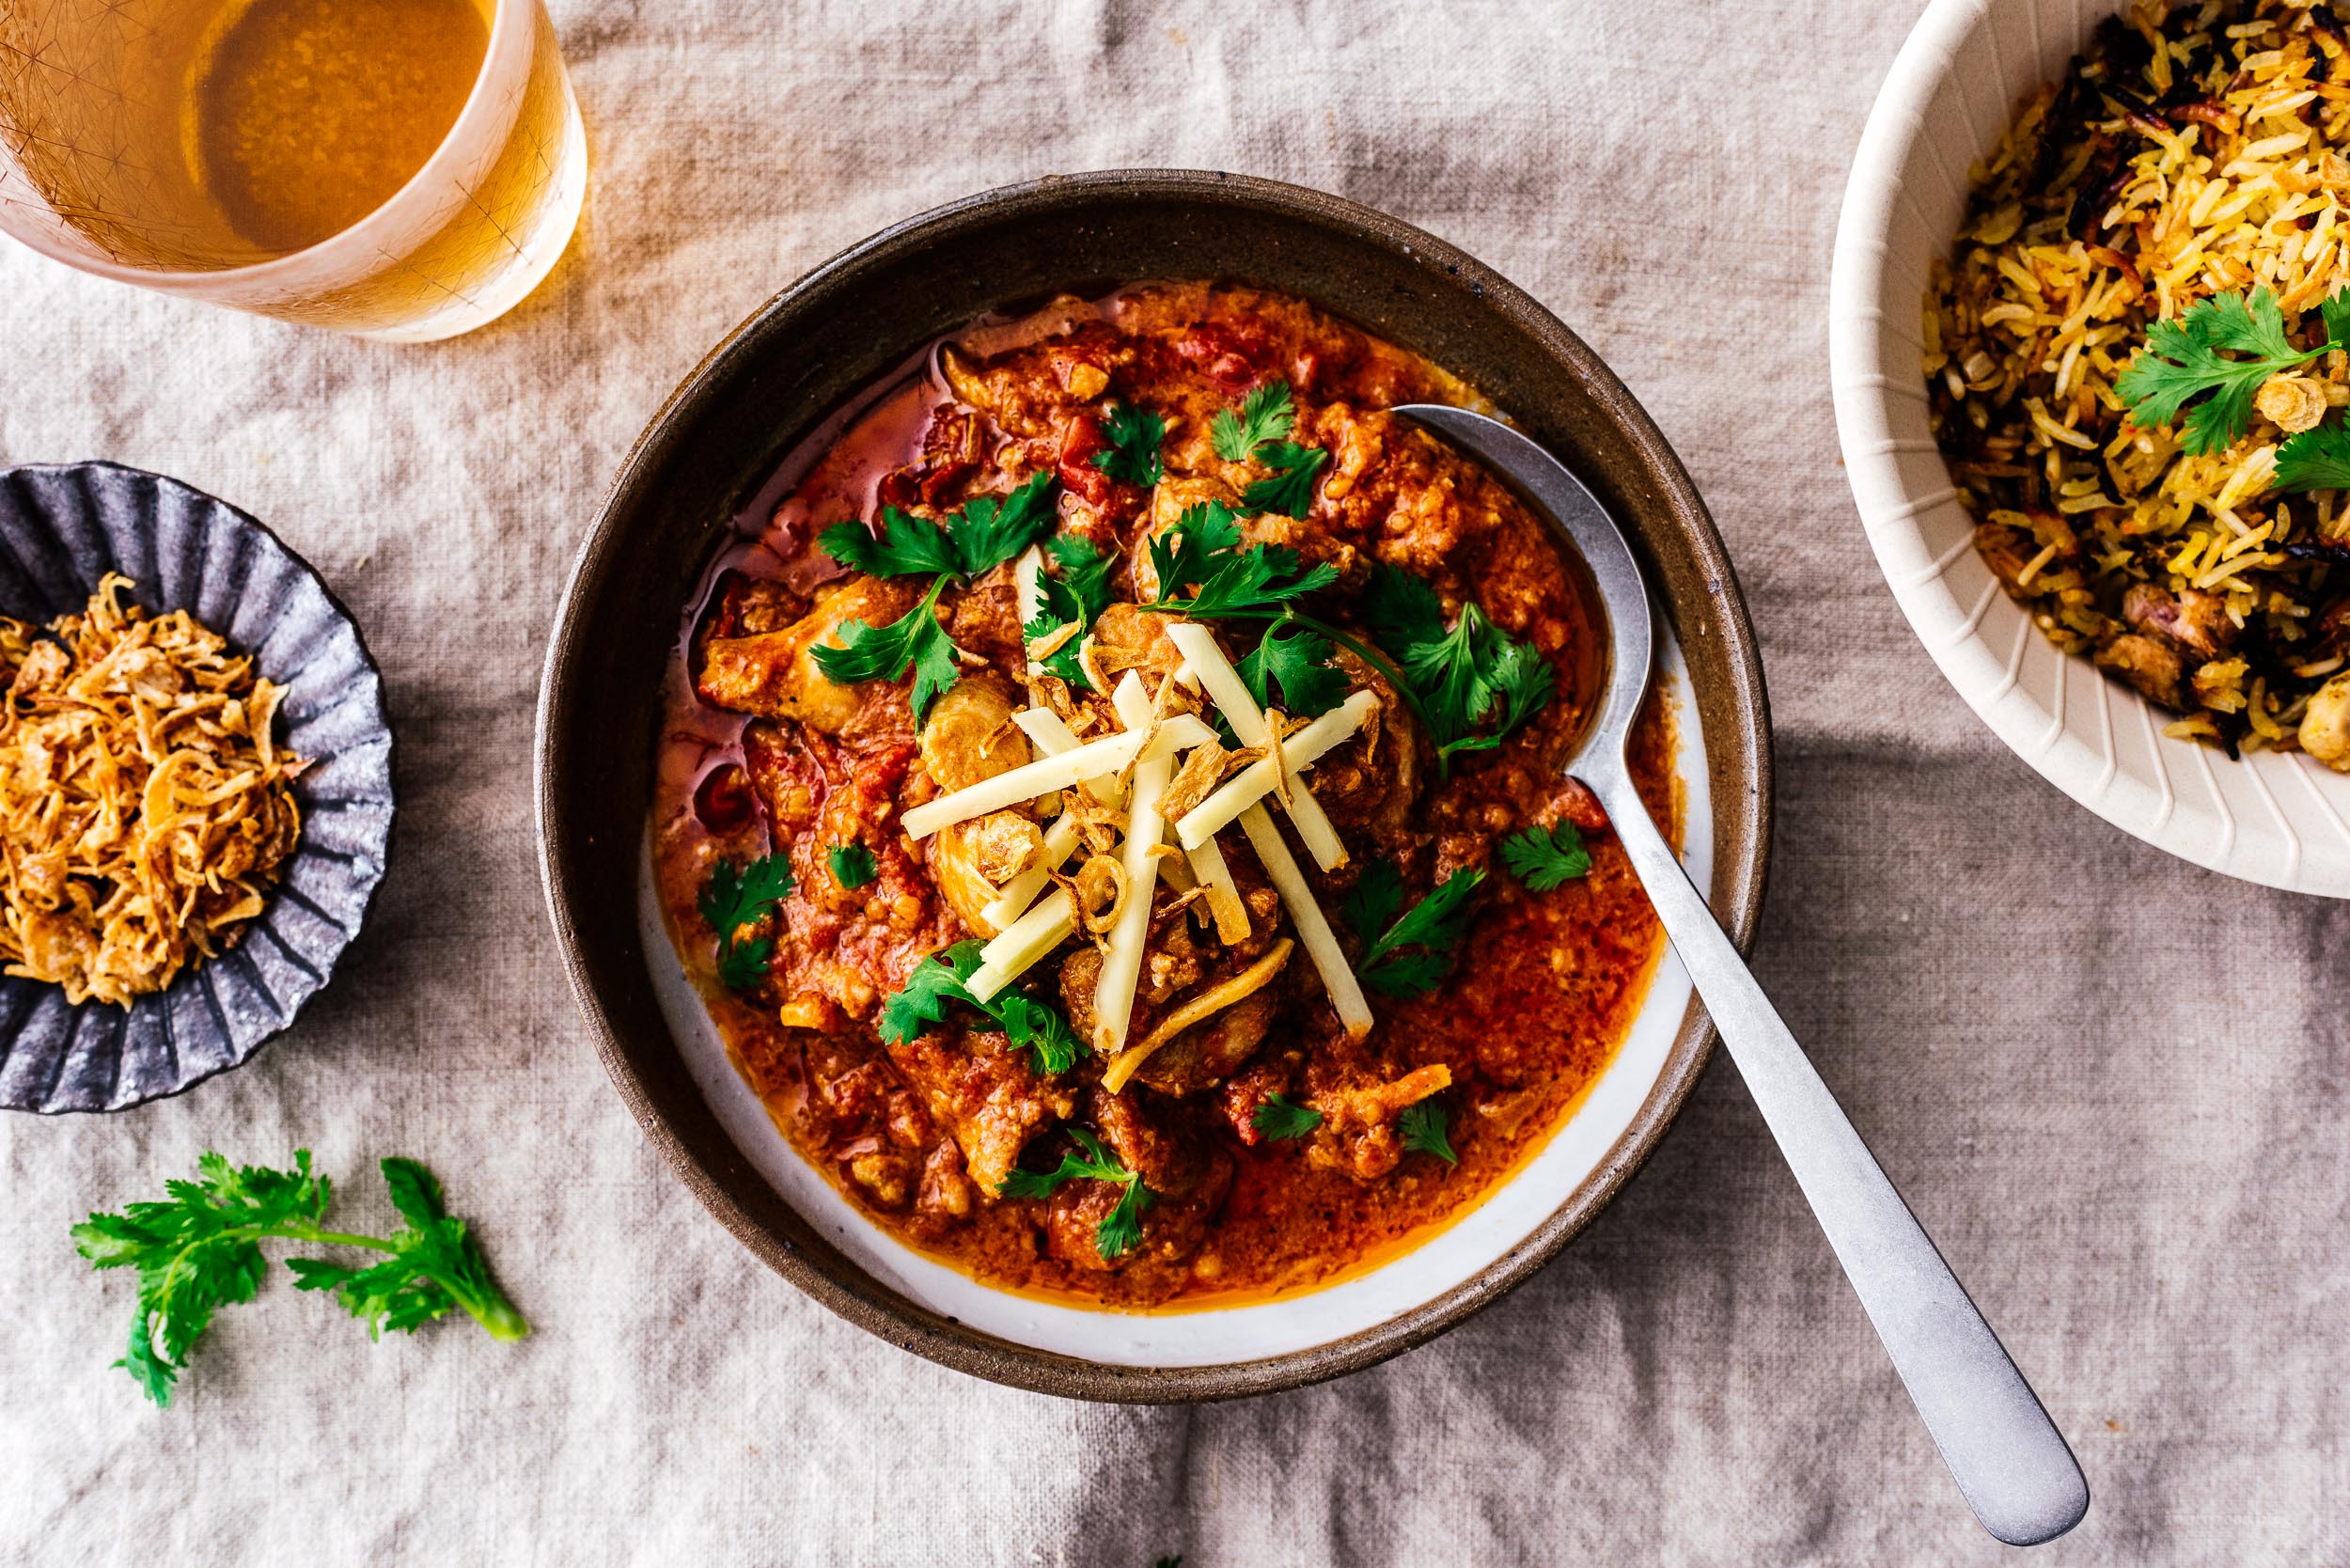
I Am... Instant Pot Dishoom Ruby Chicken Curry
There is only one city in the world I never have to think about what my favorite restaurant is: London, because of Dishoom. London has loads of great restaurants and we’ve eaten at a lot of them, but through it all Dishoom is a unique, accessible place that we can just relax and enjoy, and send all our friends to if asked for recommendations.
Dishoom is like the Momofuku of a) Britain and specifically b) Indian food. It’s not all that authentic, pan-Indian, and definitely toned down for the British palate (and ours too). It’s a total crowd pleaser and that means that this curry is finely tuned to make just about everyone happy.
This is a one pot, Instant pot, quick version of our OG Dishoom Ruby Chicken Curry post awhile back. From a pure taste perspective, that one is better, for sure. If you have a grill, and lots of time. This version is great for a relaxing weeknight dinner that's just simple and executed well, much like Dishoom itself. If I’m honest, I’ll pretty much reach for this recipe every time we want need curry for dinner, unless friends are coming over, or the grill is already fired. The smoky char is great, but the ease and simplicity of this one pot wonder is even better.
You'll still have to marinate the chicken, and it’s still best to do that overnight, but you can cut it down to just an hour or so if you need to. Give this a try, it’s worth it. As usual, this will go great with just about anything, but some suggestions are: basmati rice, garlic naan, or even more chicken via Dishoom’s chicken biryani (biryani is like a mixed rice).
-Curry out.
Instant Pot Dishoom Ruby Chicken Curry
For the Chicken
- 1/4" fresh ginger
- 5 cloves garlic
- 1 tsp ground cumin
- 1/2 tsp garam masala
- juice of 1/4 lime
- 2 tsp oil
- 1/4 cup kefir or greek yogurt
- 1 lb chicken thighs (cut into 2" cubes)
For the Curry
- 1/4 cup oil
- 1 bay leaf
- 6 pods green cardamom
- 1 cinnamon stick
- 4 cloves garlic (crushed)
- 1/2" fresh ginger (grated)
- 1 can crushed tomatoes (about 14oz)
- 1/2 tsp garam masala
- 1/2 tsp sugar
- 1/2 tsp ground cumin
- 1/4 cup cream
- 1 tbsp butter
Blend the ginger, garlic, cumin, garam masala, lime juice, oil, and yogurt together into a smooth paste. Marinate the chicken for a minimum of 1 hour and up to overnight.
Add 1/4 cup oil to the instant pot, set to saute medium, and cook the bay leaf, cardamom pods, and cinnamon stick until fragrant, about 3 minutes.
Add ginger and garlic to the oil and cook until slightly brown, about 2 more minutes.
Add the tomatoes and set the instant pot to saute high. Cook until the sauce has reduced and darkened, about 5 minutes.
Scrape the bottom of the instant pot with a wooden or silicone spatula to release any stuck on bits, then add the garam masala, sugar, cumin, and chicken along with its marinade. Close the lid and set to High Pressure for 5 minutes. Once finished, do a quick release.
Stir in cream and butter. Cook for another 5 minutes using residual heat/keep warm setting. Serve hot, with cilantro and ginger matchsticks.
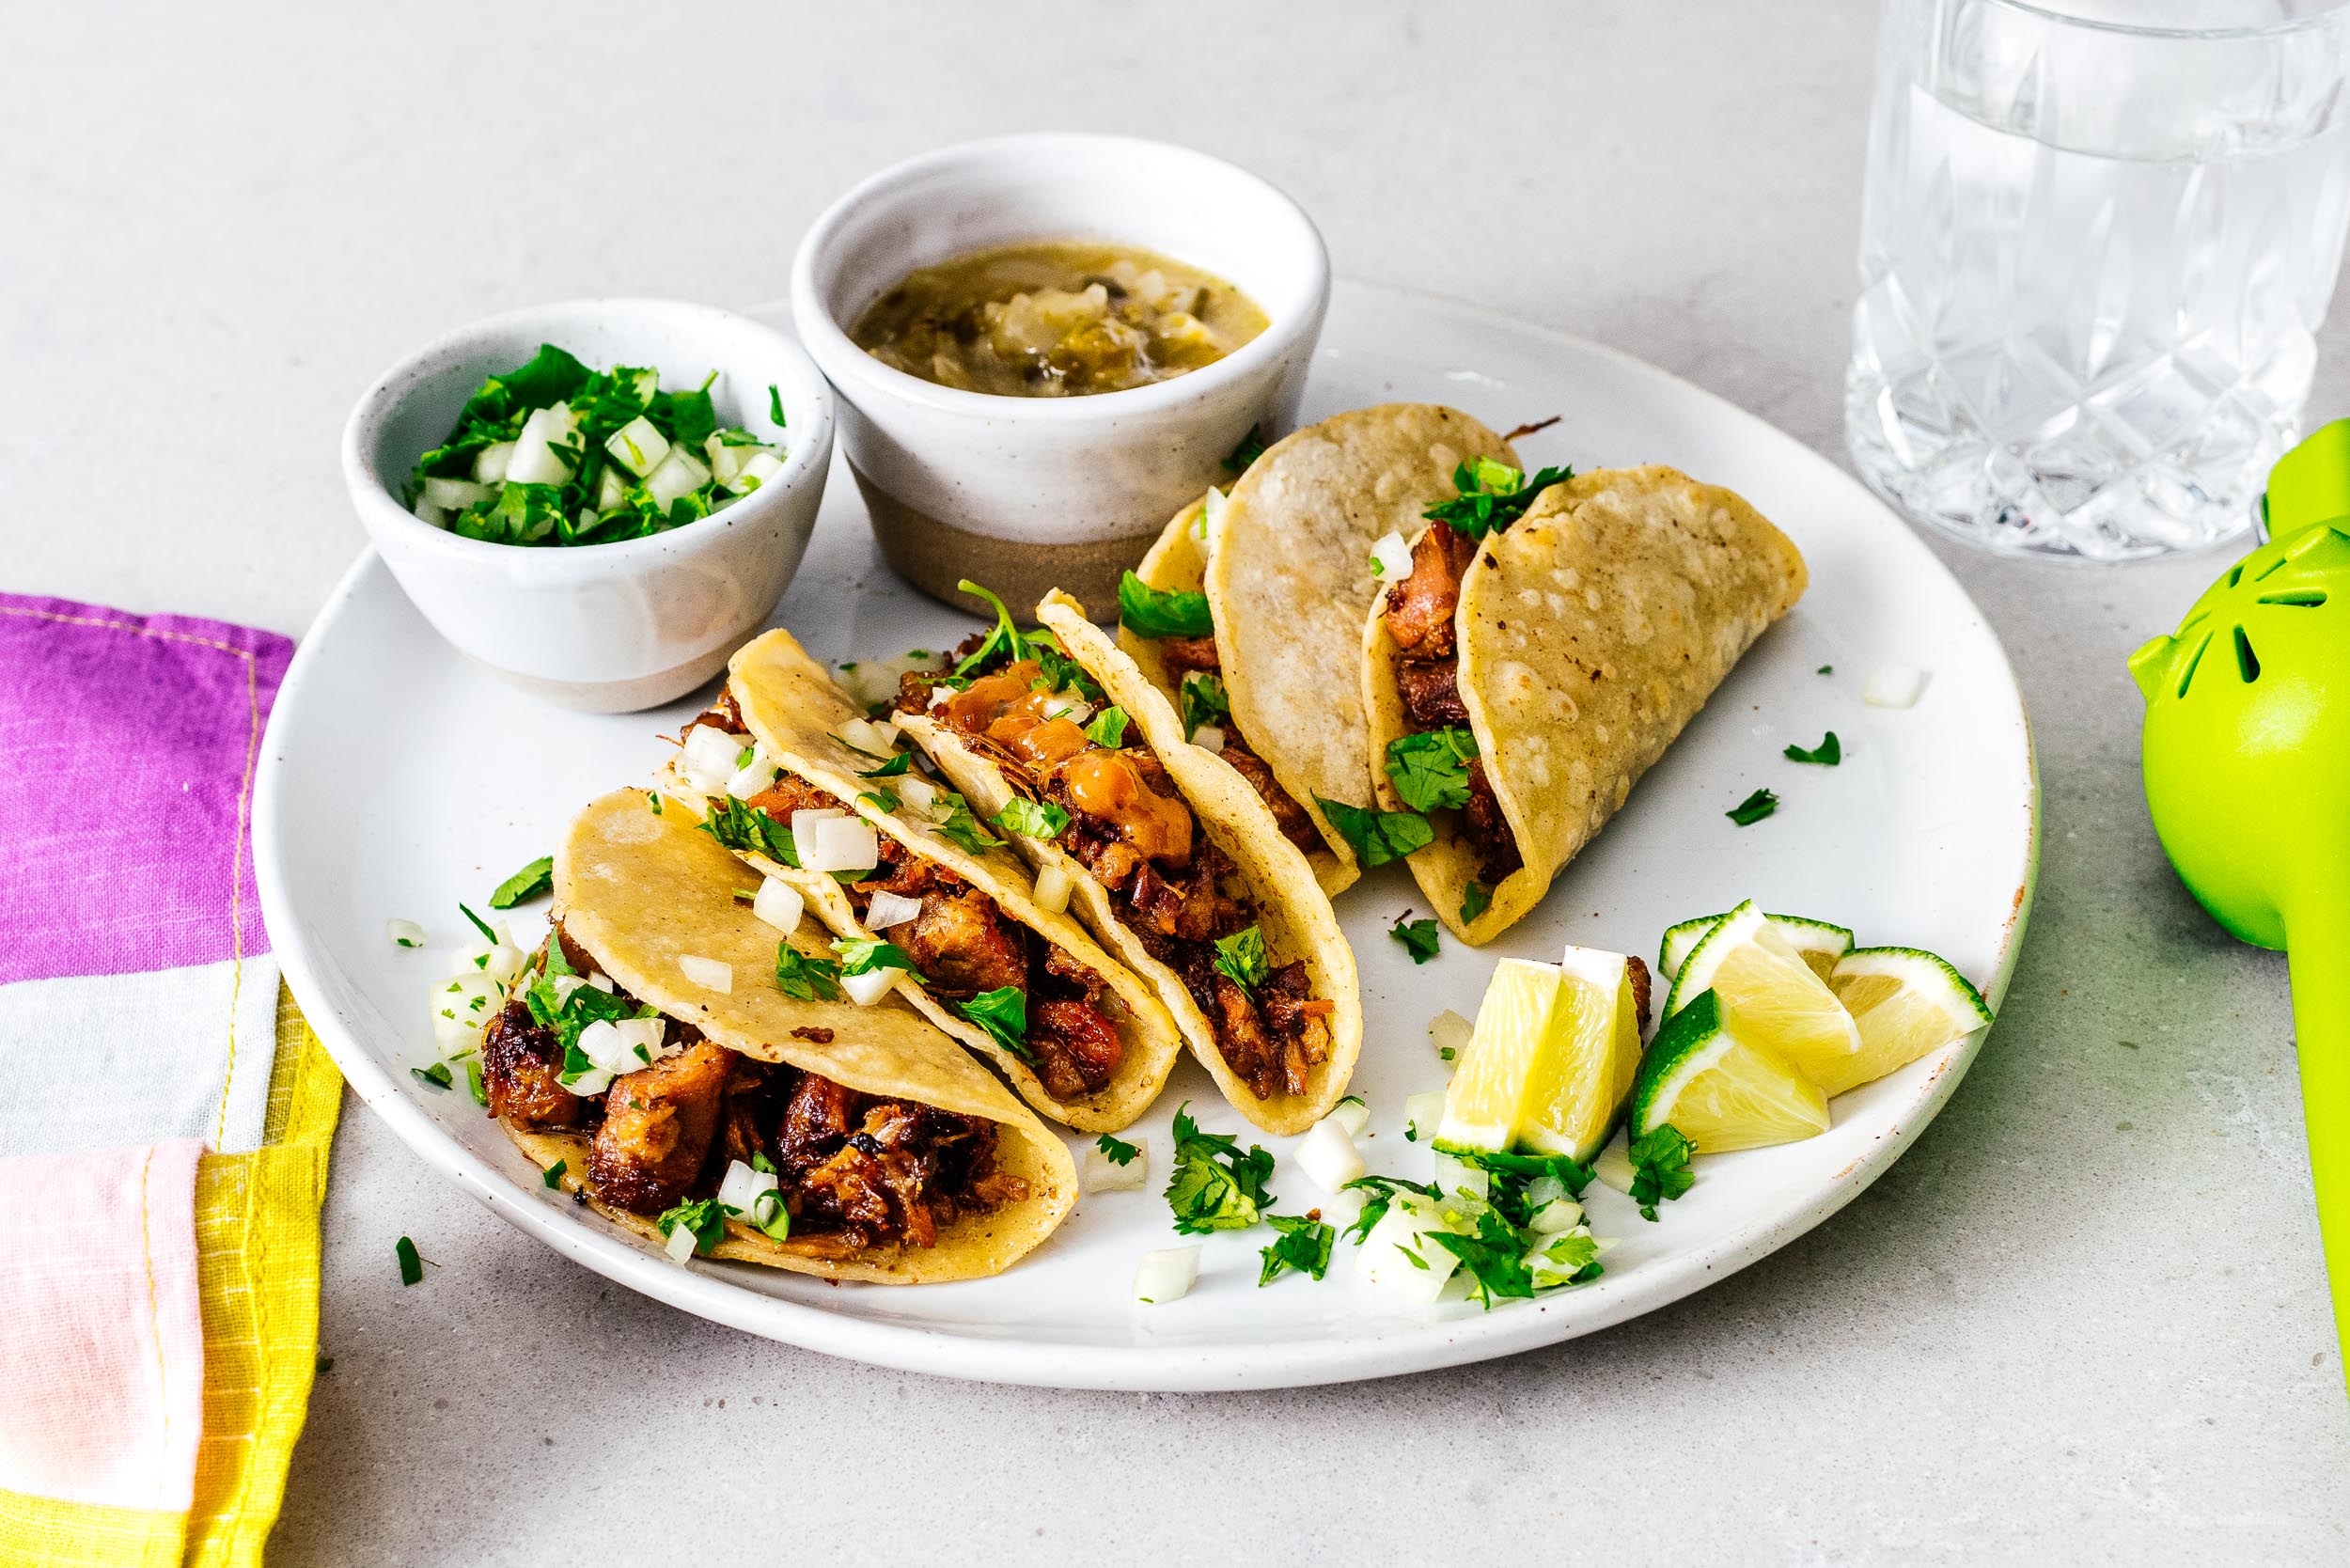
I Am... The Best Stovetop Carnitas Recipe
Carnitas need no introduction. Besides al pastor, they are probably the greatest pork product to ever have come out of mexico, and they are so easy to make at home, especially with this trick in your back pocket. Most recipes you find for carnitas say you need lard to get that beautiful pork confit effect, but what if you don’t want to buy lard or can’t find any? I had the idea recently to use pork belly to make a self-confit carnitas and it worked out great. This trick works because you cut everything up into 1" cubes, which sounds like a lot of work, but with a sharp knife, it’s really fun. You could probably convince a butcher to do it for you as well. After that, you just scatter the pork belly up in between the shoulder and, as it cooks, the fat melts right off the belly and confits the pork. Bonus: you end up with pork belly in your carnitas, and if that isn’t awesome, I don’t know what is. All the herbs and spices are optional, but they’re traditionally what’s included in hierbas de olor, aka Mexico’s bouquet garni, and it's what sets this carnitas apart and makes it taste just like the good taqueria in town, especially the cinnamon. People are always saying homemade sourdough is the ultimate quarantine food because it takes a lot of time and we all have a lot of time these days to hover around the kitchen. I disagree: traditional carnitas is actually the ultimate lockdown recipe. I made this on the stovetop and it was so perfect for lockdown. Just put it on the lowest heat and give it a stir every hour or so. Your whole house smells good, it gives you a reason to get up every so often, and something really magical happens between hour 4 and hour 6. You could also do this on the slow cooker, but why take that out if you don't need to? I thought this recipe would make carnitas tacos for days, but it was so good that they basically only lasted through lunch and dinner. We haven’t made it out to our local taqueria this year, and now it’s looking like it’s going to be even longer before we do, because between this and our birria taco recipe, we have our own little taqueria here.
Tips for the best tacos:
- Those little tortilla warmers they sell do a really good job warming up your tortilla, but since you have all this pork fat, why not dip the tortillas in pork fat and fry them up over a low flame?
- The best tacos are saucy and spicy, so pre-sauce your tacos before they land on the table. If you’re feeling lazy, aardvark sauce makes for a pretty darn amazing lazy salsa
- It’s better to pack more meat into fewer tacos than the other way around. Ignore the photos in this post. A good taco should be fat and happy, and doubled up on the tortilla.
The Best Stovetop Carnitas Recipe
- 2 lbs boneless pork shoulder
- 1 lb boneless pork belly (skinless optional)
- 1 tbsp dried oregano (mexican preferred)
- 1 tsp ground cumin
- 1/2 medium onion (chopped)
- 6 cloves garlic (chopped)
- 1 stick cinnamon
- juice of large orange (about 1lb)
Cube your pork belly and pork shoulder, then season with salt, pepper, oregano, and cumin. Toss to combine and mix well.
In a heavy pan able to snugly hold the meat (about 2qt), add 2 tbsp oil and saute the onions until golden and translucent. Add garlic and saute for another minute.
Add the meat, cinnamon, and orange juice. Bring to a boil, stirring occasionally.
Turn the heat all the way down as low as it will go. Cook, stirring once every hour or so, trying to keep the meat as flat and packed down as much as possible.
When the meat is done, remove the cinnamon stick and store in an airtight container in the fridge. To make tacos, crisp up the meat in a dry cast iron or nonstick skillet, then serve in doubled up warm tortillas with plenty of onions, cilantro, lime, and salsa.

I Am... Oreo Cheesecake Recipe
Hello Oreo cheesecake! If you’re firmly in the no bake cheesecake camp, this no bake Oreo cheesecake is just the thing for you. They’re creamy, chocolatey, and just plain good. If you love cookies and cream, you’ll love these bars. I love them so much that I always quarter the recipe so it only makes four bars. Even so, I think I ate the whole batch in just under two days, which kind of defeats the purpose, but it is what it is. Do you love Oreos? Cookies and cream ice cream is one of my favorites! I like the way the black and white cookies mixed into ice cream and as a kid I would always get cookies and cream blizzards at Dairy Queen. I am obsessed with Oreos. We even buy the weird flavors, just so I can try them (I love it when the pumpkin spice ones come out!). Mike’s more of a classic Oreo guy, but I love all the seasonal varieties. Anyway, we’ve gone through several bags of Oreos during the pandemic. I kept saying that I wanted to make no bake Oreo cheesecake and earmarked cookies just for that purpose, but always ended up eating them all straight out of the package. Sidenote, isn’t it weird that one of America’s most popular cookies is not really makeable at home? I mean I did try to make Oreos once but they didn’t really turn out the same. It’s a good thing that Oreos lend themselves so well to being made into other baked goods. I love watching TikToks with deep fried Oreos, Oreo mug cakes, and Oreo donuts.
What is no bake cheesecake?
No bake cheesecake is a unbaked cheesecake. Instead, it sets by using either gelatin, or in this case, whipping cream. It’s perfect because you don’t have to turn on your oven and it’s really easy to make. This oreo cheesecake is super simple with a base of cream cheese and heavy whipping cream. You set it in the freezer and it settles into a creamy kind of ice cream texture. I love it frozen, but you can defrost it in the fridge and it tastes just like regular cheesecake.How to make no bake Oreo cheesecake
It’s really simple: crush up some Oreos and mix with melted butter for the base of the cheesecake. The cheesecake itself is whipped room temperature cream cheese, heavy cream, sugar, and crushed Oreos. That’s it! The most time you spend on this is waiting for the cheesecake to set. Quick and easy and perfect for quarantine "baking."No bake Oreo cheesecake ingredients
The best part about this recipe – aside that you don’t even have to turn the oven on – is that the ingredient list is so short. All you need is:- Oreos
- Butter
- Cream cheese
- Heavy cream or sour cream
- Vanilla
- Sugar
Oreo Cheesecake Bars
No bake oreo cheesecake: creamy, sweet, and full of the Oreo cookies you love.
- 40 oreos (divided)
- 1/4 cup butter (melted)
- 2 boxes cream cheese (room temp, 16 oz, about 4 cups)
- 1 2/3 cups heavy cream (14 oz)
- 1 tsp vanilla (optional)
- 1/2 cup sugar
Use a food processor to crush 24 oreos into fine crumbs. Alternatively, use a ziplock bag and crush until fine. Mix together with the melted butter then press into a 8x8 inch pan and refrigerate for 10 minutes while you make the filling in the next step.
In a mixing bowl or stand mixer, whip the cream cheese until very smooth. Add the heavy cream, vanilla, and sugar, beating until well combined. Break up 16 oreos into chunks and fold into the cream cheese mix.
Pour the filling over the chilled cookie crust and spread evenly. Add some crushed oreos on top, if desired.
Freeze for 1-2 hours or until set. Cut into squares and enjoy! You can keep these either in the fridge or the freezer once sliced - the freezer version tastes more ice cream-y and the fridge version tastes more creamy and like regular cheese cake.
For a small batch that makes 4 bars in a small 4.75 inch square pan:
10 oreos, 6 for the base and 4 for mixing in and topping
1 tbsp butter, melted
100 grams cream cheese, at room temp, about 1/2 cup
100 grams heavy cream, about 1/2 cup
1/4 tsp vanilla, optional
2 tbsp sugar
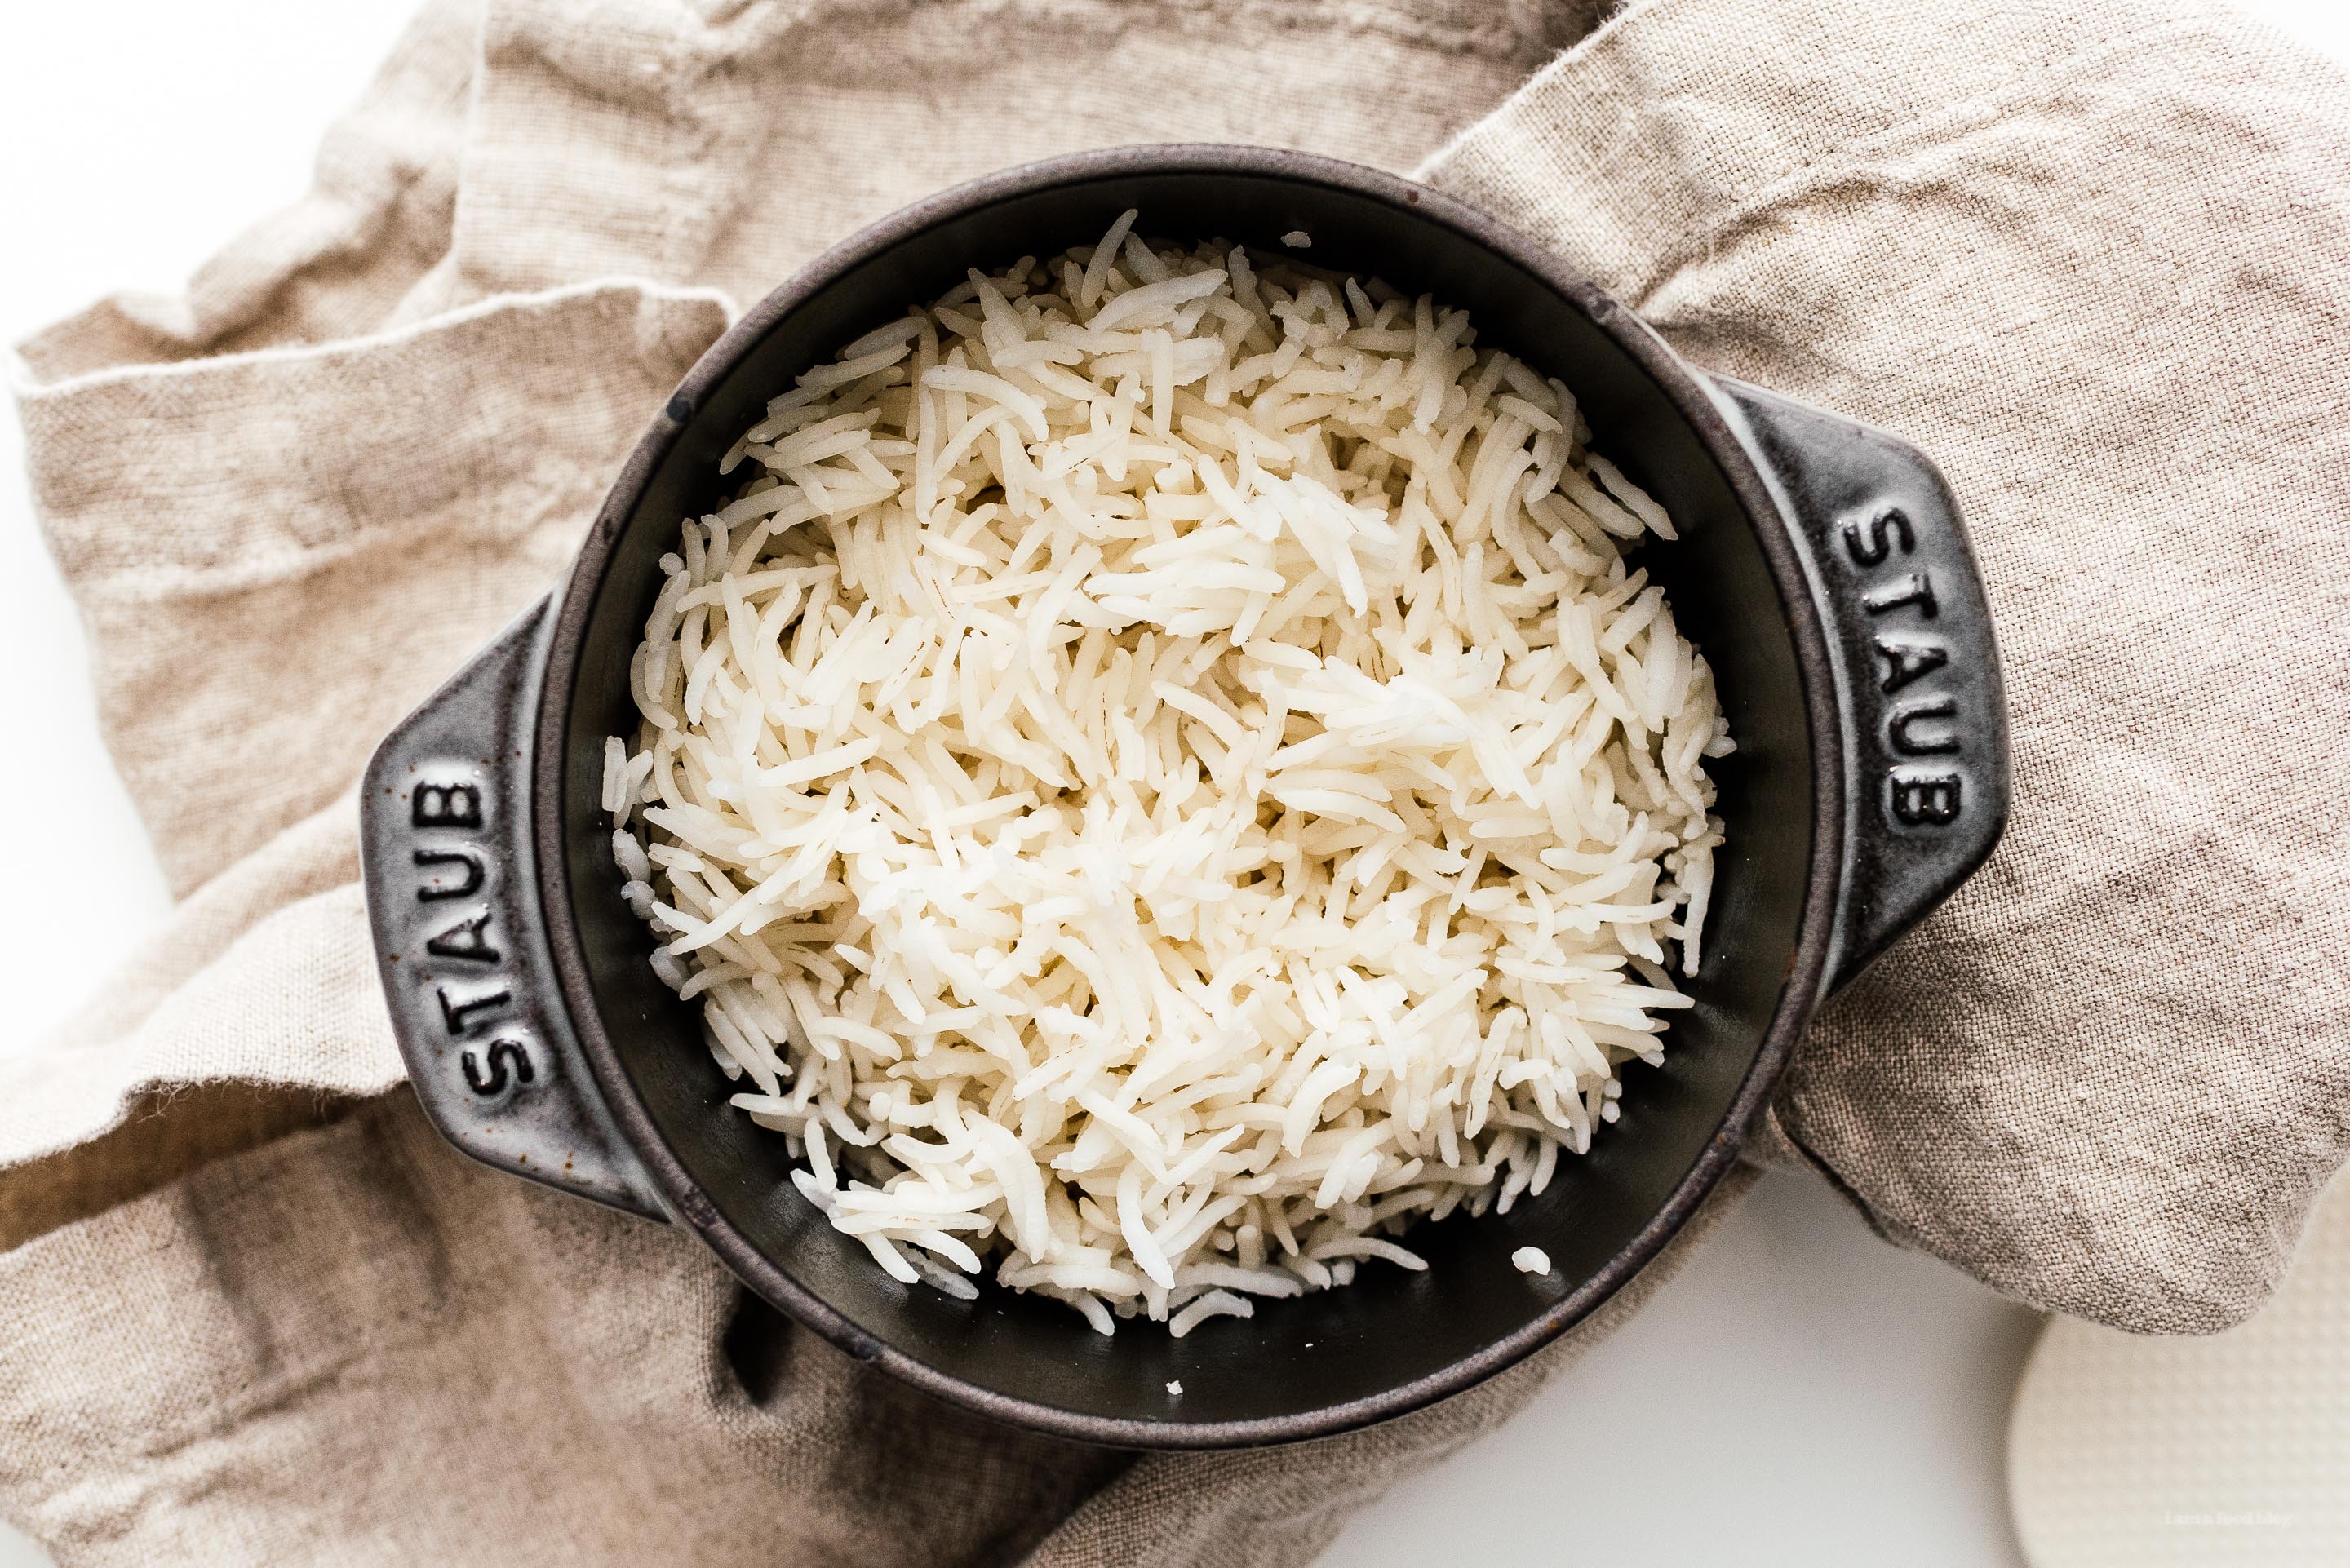
I Am... How to Make Fluffy White Rice Perfectly Every Single Time
A few years ago, I didn’t know how to make rice. I mean, I knew how to cook rice in a rice cooker, like every Asian kid I know, but aside from that, I was clueless. A rice cooker takes all the guessing out of cooking rice: you use the provided cup, add water to the line according to how much rice you added, push the button and boom.
Read More →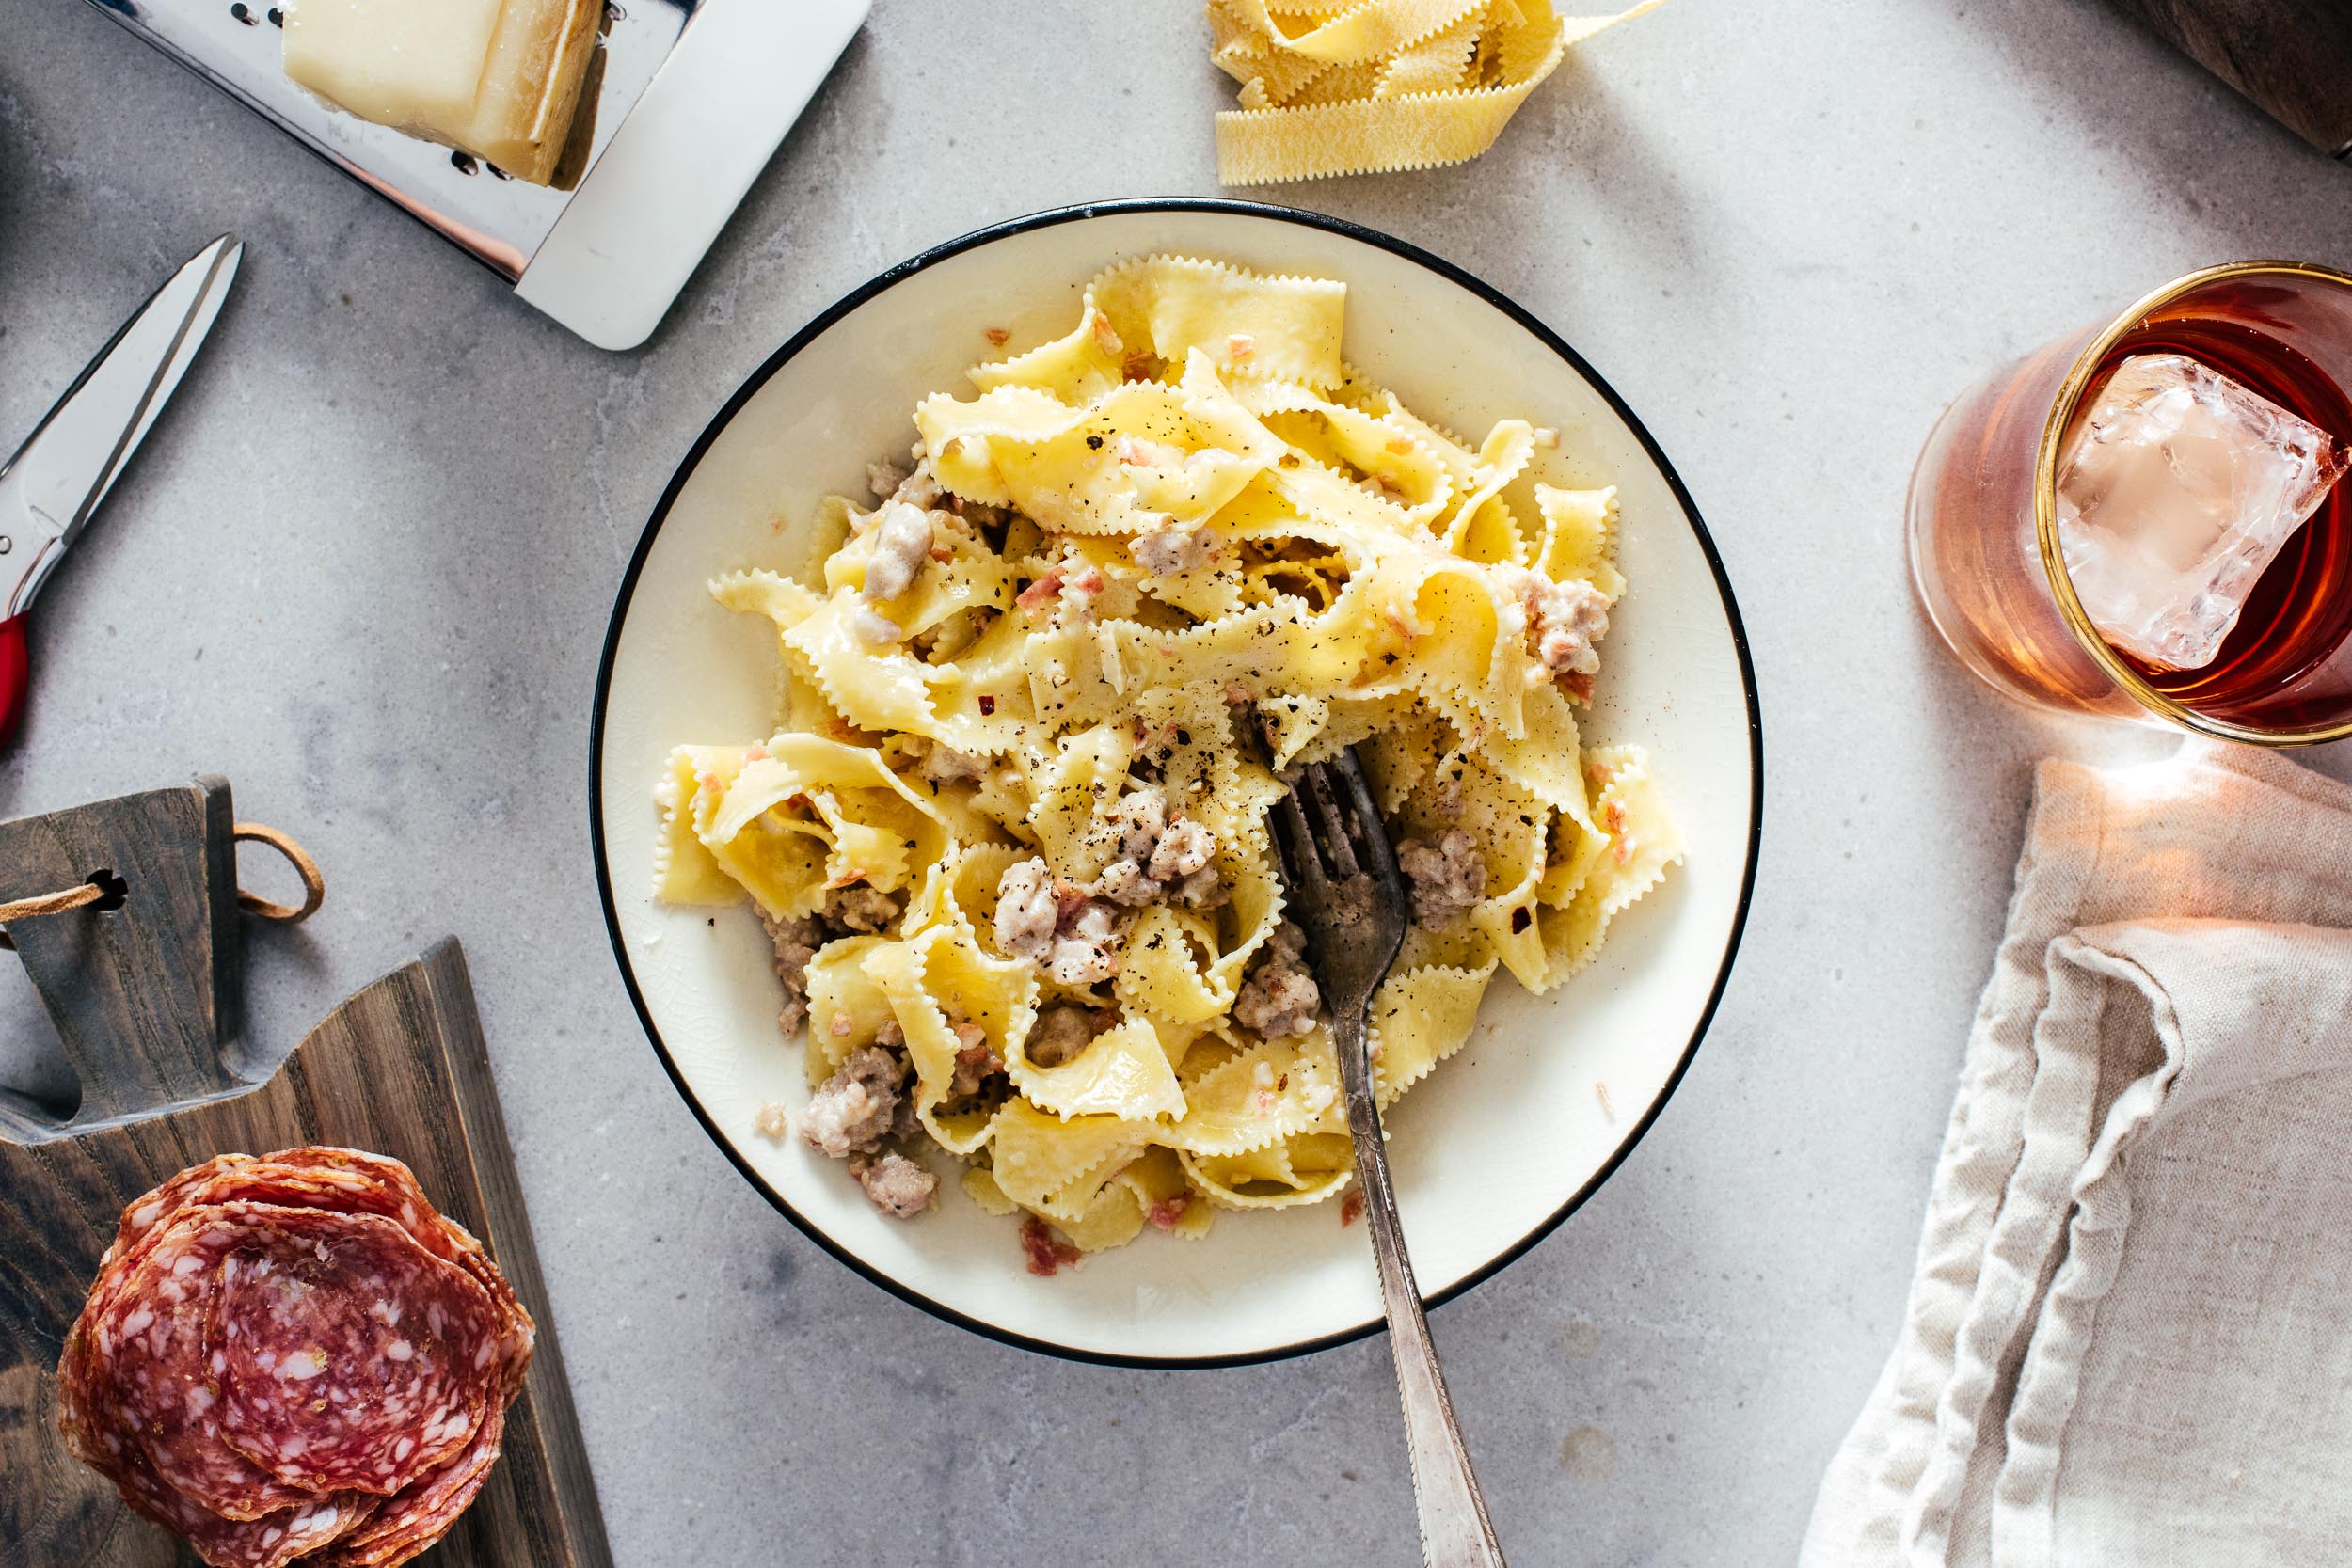
I Am... Pasta alla Norcina Recipe
This is an insanely good plate of pasta that has no right to be this easy or fast. Just seven ingredients and 10 minutes is all it takes to make the best pasta you’ve had in a long time. Like Bolognese, some people would say that this pasta only works in the specific city in Italy it’s named for: Norcia, where the pigs are so good they fly around upon clouds of rainbows and sunshines. And it's true: both the province of Umbria and the city of Norcia are famous throughout Italy for almost every ingredient in this dish. From the salumi and the sausage, to the cheese and the wine, to even the olive oil; Umbria and Norcia are widely regarded as producing some of the best food and ingredients in Italy. This ragu is kind of intended to show off basically everything they’ve got. In the right season, you might even get truffles (they’re famous for those too, because of the pigs) on your pasta. Unfortunately, not too much of this good stuff makes it outside of Italy, so unless you visit Norcia, you may never know just how much better their local pecorino di umbria tastes to your grocery store’s pecorino romano, or how much better the local wine is to our (awesome) two buck chuck. In our current mid-pandemic world, it could be a long time before that can happen. But that doesn’t mean you can’t bring a little taste of Umbria to you through this dish, and likewise, the lack of imported ingredients doesn’t mean that this dish isn’t still both somehow magically good and super fast to make. I would argue that by using great local ingredients, you keep to the spirit of the dish and it will still produce something so good it’ll blow your mind, something better than if you had just used all imported ingredients. You’d never believe just 7 ingredients can turn into something you’d pay $30 a plate for in a restaurant, but it’s true.
Cooking Notes
This pasta depends on the quality of its ingredients (what the Italians call materia prima) so try to get high quality ingredients, starting with a good local uncured sausage. Most cities have a local sausage maker, someone who makes a bunch of charcuterie. I went through a few different sausages, from grocery store to local artisan, before I found my perfect sausage. One thing you should splurge on is good olive oil. It doesn’t need to be (and shouldn’t be) the most top shelf stuff, because heating oil destroys some of its delicate aromas, but try to get a mid-priced bottle from somewhere along the Mediterranean sea, ideally Italy. As always, sauce pasta by transferring the pasta to the sauce over medium heat and tossing with soft tongs until the pasta is well coated and a rich creamy sauce has formed.Pasta alla Norcina Recipe
- 7 ounces pasta
- 1/4 cup olive oil (extra virgin)
- 2 cloves garlic (minced)
- 3/4 ounce salumi (minced, see note)
- 2 mild Italian pork sausages (see note)
- 1/2 cup white wine (ideally Italian)
- 1/2 cup heavy cream ((whipping cream))
- 1 oz pecorino cheese (grated)
Bring a pot of well salted water to the boil over high heat. Once boiling, add the pasta and cook to the time on the package (or minus a minute if you prefer al dente).
Heat up the oil in a large nonstick skillet over medium heat. Add the garlic and salumi and fry until fragrant and slightly browned.
Crumble the sausage into the skillet. Cook very lightly on both sides, then break apart with a wooden spoon or silicone spatula.
Add the wine and reduce by half, about 2-3 minutes.
Add the cream and reduce by half, about 2-3 minutes. Remove from heat.
When the pasta is done, drain and transfer to the skillet along with the cheese, over medium heat. Toss until the pasta is well coated and a thick sauce has formed. Enjoy immediately with extra cheese.
I used a local artisanal fennel sausage and a fennel salumi called finocchiona.
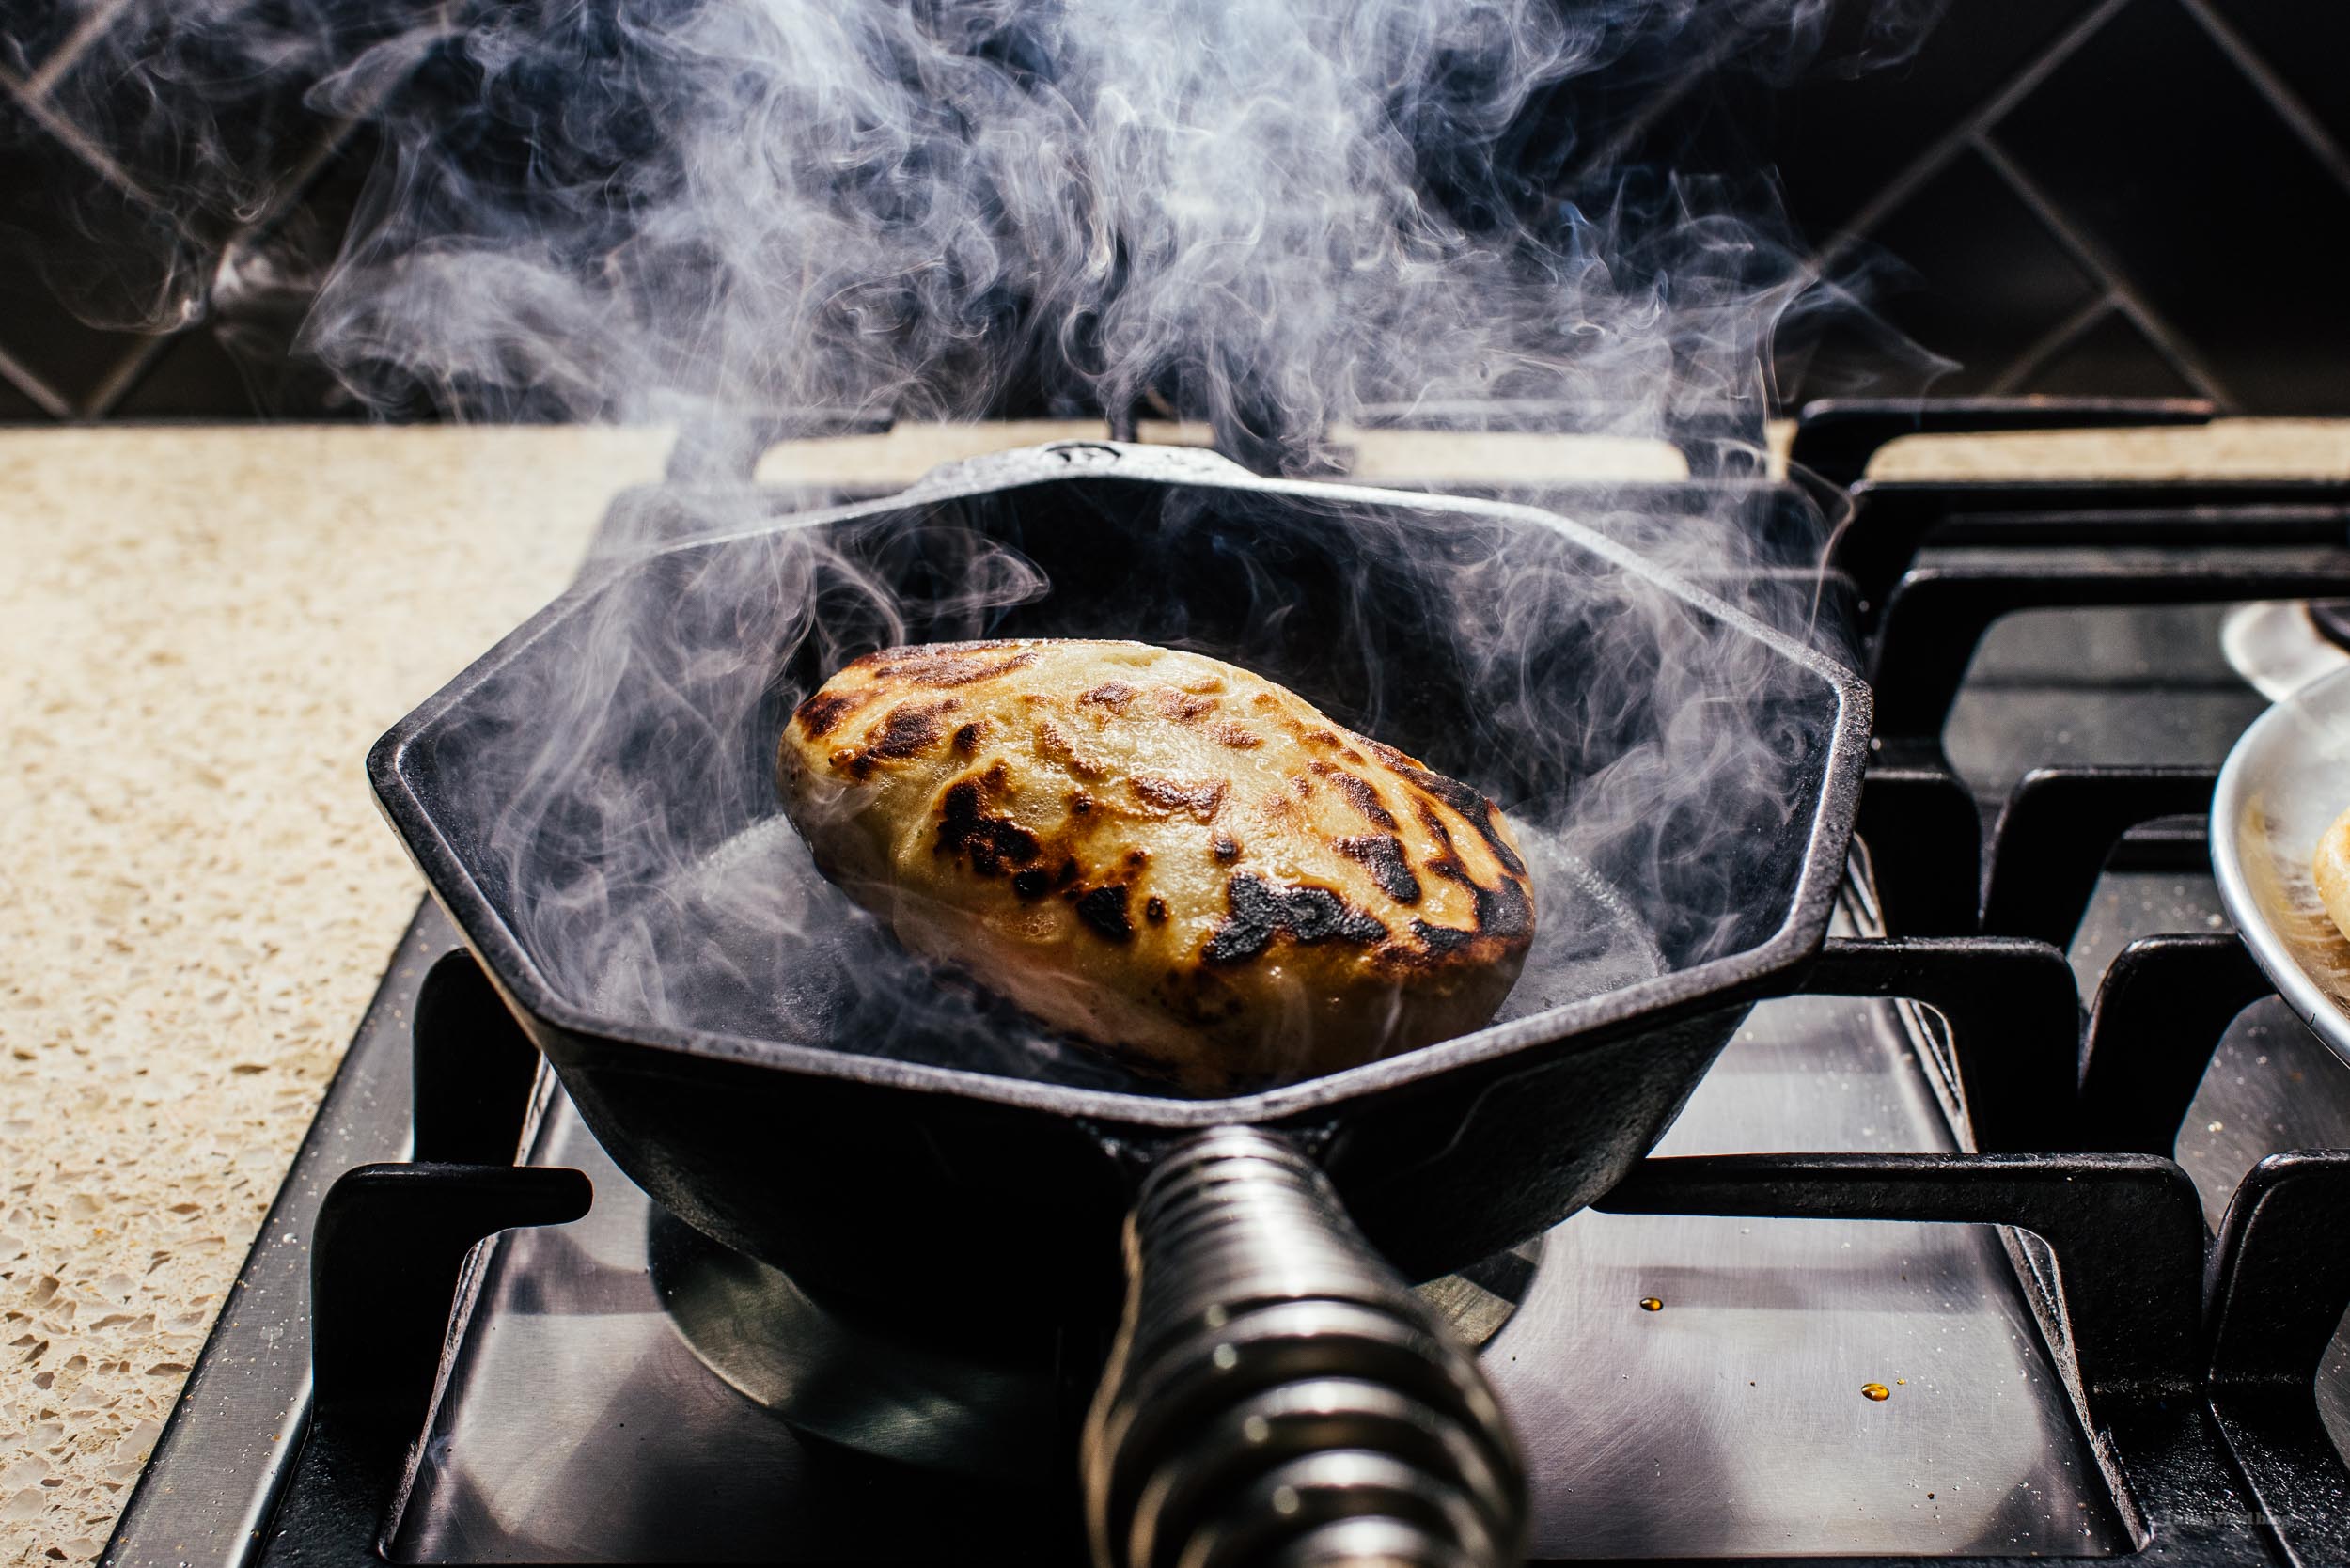
I Am... No Yeast Cheesy Naan Bread
This simple flatbread gets it’s fluffiness from a bit of baking powder, soda, and yogurt. It’s fluffy, crisp, and absolutely awesome. To put it plainly, cheesy yogurt naan is giving me life.
Read More →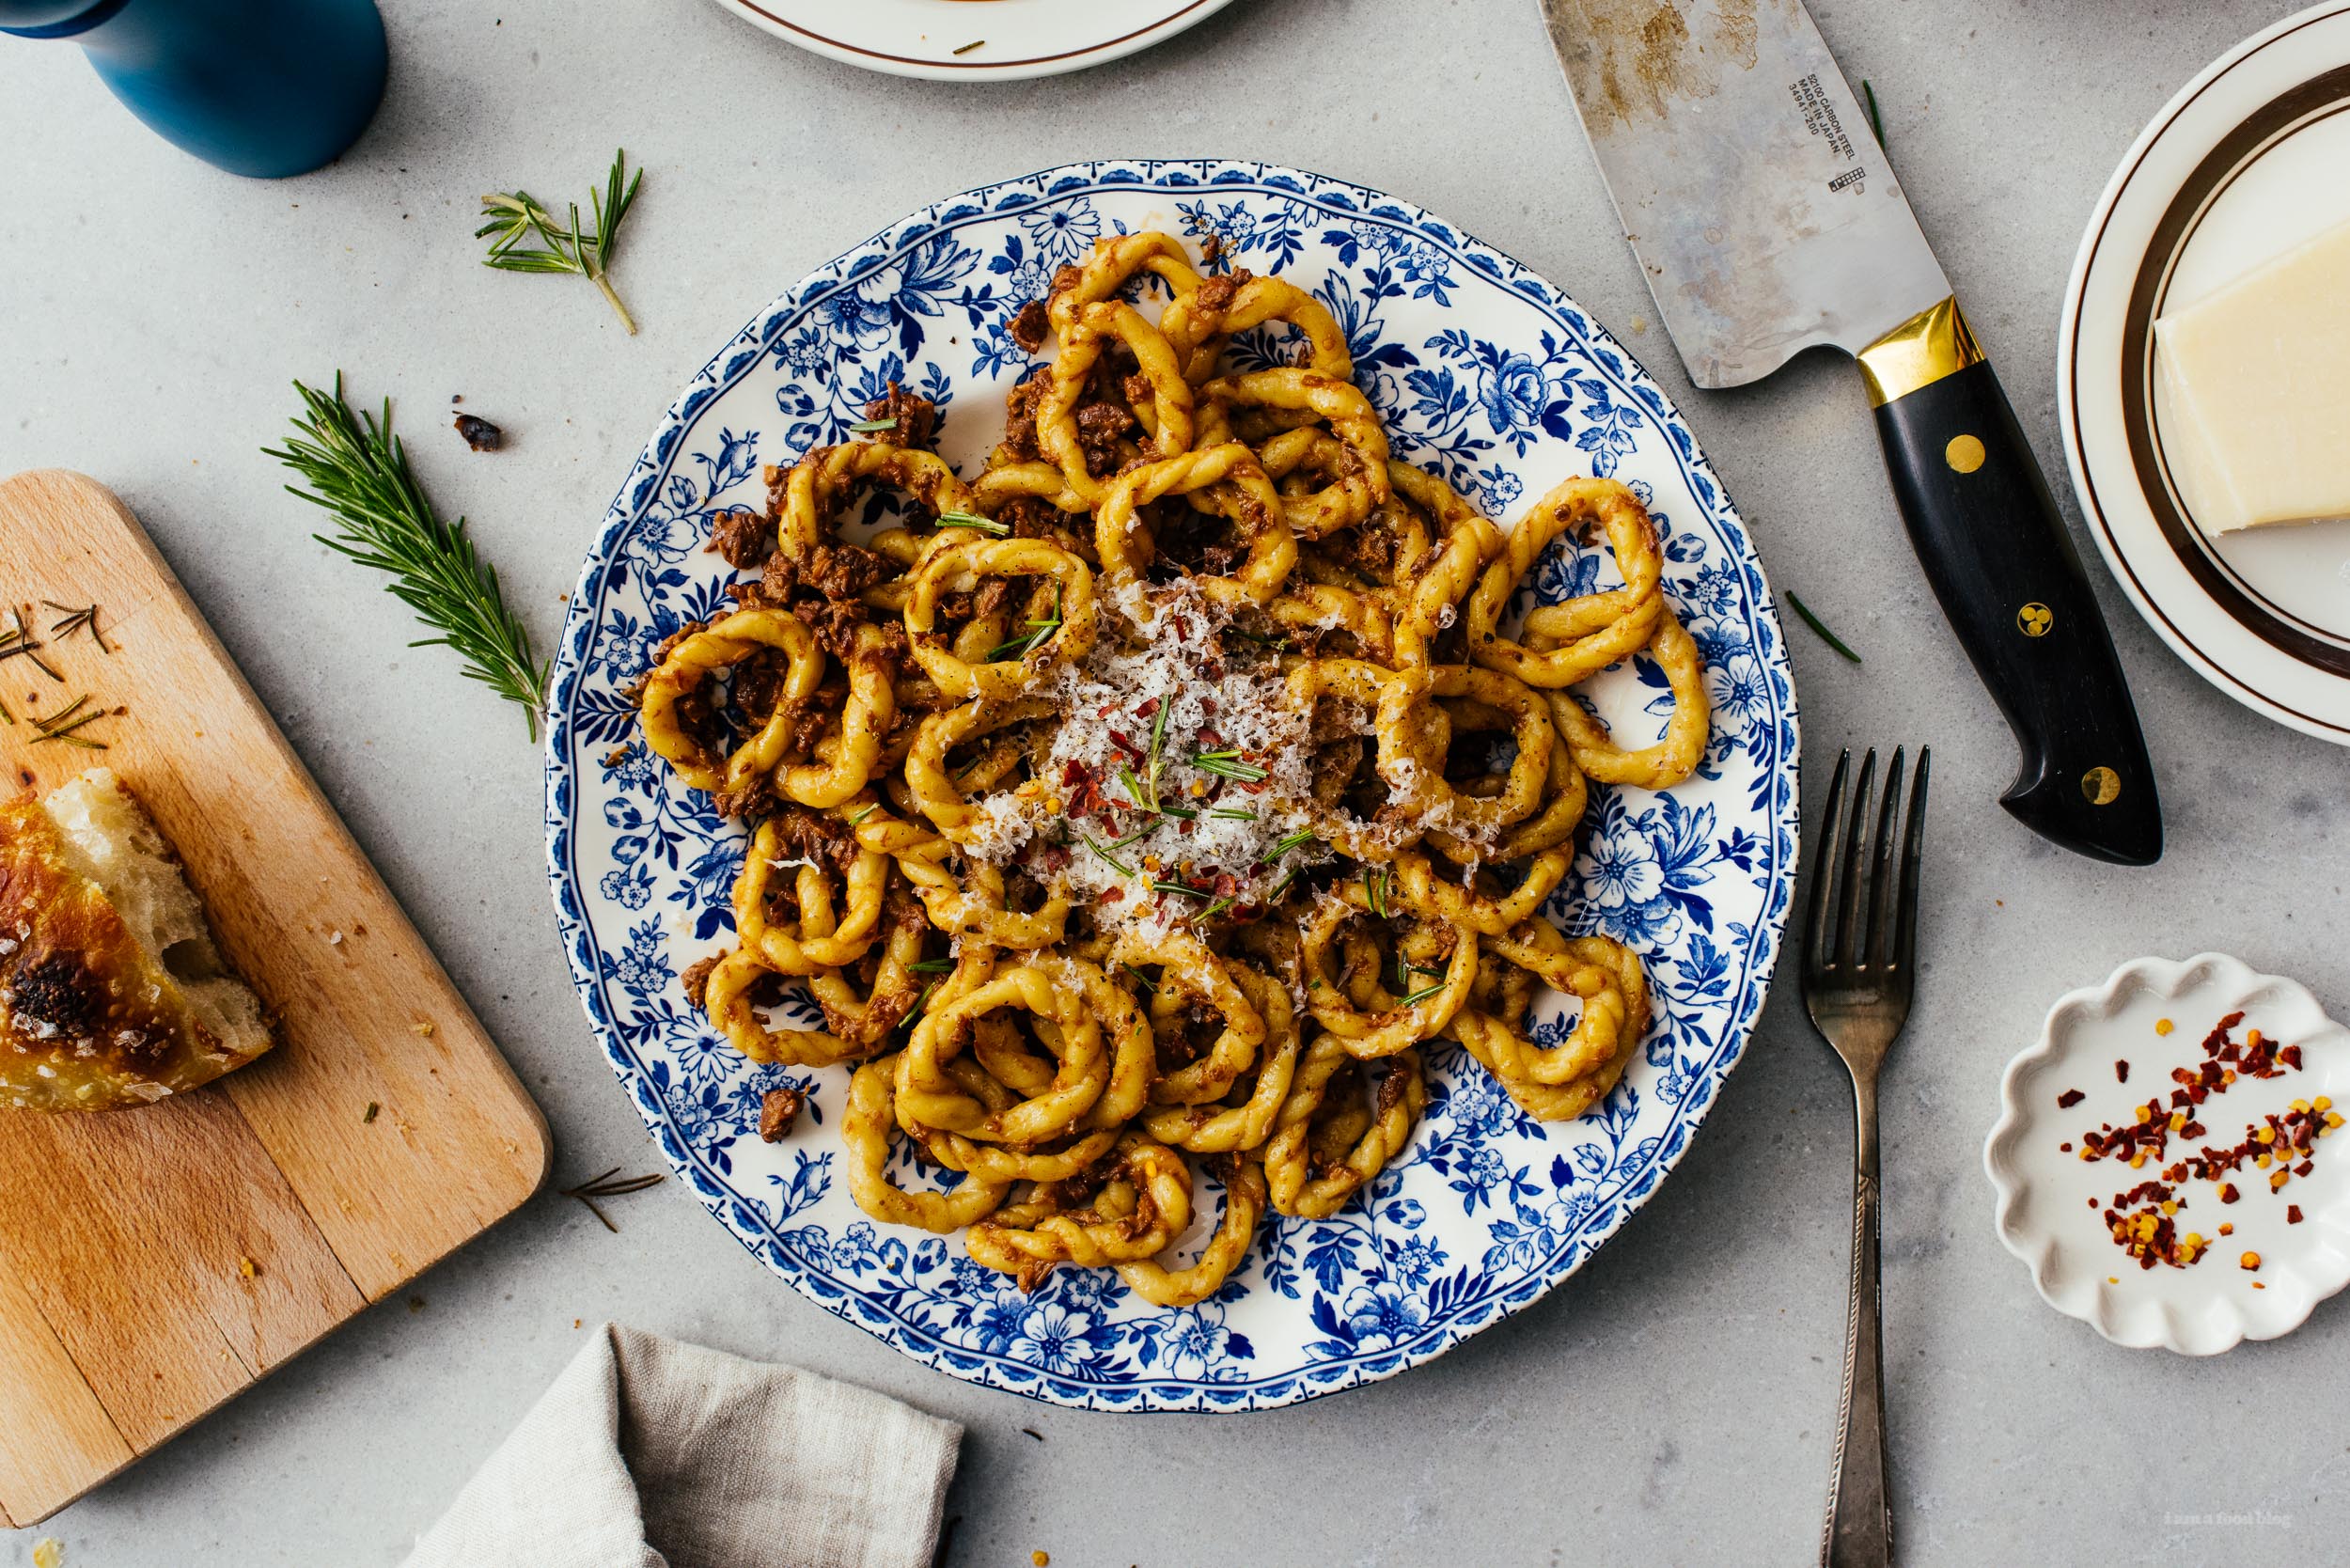
I Am... Instant Pot Lamb Ragu Recipe (Ragù d’agnello)
One bite of this classic lamb ragu and you’ll feel like you’re sitting on a sun drenched trattoria patio in the mountains of Italy up high in sheep country, even if you have never been there. It’s rich, authentic, satisfying, and best of all, easy and effortless. If you’ve ever wanted to up your pasta game, changing up your protein is a great place to start. Have you ever noticed that the super authentic Italian pasta places are always doing their pasta sauces with wild boar, duck, bison, or other exotic meats, but at home we’re always making sauces with ground pork and beef? But, if you look closely at the menu, they almost always also have a lamb ragu too, and that’s because lamb is one of the most traditional and authentic proteins you can get for Italian food. It also happens to be pretty easy to come by and it’s usually the same price as beef, if not even a little cheaper. Lamb is a wonderful meat: rich and tender and only slightly gamey enough to be interesting, but not offensively so for people who aren't so adventurous. This is a modernized take on a super classic Umbria ragu. Lamb, garlic, rosemary, and cheese combine together to make something so rich and flavorful you’d never believe it was just a couple of hours of passive cooking. Even though most ragus are just simmered on the stove anyway, doing your ragu in the instant pot locks in your flavors and guarantees your sauce can’t burn or boil dry. Traditionally this is served with a homemade egg tagliatelle, but here I’ve paired it with this amazing lorighittas Steph made. Any fresh pasta, even store bought, will be a million times better than dried for this sauce though.
How to cook fresh pasta
To cook fresh pasta, drop it in salted boiling water until it floats, then transfer to a nonstick skillet and toss with sauce for 1-2 minutesHow to make a great instant pot pasta sauce
Making a traditional tasting ragu in the instant pot is really simple. Once you have the basic process down, it works for any ragu: 1. Saute your soffritto in high quality olive oil on high for at least 3-4 minutes. Go for a really deep caramelization: the flavor of the ragu comes from the soffritto. 2. Add your meats, cheese rind, and bay leaf. We don't try to brown the meats because we're looking for a silky smooth ragu, and although browning meats helps build flavors, it also adds an unwanted (for me) crunchy texture sometimes. 3. Top with enough chicken stock to barely cover the meat. As the meat cooks, it releases more liquid, so we're going for just enough to build pressure and transfer heat here. 4. Cook on high pressure for 2 hours. You can go as short as 30 minutes, but I've found that 2 hours replicates about a 6-7 hour simmer, which is the magic time when it comes to ragu. 5. Quick release and switch back to saute high for 8-10 minutes, or until it reduces to a thick and creamy sauce. Finish with cheese and rosemary. Finishing with spices at the end helps preserve their delicate flavors and imparts a fresher feel to the sauce.Instant Pot Lamb Ragu Recipe
- 2 tbsp olive oil
- 2 cloves garlic (crushed or diced)
- 1/2 small carrot (diced)
- 1/4 medium onion (diced)
- 1 stalk celery (diced)
- 2 tbsp proscuitto (minced)
- 1 lb lamb (1/2" cubed)
- 1 parmigiano rind ((about 2.5oz))
- 1 bay leaf
- chicken stock (enough to cover (about 1/2 cup))
- 1 cup Pecorino (or Parmigiano Reggiano )
- 1 stalk rosemary
Set the Instant Pot to saute high. Add the olive oil and saute the diced garlic, carrot, onion, and celery until well caramelized, at least 3-4 minutes.
Add the proscuitto, lamb, parmigiano rind, and bay leaf. Add enough chicken stock to just barely cover the meats. Place the lid on the Instant Pot and set to high pressure for 2 hours.
Quick release and remove the lid, then switch to saute high. Reduce, stirring occasionally, until a thick sauce has formed, about 8-10 minutes.
Finish with the cheese and rosemary. Serve with fresh pasta.
To serve, heat up about 1-4 to 1/2 cup of sauce for each portion of pasta in a nonstick skillet. Cook the pasta until al dente, then transfer the pasta to the skillet. Toss until the pasta is well coated and glossy, then finish with extra cheese, red pepper flakes, and rosemary as desired.

Latest Comment
“Made these in the Dutch oven in the oven- THEY WERE AMAZING”AJ on Birria Tacos RecipePopular
 2015 Holiday Giveaway
  One-Pot Lemon Scallop Pea Spaghetti
  Beer Battered Onion Rings, Jalapeno Aioli
  2014 Holiday Gift Guide and a Giveaway
  Easy Gourmet Hot Wings and a Giveaway!
 The Ultimate Veggie Sandwich
  Vegan(!) Creamy Corn Soup Recipe
  Sunday Brunch: Grilled Cheese Eggs Benny
