I Am... Five Best Restaurants in Whistler
These are our five best restaurants in Whistler and we always make sure to hit them up. Nothing beats a comforting apres meal after a day on the slopes or a crisp, cold cocktail after a satisfying hike. We consider Whistler our home mountain and we're there all summer and winter long. These are our favorite haunts that we have to hit up every time we're there, whether it's for skiing or hiking or cycling. We’re always on the lookout for more, so if you have a favorite, please leave your suggestions in the comments below!
Best date night restaurants in Whistler
Wild Blue
Wild Blue is one of Whistler’s newest restaurants and also one of its best. The room is absolutely gorgeous, all blue velvet, dark wood, and warm inviting light. The vibes and ambiance are immaculate. If you’re looking for a super romantic date or somewhere to dress up and grab cocktails and a bite to eat, Wild Blue is where you want to be. The menu focuses on seafood, steak, and local produce. The seafood tower is a standout as are their seafood forward pastas and vegetable forward dishes. Bonus, their fries are pretty darn good too! Wild Blue 4005 Whistler Way, Whistler, BC V8E 1J1 Open: 7 days a week, 5pm-10pmBest Happy Hour in Whistler
Araxi
Araxi is known as one of Whistler’s best restaurants – they focus on Pacific Northwest plates and they are indeed amazing at dinner. That being said, our favorite thing to do is visit their cocktail bar. It’s a cozy and lovely space for a casual bite, happy hour, or après. Bonus points if you’re sitting at the bar where you can peek out the window and watch the snow fall. They have a large whisky and scotch selection and so many delicious cocktails (both classic and innovative) made with housemade infusions, bitters, and syrups. There’s also an extensive spirit free cocktail list made with made with non-alcoholic spirits for people who don’t drink. The oysters are super fresh and tasty, the fries are made from BC potatoes, and the cave aged gruyere fondue (see below) is always a fun treat. Definitely a romantic cozy vibe. Araxi 4222 Village Square #110, Whistler, BC V0N 1B4 Open: Mon-Thurs 5pm-10pm Fri-Sun 3pm-10pmBest casual restaurants in Whistler
La Cantina
Honestly, after a long day on the slopes, sometimes all you want to do is grab a quick bite before heading into the hot tub. If you’re looking for a quick and casual meal, our favorite is La Cantina. La Cantina has authentic street style tacos, burritos, and burrito bowls and trust me when I say, they are the best Mexican food in Whistler. The restaurant chain was started by a Mexican who put down roots in Whistler. You can dine in or take out, either way, it’s quick, filling, and super delicious. They have two locations, one in the Village and one located next to Nester’s. It’s a casual dine in place where you order at the counter, grab a seat and wait for your food. Super fresh and delicious. Plus, if you’re looking for vegan or vegetarian options, they’ve got you. They also have a sister restaurant, The Mexican Corner, which offers more classic Mexican dishes in a sit down service restaurant. Both places are amazing. At La Cantina we love the burritos and the burrito bowls! The chicken tinga is perfect and the grass fed beef pasilla is also amazing. La Cantina 129-4340 Lorimer Road, Whistler, BC V8E 1A5 209-7015 Nesters Road, Whistler,. BC V8E 0X1 Open: 7 days a week, 11am-9pmView this post on Instagram
Best brunch restaurants in Whistler
Hunter Gather
If you’re looking for a good brunch before leaving Whistler (or maybe you want to fuel up before hitting the slopes), Hunter Gather is where you want to be. It’s a casual counter eatery and tap house that serves locally crafted dishes and BC craft beer on tap. They’re open all day but we especially love their brunch/breakfast. The space is lovely, bright, and wide open. Menu-wise, we love the any of the eggs benedicts served on potato rosti. The rosti is essentially a giant, thick potato pancake made from local Pemberton potatoes. It’s super crispy on the outside and creamy and potato-y on the inside. I also love the waffles which come with Canadian maple syrup. In the summer they have a lovely patio where you can enjoy their many craft beers on tap. Super fun and super tasty! Hunter Gather 4368 Main St #101, Whistler, BC V8E 1B6 Open: 7 days a week, 9am-10pmView this post on Instagram
Best bakery Whistler
Purebread
Purebread is a legendary Whistler bakery. So much so that they’ve expanded to two Whistler locations, as well as nearby(ish) Vancouver and Squamish. They bake the most delicious pastries, cakes, bars, cookies, and breads. They also have coffee, making it a perfect morning stop to grab and go before heading out on a hike or the gondola to hit up the slopes. I especially love their savory scones, confetti cookie, and their chocolate bottom banana cake. Purebread 4338 Main St #122, Whistler, BC V0N 1B4 Open: 7 days a week, 8am-5pmView this post on Instagram
Best après Whistler
The Mallard Lounge
As a caveat, this isn’t about the best bar for the après party scene that you see on social with loud bass, sparklers, and people dancing on tables – if you’re looking for that, you’re looking for the Longhorn. If you’re looking for a cozy space filled with a roaring wood fireplace, live music, giant plush leather chairs and an overall mountain chalet vibe, you’re looking for the Mallard Lounge in the Fairmont Chateau. There are giant floor to ceiling windows where you can watch the snow falling gently to the ground and there’s a live musician to help dial in relaxing luxe vibes. Their fries are crispy, potato-y, and a perfect treat after spending the day on the slopes. They have a local meat and cheese charcuterie board and the nachos are definitely a must order if you’re indulging! The Mallard Lounge 4599 Chateau Blvd Unit 205, Whistler, BC V8E 0Z5 Open: 7 days a week, 11am-11pm Happy eating! Please let us know what your favorites are in Whistler, if you’ve been! xoxo steph Read More →I Am... Homemade Pumpkin Cream Cold Foam (Starbucks Copycat Recipe)
I am obsessed with pumpkin cream cold foam and this starbucks copycat recipe lets me have it at home. It’s so good, I feel like I could drink a glass of it and be happy. That might be a bit excessive though? Also excessive is my desire to grab a pumpkin cream cold foam anytime I see a Starbucks. Since Starbucks prices have gone through the roof, I’ve started making pumpkin cream cold foam at home and it definitely satisfies the itch. This pumpkin cold foam tastes amazing on cold brew but I also like the velvety way it flows into hot coffee too. So good!
What is cold foam?
Cold foam (at least according to Starbucks) is whipped non-fat milk that floats on top of cold coffee. They use their special blenders to whip up the milk so it has micro bubbles which gives it a velvety, creamy texture. If you get a flavored cold foam (sweet cream cold foam, pumpkin cold foam, salted caramel cream), it’s not just milk though, it’s a mix of non-fat milk, heavy cream, and syrup.What is pumpkin cream cold foam?
Pumpkin cream cold foam is a mix of sweetened heavy cream with vanilla syrup and pumpkin sauce frothed together so it becomes velvety and thick but pourable. It’s nothing like the consistency of whipped cream, more of a thick, melted ice cream texture. If you live for pumpkin spice season, pumpkin cream cold foam is going to be your jam.Why cold foam?
Personally, I love the way the cold foam floats on top of the coffee and slowly, slowly cascades down into the rest of the drink. When you take that first sip, you mostly get the velvety sweetness of the cold foam with the contrast of the unsweetened coffee pulling through. There’s something extra rich and creamy about cold foam. I think it’s the tiny bubbles that make the drink so decadent.Two different ways to make pumpkin cold foam
I’ve outlined two different ways to make pumpkin cold foam: an easy way and a little bit more advanced way. The easy way is to just foam up the ingredients. The advanced way takes a bit longer but is well worth it. Starbucks uses vanilla sweet cream and their proprietary pumpkin sauce to make their cold foam so I decided to reverse engineer it a bit to see how close I could come. Now that I’ve tasted both the easy way and the advanced way, I can honestly say that the advanced method is far superior. It tastes a lot closer. But, if you’re in a hurry, the easy way is a quick way to get your fix.How to make cold foam: the easy way
- Mix. To a glass measuring cup or tall glass, add heavy cream, milk, pumpkin purée, vanilla syrup, and pumpkin pie spice.
- Froth. Use a milk frother to whip everything up until it is thick and creamy.
- Pour. Add cold brew to a tall glass with ice and slowly pour the pumpkin cream on top. Dust on some extra pumpkin spice using a sieve for a pretty top.
- Enjoy. Sip slowly and enjoy the fall feels.
How to make cold foam: the advanced way
- Make vanilla sweet cream. Mix together 2 cups heavy whipping cream, 1 1/4 cups milk, and 3/4 cups vanilla syrup. Store in the fridge to keep it very cold.
- Make pumpkin sauce. In a pot, combine 1/2 cup sugar, 1/2 cup water, 2/3 cups pumpkin purée, 1 can of sweetened condensed milk, 1 tsp pumpkin spice, and 1/4 tsp salt. Bring to a simmer while stirring, making sure the pumpkin spice is evenly mixed in and the sugar dissolves. Pour into a container and let cool completely.
- Make the cold foam. In a glass measuring cup or tall glass, add a scant 1/2 cup of the cold vanilla sweet cream. Add 2 tbsp of the cold pumpkin sauce. Froth until thick and creamy. This should be enough for 2 drinks or one extra decadent one.
The best frother for cold foam
I like using a hand milk frother because you can whip up small amounts. They’re fairly inexpensive and they are great for whipping up small amounts of whipping cream, whisking eggs, and making all kinds of whipped drinks (dalgona, whipped matcha, whipped hot chocolate). I have a frother similar to this one but they don’t sell the exact model I have anymore. You can also use the nespresso milk frother too – it has a special setting for cold. I haven’t tried it, but I’ve heard it works very well.Pumpkin cream cold foam ingredients
- heavy cream - this is the same as whipping cream, it’s what gives the pumpkin foam a thick and velvety texture.
- vanilla syrup - classic coffee vanilla syrup. I always use Torani.
- pumpkin purée - this is the stuff that is sold in cans at the grocery store. I like Libby’s. Get the can that says pumpkin purée and not pumpkin pie filling.
- sugar - add bit of extra sweetness that’s cooked into a simple syrup that’s mixed into the pumpkin sauce
- sweetened condensed milk - this add extra thickness, creaminess, and sweetness to the pumpkin sauce.
- pumpkin spice - pumpkin spice!! You can buy it at the store already mixed up or you can make your own if you have all the spices at home. It’s: 2 tsp ground cinnamon, 1/2 tsp ground ginger, 1/2 tsp ground nutmeg, and 1/4 tsp ground cloves. If you make your own you can also adjust the spice ratios to your liking.
What goes well with pumpkin cream
To be honest, pumpkin cream tastes amazing on all drinks and even as a sauce for ice cream or cake. Try it on: iced coffee, cold brew, hot coffee, espresso, lattes, and iced tea. Also, consider it with: Enjoy the pumpkin spice life! xoxo stephHomemade Pumpkin Cream Cold Foam Cold Brew Coffee
If you live for pumpkin spice season, pumpkin cream cold foam is going to be your jam.
- 2 cups heavy whipping cream
- 1 1/4 cups milk (2% preferred)
- 3/4 cups vanilla syrup
- 1/2 cups sugar
- 1/2 cups water
- 2/3 cups canned pure pumpkin puree
- 14 oz sweetened condensed milk (~1 can)
- 1 tsp pumpkin spice (see post for details)
- 1/4 tsp salt
- 12 oz coffee (cold brew)
Make vanilla sweet cream. Mix together 2 cups heavy whipping cream, 1 1/4 cups milk, and 3/4 cups vanilla syrup. Store in the fridge to keep it very cold.
Make pumpkin sauce. In a pot, combine 1/2 cup sugar, 1/2 cup water, 2/3 cups pumpkin purée, 1 can of sweetened condensed milk, 1 tsp pumpkin spice, and 1/4 tsp salt. Bring to a simmer while stirring, making sure the pumpkin spice is evenly mixed in and the sugar dissolves. Pour into a container and let cool completely.
Make the cold foam. In a glass measuring cup or tall glass, add a scant 1/2 cup of the cold vanilla sweet cream. Add 2 tbsp of the cold pumpkin sauce. Froth until thick and creamy.
Pour the cold brew into a tall glass with ice.
Top with the pumpkin cream and use a small sieve to dust/sprinkle on extra pumpkin spice. Enjoy!
makes enough vanilla sweet cream and pumpkin sauce for 16 drinks
I Am... Roasted Garlic
Roasted garlic is earthy, sweet, caramelized, soft, creamy, and delicious. When you roast garlic your house will smell intoxicating and it will drive you nuts in the best way possible. In the oven, the garlic transforms, turning from sharp and spicy to creamy, soft, and mellow. It spreads like butter and is the best thing in the entire world. Are you a garlic lover? Do you put 12 cloves of garlic in a recipe when it calls for 2? Do you sweat garlic butter? If so, I know you know the magic of roasted garlic. But do you know all the different ways to make roasted garlic? I am here to guide you through the world of roasted garlic. Depending on time, ease, peeled cloves, whole heads, oil usage, appliance, and deliciousness. I have complied ALL the ways to roast garlic as well as dreamed up a list of how you can enjoy it.
How to roast garlic
There are so many ways to roast garlic. You can do it in the crock pot, Instant Pot, microwave, air fryer, on the stove, or in the oven. If you’re anything like the youths, you’ll love squishing roasted garlic out of the skins. If you’re into buying peeled cloves, I’ve got you too. The most popular and classic way to roast garlic is to roast whole, unpeeled heads of garlic in the oven. Here’s how to do it:Oven roasted garlic
- Heat the oven to 400°F.
- Peel off the loose, papery outer layers on the outside of as many heads of garlic as desired, leaving the head intact.
- Cut 1/4 to 1/3 inch off the tops of the heads leaving the head intact. Place the head on a small piece of foil, large enough to wrap up and around.
- Drizzle olive oil all over, especially into the exposed cuts. Wrap the foil up and around the garlic.
- Place the garlic on a baking sheet and roast for 45 minute to 1 and half hours depending on how caramelized you want it. The longer it roasts, the more brown, sweet and caramelized it becomes.
- Remove from the oven and let cool until you can safely touch it, then squeeze the cloves out from the bottom of the head.
Oven roasted garlic confit
Garlic confit is exactly the same as roasted garlic, except, if you don’t want to squish garlic cloves out of their skins, this is for you. Roasting whole, PEELED cloves of garlic in oil turns the cloves into soft, spreadable, caramelized golden deliciousness. To make garlic confit:- Heat the oven to 200°F.
- Place peeled garlic cloves in an oven proof dish and cover with olive oil.
- Confit (bake) for 3 hours or until the cloves are soft and spreadable.
- Scoop the cloves out of the oil and enjoy.
Air fryer roasted garlic
Prep the garlic, drizzle with oil, wrap in foil, then air fry at 400°F for 18-20 minutes. Let cool then squeeze out the cloves.Slow cooker roasted garlic
- Prep the garlic, drizzle with oil, wrap in foil, then place into the insert of the crock pot.
- Cover and cook on low until the garlic is soft and caramelized, 4-5 hours.
- Let cool slightly, then squeeze the cloves out and enjoy!
Instant Pot roasted garlic
- Prep the garlic, drizzle with oil and place on the trivet in the Instant Pot insert.
- Add 1 cup of water and cook on high pressure for 10 minutes.
- Let natural release 10 minutes then release the pressure.
- Let cool slightly and squeeze out the cloves and enjoy.
Microwave roasted garlic
Technically you’re not roasting garlic here, you’re steaming it, but who cares about technicalities? Microwave garlic is soft and smushable and tastes almost as good as slow roasting in the oven. Plus it’s done in a fraction of the time.- Prep the garlic, place in a microwave safe dish and drizzle with olive oil.
- Add 2 tbsp water and cover the dish with a microwave safe lid.
- Microwave at 50% power until garlic is soft and squishable, 8-9 minutes.
- Let cool then squeeze out the cloves.
Why roast garlic?
Roasting garlic softens its spicy raw heat into a buttery, earthy, soft, and spreadable eat-the-whole-clove deliciousness. Like all things cooked low and slow, heat transforms garlic into something magical. It adds depth and flavor to savory dishes and is delicious just as is. Plus, garlic is good for you, from a health perspective and a self care perspective. Even if you don’t like garlic things, I’m convinced that you’ll love sweet, caramelized roasted garlic.FAQ
Can you roast garlic without oil?
Yes, but it won’t end up as golden brown and caramelized. It still tastes amazing though and if you’re trying to cut out oil it definitely works.Can you roast garlic without foil?
Yes, you can just use parchment paper!How to remove roasted garlic cloves
There are two ways you can easily remove roasted garlic:- Squeeze - Do like the kids do and squeeze out the garlic from the base of the head, using your fingers to squeeze the caramelized cloves out of their skins
- Use a knife - Use the tip of a small knife to gently flick each clove out, intact.
How to store
It’s best to enjoy right away or freeze for future use. To freeze it, squeeze the garlic from the skins, place in an air tight container and freeze until ready to use. To use from frozen, thaw and use as directed in your recipe. If you’re using the garlic the next day, you can just place it in the fridge in an air tight container. Any longer that 2-3 days, and you’ll need cover it entirely with oil so it’s completely submerged in an airtight container.20 ways to use roasted garlic
- Eat it on toasted sourdough bread
- Mix it in to mashed potatoes
- Stir it into mushroom risotto
- Add it to pasta
- Enjoy it on naan
- With steak!
- With baked brie
- In stuffed mushrooms
- In mac and cheese
- With pork chops
- In lasagna soup
- Mixed in with the butter for a garlic grilled cheese
- In hummus
- In guacamole
- On pizza
- In gravy
- With jammy eggs
- In tomato sauce
- With lo mein
- With corn
Roasted Garlic
Roasted garlic is earthy, sweet, caramelized, soft, creamy, and delicious. It will drive you nuts in the best way possible.
- 1 head garlic
- 1-2 tbsp olive oil
Heat the oven to 400°F. Peel off the loose, papery outer layers on the outside of as many heads of garlic as desired, leaving the head intact.
Cut 1/4 to 1/3 inch off the tops of the heads leaving the head intact. Place the head on a small piece of foil, large enough to wrap up and around. Drizzle olive oil all over, especially into the exposed cuts.
Wrap the foil up and around the garlic. Place the garlic on a baking sheet and roast for 45 minute to 1 and half hours depending on how caramelized you want it. The longer it roasts, the more brown, sweet and caramelized it becomes.
Remove from the oven and let cool until you can safely touch it, then squeeze the cloves out from the bottom of the head. Enjoy any way you like!
Estimated nutrition is for 1 whole head per person, because who would eat less than that?
I Am... Pickled Garlic
Pickled garlic is crunchy and salty with a little bit of sweet. It has a huge garlicky hit and is completely addictive.
What is pickled garlic?
Pickled garlic is kind of unassuming, but it’s super popular and universally loved, especially in Korean food. You can snack on it as is (as people have been doing with tiktok spicy pickled garlic) or you can slice it or crush it and add it to rice, noodles, or stir fries. If you like kimchi, you’ll love this.The best snack
If it sounds crazy to you that people are eating cloves of garlic as a snack, don't worry, the pickled version tastes vastly different than raw. Just like how garlic gets sweet and caramelized when you slow roast it, garlic also mellows out and sweetens as you pickle it. The longer it pickles, the more mellow, sweet, and tangy it turns. Pickled garlic is truly wonderful.How to make spicy pickled garlic
There are two ways of making pickled garlic. The fast and easy way and the slow and easy way. Either way is good, it’s just a question of how much time your have on your hands.From scratch
- Peel your garlic, keeping the cloves whole.
- Add the garlic to a jar.
- Top the jar up with a pickling solution made of soy sauce, vinegar, sugar, and Korean chili flakes.
- Pickle. Let the magic of pickling do its job for 2 weeks minimum. The longer the raw garlic sits in the brine, the more mellow and sweet, yet garlicky it gets.
With store bought pickled garlic:
- Drain your jar of store bought garlic.
- Mix in 1-2 tbsp of your favorite hot sauce and 1-2 tsp gochugaru/Korean chili flakes, and 1-2 tsp fresh thyme.
- Put the lid back on the jar and shake it up. Enjoy!
Homemade ingredients
- garlic - you need a lot of it, we’re talking multiple heads of garlic
- rice vinegar - rice vinegar is my preferred vinegar but you can also use white vinegar too
- sugar - sugar adds a extra bit of sweetness
- Korean chili flakes -also known as gochugaru, Korean chili flakes are fruity, sweet, smoky, sun dried bright red flakes. It’s not too spicy and perfect for spicy garlic
Tiktok pickled garlic ingredients
This store bought spicy version was made popular by @lalaleuu on Tiktok.
- store bought prepickled garlic
- hot sauce - use your favorite hot sauce, the Tiktok version uses sriracha but I think sambal oelek would be even better
- Korean chili flakes - add as desired
- fresh thyme - there’s a bit of fresh thyme leaves in the Tiktok version - it’s pretty optional in my opinion
How to easily peel garlic
For best results, you want to keep the cloves whole. Separate all the cloves from the base, then place the garlic into a bowl of very hot tap water. Trim the ends off the garlic and the peels should just slide right off. OR Separate all the cloves from the base and put the separated unpeeled cloves into a bowl and cover with another bowl (you can use a large jar too). Shake to remove the skins. OR Just buy the bag of pre-peeled garlic. Your fingers will thank you.How to enjoy pickled garlic
- on its own as a snack a la tiktok
- on a charcuterie platter
- with instant ramen
Spicy Pickled Garlic
Pickled garlic is crunchy and salty with a little bit of sweet
- 1/3 cup rice vinegar
- 2 tbsp sugar
- 1 tsp salt
- 4 heads garlic (peeled, about 48 cloves, see notes)
- 1-2 tsp gochugaru (optional)
Stir together the 2/3 cup warm water, rice vinegar, and sugar until the sugar dissolves. If you like you can heat it on the stove over low heat then let it cool completely.
Place the garlic and gochugaru (if using) n a glass jar. Cover with the vinegar-sugar mixture and cover tightly. Depending on your jar, you might need to double the pickling solution. Let pickle in the fridge until desired. Pickled garlic usually takes 2 weeks. The garlic becomes more mellow the longer the pickling period.
If you want to make this with store bought prepickled garlic, skip the rice vinegar, sugar, and salt, and add hot sauce to taste.
I Am... Sweet and Spicy Instant Pot Chicken Breast
Super juicy, sweet and spicy Instant Pot chicken breast is a dinner life saver; they’re moist, perfectly cooked, and smothered in the most addictive sauce ever. If you’re looking for a quick and easy dinner or meal prepping a bunch of chicken, the Instant Pot is a definitely the best choice. Because they're so fast to make, you can have these sweet and spicy chicken breasts for dinner or meal prep them for the rest of your week. They’re great shredded, chopped, or sliced in salads, wraps, sandwiches, bowls, with rice, and on pasta. I’m in LOVE.
Instant pot chicken breast, Korean style
These chicken breasts are marinated in a sweet and spicy chili sauce that’s inspired by the BTS sweet chili sauce. I’m a low-key ARMY so when I saw that Mcdonald’s themed up with BTS for a chicken nuggget meal you bet I was there. I love nuggies! But most of all, I loved the sweet chili sauce! Because I suspected it was a classic Korean sweet and spicy sauce used with Korean fried chicken, I did a quick peep on the ingredients for the sweet chili sauce and it was almost exactly what you’d find in a Korean dakgangjeong sauce.Sweet chili sauce
This chicken is cooked in a magical sauce that’s a mixture of brown sugar, gochujang, and soy sauce. It’s sweet and spicy and incredibly addictive.What is gochujang?
Gochujang is a savory, sweet, spicy thick fermented paste made from chili powder and sticky rice. It adds sweet and heat and a ton of flavor. We use it for our baked salmon, in our cabbage soup, and our Korean fried chicken. Traditionally it comes in tubs, but these days you can find it in convenient squeeze bottles in the Asian aisle of literally any grocery store.How to make Instant Pot chicken breast
- Marinate. Mix together the marinade ingredients and cover the chicken in the marinade. Let marinate for 1 hour or up to overnight.
- Cook on high pressure. Add the chicken to the Instant Pot along with 1 cup chicken stock and cook high high pressure for 5 minutes.
- Natural release. When the Instant Pot is done, natural release for 5 minutes, then vent the pressure.
- Remove. Open the Instant Pot and remove the chicken and set aside.
- Make a sauce. If desired, whisk 1 tbsp cornstarch with 1 tbsp cold water. Bring the liquid in the Instant Pot up to a boil over high and stir in the slurry.
- Let bubble until thick, then serve on the chicken.
How long to cook chicken breast in Instant Pot
- Boneless chicken breasts: 3-6 minutes on high pressure, plus 5 minutes of natural release, depending on size.
- Bone in chicken breasts: 8-10 minutes on high pressure, plus 5 minutes of natural release, depending on size.
- Frozen boneless chicken breasts: 10-12 minutes, plus 5 minutes of natural release, depending on size.
Can you use frozen chicken?
Can you cook frozen chicken breast in the instant pot? Yes, absolutely! See above for times.Plain instant pot chicken breast
To make plain instant pot chicken breast for salads, sandwiches, wraps, and bowls, just skip the marinating in the sauce. To add more flavor to the chicken breast, you can flavor the chicken stock with aromatics like garlic, onion, leeks, or spices.- Add the chicken breast to the insert with 1 cup chicken stock and any aromatics you want to season your chicken with.
- Set the Instant Pot to high pressure and cook for 5 minutes.
- Natural release for 5 minutes, then vent and remove the lid.
- Immediately remove the chicken from the stock, let cool, and shred, slice, or cube.
How to make juicy chicken breast
The secret to juicy Instant Pot chicken breasts is…there is no secret! Well, there is a secret: don’t over cook them, because if you over cook your chicken breast, you’ll end up with dry chicken. I like to err on the shorter side of the time range I gave, because the chicken will continue to cook as the pressure is naturally released. It will come up in temp another couple of degrees while it’s resting too. A thermometer is the best way of ensuring juicy chicken. The best kind of thermometer is a thermocouple style, but you don’t have to spring for the fancy expensive ones: this one is nice and inexpensive and still super fast. The other tip I have is to let the breasts rest a bit, outside of the Instant Pot. Letting them rest for 2 minutes will let the juices settle, keeping the breasts juicy, instead of spilling out on to the plate.What to serve with with this chicken
Other dishes with gochujang
Instant Pot Chicken Breast
Super juicy, sweet and spicy Instant Pot chicken breast is a dinner life saver. This one is done in a BTS sweet chili sauce for extra points!
- instant pot
- 1 tbsp ketchup
- 1 tbsp gochujang
- 1 tbsp brown sugar
- 1/2 tbsp soy sauce
- 1/2 tbsp toasted sesame oil
- 1 tsp ground ginger
- 1 tsp garlic powder
- 1 cup chicken stock
- 2 chicken breasts
- lime wedges (to serve)
- green onions (sliced, to serve)
Make the spicy chili sauce: in a small bowl, mix together the ketchup, gochujang, brown sugar, soy sauce, toasted sesame oil, ginger, and garlic.
Marinate the breasts for minimum 1 hour and up to overnight.
To the Instant Pot, add the chicken breast along with all the marinade, and the chicken stock.
Make sure the venting knob is in the sealed position and set the pressure cook on high for the times listed below, then natural release for 5 minutes.
- For boneless chicken breasts (skinless or skin on): 3-6 minutes
- For bone in chicken breasts (skinless or skin on): 8-10 minutes
- For frozen boneless chicken breasts (skinless or skin on): 10-12 minutes
(All times dependent on size)
After 5 minutes of natural release, carefully vent the Instant Pot and remove the lid. Remove the chicken from the Instant Pot. Garnish with lime wedges and slice green onions and enjoy!
If desired, thicken the sauce in the Instant Pot by whisking 1 tbsp cornstarch with 1 tbsp cold water. Add the cornstarch slurry to the Instant Pot and turn the heat to a medium simmer. Let bubble until it thickens, then spoon over the chicken.
Estimated nutrition based on boneless skinless breasts, about 4oz each.
I Am... Risotto with mushrooms and eggs and parm
The coziest risotto recipe topped with an egg and plenty of parm! Super creamy, super comforting, and so, so delicious. I LOVE risotto. It’s kind of retro and not really popular at modern restaurants, but creamy, cheesy rice? Um, yes please! To me, it’s the perfect kind of fancy, kind of out of the ordinary dish I love making, either on weeknights or special occasions. Risotto was one of the very first things I ever learned how to cook when I first moved out! I have to admit, the very first time was a disaster. I must’ve spent hours at the stove, stirring until I thought my arm was going to fall off. It was way back in the day when blogs or cooking wasn’t as popular as it is now and I didn’t have much to go on and I didn’t know that you’re supposed to heat the stock before you add it to the rice. Even after hours of stirring, the rice was still crunchy. Mike ate it and said it was good, but I knew he was just being nice…Anyway, many, many pots of risotto and many recipes later and lesson learned. I’m here to give you all the tips and tricks to making the perfect risotto with the best and coziest recipe out there!
What is risotto?
Risotto is an Italian rice dish where the rice is cooked in a specific way to become gooey and creamily delicious, yet still firm, in a way most other rice dishes aren't. Properly cooked risotto becomes rich and creamy due to the grains of rice rubbing against each other and releasing their starch into the cooking liquid. The grains of rice are al dente and separate, while still kind of fluid. Italians say that it is all’onda, which means that it’s kind of flowing and wavy - they’re talking about how when it’s served on a flat plate the risotto spreads out but isn’t super liquid. Risotto comes in many different regional flavors and in more modern ones too. My favorite is mushroom but I also like a carbonara-type risotto with crispy guanciale, egg, and pecorino.How to make risotto
- Bring a pot of stock up to a simmer. Keep the stock hot so it can cook the rice while you’re stirring.
- Cook the aromatics. Gently cook your aromatics: onions, shallot, or garlic in some butter or oil until soft, but not brown. Deglaze the pan with a bit of wine, stirring, until most of the wine is cooked off.
- Toast the rice. Stir the rice into the aromatics, being sure to coat each grain of rice with butter/oil. Coating the grains of rice with fat before adding any liquid helps them cook evenly so the outsides don’t become mushy before the insides get tender.
- Add the stock. Slowly ladle in the hot stock, while stirring, so the grains of rice rub up against each other and release their creamy starches. Continue to add stock and stir until the rice is just cooked through, creamy, and al dente.
- Finish and serve! Stir in some butter and cheese to finish, taste and season with salt and pepper. Enjoy immediately!
The only risotto recipe you need
All you need for this classic risotto recipe is arborio rice, broth, butter, aromatics (like onions, shallots, or garlic), white wine, and cheese.Risotto Rice: do you need it?
Yes! The key to risotto is the rice. My go to rice for risotto is arborio, an Italian short grain rice that has a higher starch content which helps thicken the cooking liquid and make it creamy. When cooked right, the grains of rice are firm, creamy, and not at all soft. It’s the most common of all the rice varieties used to make risotto and you can easily find it at the grocery store. That being said, if you’re deep into risotto and want to branch out into other risotto rices, try carnaroli - it has a slightly firmer texture and its harder to accidentally overcook, so it has a great texture. Vialone Nano is also a fantastic risotto rice: it cooks quickly, absorbs flavors beautifully, and finishes incredibly silky. You’d definitely have to check out a specialty store to find these guys (or online, as linked).Broth
Generally, I like using unseasoned broth so I can control the salt content of the risotto. All you need to know here is: use a broth/stock you like and make sure you keep it at a low simmer before you start cooking the rice. We tend to just go with a basic chicken broth, but we also have a tendency to get creative! We love risotto with dashi, duck broth, leftover ramen soup, pho soup, essentially if we have leftover flavored liquids in the fridge, you better believe we’ve tried risotto with it!Butter/Oil
Risotto needs a bit of fat to coat the grains of rice to help it cook evenly. You can go with all butter or all oil, typically we use a mix of butter and olive oil so you can get a little brown butter nuttiness without overwhelming the dish.Aromatics
The traditional aromatic used in risotto is finely chopped onions, but you can also go for any and all aromatics: shallots, garlic, leeks, ginger, lemongrass, scallions, celery, carrots, chilis, there are so many possibilities. We prefer shallots because they are smaller – therefore cuter – and sweeter.Wine
A dry, crisp Italian white is classically used. I say go for a bottle that you like drinking - there isn’t so much wine in risotto but it does add a lovely layer of flavor so you’ll want to use a decent bottle. It might seem like a tiny amount but it adds so much flavor. If you’re non alcoholic, you can skip out on this step.Cheese
Make it rain cheese! Cheese gives risotto and extra boost of umami and creaminess. Parmesan is everyone's go to but you can definitely be creative here too. Just make sure it’s very finely grated so it melts nicely into the rice.Cream or no cream?
Most purists say that cream has no place in a REAL risotto. I say, I love cream and there’s nothing wrong with adding a bit in at the end to give your risotto an extra bit of deliciousness. Technically, the creaminess in risotto comes from the starch that comes off of the rice while cooking, so if you’re cream averse, you can leave it out.The best recipe is the one you invent
But, life is too short for classic plain risotto. Mix it up with these variations or invent your own:Mushroom
My favorite of all is mushroom risotto, but especially a garlicky brown butter mushroom risotto. The nuttiness of the brown butter with the earthiness of mushrooms can’t be beat. You can use whichever mushrooms you have on hand, but I like to use a mix if I can. If you’re using white or cremini mushrooms, slice them, but if you’re using a mix (portobellos, trumpet, shiitake, enoki, porchini), tear them so they end up with differently sized craggily bits that sear nicely. This one is so good that it's our default, and the main risotto recipe below.Sautéed vegetables
Melt butter in a pan, then add 1-2 cups bite sized spring vegetables of choice (sugar snap peas, asparagus, peas) and cook until bright green. Remove from the heat and season with salt and pepper and stir in chopped herbs of choice. Stir half into the risotto and top with the remaining half.Roasted tomatoes
Heat butter with a bit of olive oil in a pan and lightly cook 2-3 cloves chopped garlic. Add 1-2 cups tomatoes of choice and cook, carefully pressing down until the tomatoes are soft and jammy. Taste and season with salt, pepper, and chili flakes. Stir half into the risotto and top with the remaining half.Risotto Carbonara
Brown guanciale or pancetta cubes until crisp. Make a soft sous vide egg or a jammy boiled egg. Top the risotto with the crispy pork, egg, and a generous amount of pecorino or parm and black pepper.Lobster Risotto
When you need that little bit of luxe comfort, lobster risotto is here for you. Shown here with reverse seared steak.Risotto tips
Hot cooking liquid
Hot cooking liquid is the number one thing you need to succeed at making risotto. Having your broth at a simmer and ready will make your risotto making process so much smoother and faster because the broth won’t take as much time to come to a boil when you’re adding it to the rice. The hot broth will also coax out more creaminess out of each grain and prevents overcooking.Layers of flavor
Why stop at just regular chicken broth? you can infuse your stock with any and all flavors. Add some herbs or spices in while you’re heating it up for an extra layer of flavor. Ditto on when you lightly fry your rice in butter. You can always bloom some spices or lightly fry up some aromatics like garlic, shallots, onions, ginger.Stir, but not too much.
You don’t need to stir constantly, just slowly stream in the stock and stir occasionally. If you’re stirring constantly, you’re dispersing the heat, making it harder for the rice to cook.Finish with butter and cheese
This one is a no brainer. Stir in a bit of butter for that extra creamy mouthfeel and a huge amount of cheese for umami and cheesiness. And, if you’re like me, you can add in a swoosh of cream too, just so you can be a bit extra.Top it with an egg
And, if you want to be REALLY extra, top off your risotto with a soft sous vide egg for an extra bit of oomph and creaminess.Eat it right away
The longer risotto stands, the thicker it gets as the starch sets. You’ll lose the creamy silkiness you worked so hard to achieve, so make sure you have your bowls or plates at the ready.Risotto Recipe
Mushroom Risotto has got to be the coziest risotto recipe.
- 4 cups chicken stock (low/no sodium preferred)
- 3 tbsp butter (divided)
- 2 tbsp olive oil (divided)
- 1 lb mushrooms (of choice - see notes)
- 3 cloves garlic (crushed and divided)
- 1 shallot (diced - or 1/4 medium onion)
- 2 tbsp white wine
- 1/2 cup arborio rice
- 1/2 cup Parmigiano Reggiano cheese (finely grated)
Heat up the stock in a medium saucepan and keep at a low simmer on your back burner.
In a second large heavy bottomed skillet, heat up 1 tablespoon butter over medium high heat until it starts to foam and turn brown, then add 2 tablespoons olive oil and the mushrooms. Let sear without moving for 2-3 minutes, then add 2/3 of the crushed garlic and a generous pinch of salt and pepper. Reduce the heat to medium and cook, tossing occasionally, until deeply brown and caramelized. Remove and set aside.
Note: if your skillet is on the smaller side, you may need to do this in two batches.
In the same skillet over medium heat, heat another tablespoon of butter until it foams and turns golden (but not burnt). Add the shallots and remaining garlic and cook, stirring, until soft. Deglaze with the wine, scraping the bottom of the pot with a wooden spoon or spatula. Reduce the wine until mostly evaporated.
Stir in the rice and toast until the edges start to look translucent but the center of the grains are still opaque, 1-2 minutes.
Add the stock, one cup at a time, stirring occasionally. Wait until the liquid has almost completely absorbed into the rice, then add more stock. Start tasting the rice at the 15 minute mark – the risotto is done when the rice is creamy and cooked through with a tiny bit of a bite (al dente). You might not need all of the stock.
Stir in the cheese, remaining butter, and half of the mushrooms. If you find the risotto a bit thick to your liking, loosen with cream, a tablespoon at a time. Just before you are ready to eat, plate the risotto and top with the remaining mushrooms. Enjoy immediately!
If you’re using white or cremini mushrooms, slice them; if you’re using a mix (portobellos, trumpet, shiitake, enoki, porchini), tear them so they end up with differently sized craggily bits that sear nicely.
I Am... Crockpot Beef Stew
It’s almost stew season: the best time to cozy up to a bowl of super hearty, super warming crockpot beef stew! Beef stew has to be one of the coziest, most comforting things to make and eat. Who doesn’t love tender, juicy little nubbins of beef and perfectly cooked potatoes, carrots, and onions all snuggled up in a rich and flavorful gravy? Pair a bowl with a loaf of crusty hot bread and you have my idea of heaven. At its heart, beef stew ingredients are very simple: aromatics, beef, vegetables, stock. Everyone knows and loves beef stew, but this beef stew is particularly good. It’s a take on my all time favorite stew ever, Vietnamese bo kho, a super flavorful rich and hearty stew. Are you a crockpot lover? Maybe you grew up with a crockpot happily bubbling away on the countertop or maybe you’re a recent crockpot convert. Either way, I’m pretty sure that crockpots were made for beef stew. They might as well have called them beef stew pots, am I right?
How to make crockpot beef stew
- Generously season your beef and toss in some flour. The flour will help give body to the stew so it ends up just the right amount of thickness, between a sauce and a gravy.
- Add all the ingredients to the crockpot: the floured beef, onions, carrots, potatoes, tomato paste, beef broth and a couple of secret ingredients that I’ll go over more later in this post.
- Turn the crockpot on, and go about your life. Ten to twelve hours later, your stew will be perfectly cooked and ready to eat!
How long should you cook beef stew in the crockpot
- 10-12 hours on low
- 4-6 hours on high
Beef stew ingredients
Bo kho has all of your usual beef stew suspects: beef, onions, carrots, and potatoes, but the seasoning is where the fun happens. Lemongrass adds a zippy undertone and star anise, fennel and cinnamon add warmth. It’s SO good. If you’re looking for something super comforting, yet different, this is the beef stew for you.The best cut for beef stew
The secret to really, really good stew is to not buy those precut pieces of stewing beef. All too often, those pieces have no collagen, no connective tissue, no fat, and no flavor. Yes, they’re super convenient and I've bought them many times, but I’ve learned from my mistakes. Now I like to buy whole cuts and cut them myself. For stew, you want pieces of beef that have lots of collagen and fat because well marbled meat is the key to stews that are rich, tender, and juicy. Cooking low and slow will magically turn those pieces into melt in your mouth pieces of deliciousness.Best cuts for stew
- chuck - this is probably the most common beef for stew and the BEST choice when I’m looking for something relatively cheap that has a lot of flavor, fat, and connective tissue.
- short rib - we’re going up in price, which means we’re going up in flavor. Short ribs are deeply beefy and well marbled. Bonus: short rib is usually pre cut into nice neat even cubes, if you’re into that sort of thing. fatty brisket - brisket is a great beef for stew, especially the fattier side of the
- brisket - don’t get lean brisket. It has huge beef flavor and lots of fat. Brisket is cheaper than short rib but more than chuck. It tends to be a touch fiberous though, because of the way muscles run through it.
- cross cut beef shanks - these guys are what you make osso buco with and they have the bonus of having a bone in them, which adds bone marrow beefiness. You’ll have to pull the meat off the bones and they take longer to cook, but they are delicious.
Do you really need to brown beef for stew?
This crockpot beef stew has zero browning. That’s right, it’s a no browning crockpot beef stew. I am a huge fan of browning meat - it adds SO much flavor. But sometimes, you just want to throw everything in to a pot, set it, and forget it. This is truly one of those super easy recipes were you don’t have to brown the beef. Of course, if you want to take the extra step, please feel free, it’ll take your stew over the top.To make up for the lack of browning, we’re going to amp up the flavors by adding in a bunch of umami forward ingredients:
- tomato paste - this has the benefit of thickening up your stew a bit and also adds a nice round sweet note.
- soy sauce - soy sauce helps accentuate the beefiness of this beef stew.
- fish sauce - fish sauce is the secret ingredient that will add a huge amount of umami! If you don’t have any, in this case you can substitute worcestershire sauce, which, surprise, surprise, is actually a fermented fish sauce!
- lemongrass - cut a stalk of lemongrass into 4 inch lengths, and slightly bruise it. It’ll add brightness and so much flavor to the gravy of this stew. star anise, fennel, cloves, cinnamon, bay leaf - these are some warming spices that are optional, but completely recommended. They add undertones of warmth, pepperiness, and sweetness.
Which crock pot?
We have the casserole crock, which holds 2.5 quarts. It’s so cute and perfectly-sized for this recipe, but a regular sized 7 quart crockpot will work too.Instant Pot beef stew
Can you make this stew in an Instant Pot if you don't have a crockpot? Yes! You can just use the slow cooker low mode and follow this recipe exactly the same, but you can even pressure cook and it’ll taste just as good!
To make this crockpot beef stew in the Instant Pot, add all of the ingredients minus the carrots ad potatoes and cook on high for 35 minutes. Quick release, then add the potatoes and carrots and cook on high pressure for 7 minutes. Quick release, stir, and enjoy! Click here for more in-depth instructions on making Instant Pot beef stew.
What to serve with beef stew
We like our beef stew with a loaf of crusty bread but here are some other suggestions as well:- creamy mashed potatoes because beef stew with extra potatoes is extra good
- fluffy rice - you haven’t lived if you haven’t had beef stew with rice!
- homemade pasta - you went the easy route with crockpot beef stew, why not make some fresh pasta and scoop it over the top?
- garlic bread - just in case you are a garlic bread fiend like me
Crockpot Beef Stew
A slow cooker take on Vietnamese bo kho, a super flavorful rich and hearty beef stew.
- crockpot/slow cooker
- 1 lb beef (cut into 1 inch cubes, see notes)
- 2 tbsp all purpose flour
- 2 cloves garlic (lightly crushed)
- 1 tbsp ginger (grated)
- 1 small onion (roughly chopped)
- 1-2 potatoes (cut into 1 inch pieces)
- 2 carrots (roughly chopped)
- 1 tbsp tomato paste
- 2 cups beef broth (low sodium preferred)
- 1 tbsp fish sauce (or worcestershire sauce)
- 1 tbsp soy sauce
- 1 stalk lemongrass (cut into 4 inch lengths, bruised)
Optional but highly recommended spice packet
- 1 whole star anise
- 1/4 tsp fennel seeds
- 2 whole cloves
- 1 bay leaf
- 1 cinnamon stick
Toss the beef in the flour and season with salt and pepper.
Add the beef, along with the garlic, ginger, onion, potatoes, carrots, tomato paste, beef broth, fish sauce, and soy sauce to the crock pot. If your potatoes are poking out, push them down and add a bit more beef broth to make sure they’re covered.
Optional spice packet: wrap the star anise, fennel, cloves, bay leaf, and cinnamon stick in cheese cloth or place in a large tea bag for easy removal later. Add it to the stew.
Top with the lemongrass, cover, and cook on low for 10-12 hours on low or high for 4-6 hours. Stir occasionally. Remove the lemongrass and spice pack and enjoy warm!
I Am... Kale Salad
I could eat this kale salad all day, every day. Kale might just be my all time favorite leafy green. It’s incredibly versatile - you can sauté it, bake it, roast it, stew it, salad it, you name it, kale can do it. This is my go-to kale salad: it’s garlicky, full of bright lemon, and lots of parm. It goes with practically anything and is hearty enough to eat on its own. If I had to choose only one salad for the rest of my life, it would be this kale salad. I love it because it’s easy to make and keeps incredibly well in the fridge. Hello salad meal prep! Buy several bunches of kale, make a huge batch of salad and live the kale life.
How to make kale salad
- Prep the leaves - wash, strip, and shred the kale.
- Make the dressing - in a small bowl, whisk together extra virgin olive oil, lemon juice, minced garlic, finely grated parm, and salt and pepper.
- Dress the kale - add the kale and the dressing to a large container with a lid. Pop the lid on and shake everything up until all the leaves are evenly coated.
- Eat with abandon - make it rain extra cheese and eat ALL THE KALE.
Kale salad ingredients
- kale - dinosaur kale is my top pick for kale. I love how crisp and silky dinosaur kale leaves are and it’s just the right amount of hearty and earthy.
- olive oil - go for a nice and grassy cold pressed extra virgin olive oil that you like the flavor of. This one isn't anything fancy but it's one of our go-tos.
- lemon - we need the tart acid of a lemon to wake up all the other flavors in this salad. I like adding lemon zest too for extra brightness and a bit of color. If you’re going to zest, just remember to do it before you juice your lemon.
- parm - fresh finely grated parm adds saltiness and major cheesy, nutty umami. I love finishing with a shower of extra parm because, why not!
- garlic - there’s raw garlic in this dressing, but the acid from the lemon juice and the olive oil helps mellow it out while still letting it have a bit of a bite. If you love caesar salad, this garlic-lemon-parm dressing will definitely give you caesar salad vibes.
- salt and freshly ground pepper - don’t forget s&p, they make everything sing.
Curly vs Dino Kale
You can use curly or dino kale for this kale salad, but I prefer dino kale for it’s ease of preparation (you can strip the stems out super easily) and how pretty it its when you shred it.Curly Kale
This is the most common kind of kale that you set at the grocery store. It’s a deep green with frilly edges and long, thick stems.Lacinato aka Dinosaur kale or Tuscan kale
This is my favorite kind of kale! Slender and dark green with slim stems and flat-ish leaves that are bumpy and puckered.How to prep kale for kale salad
- Wash - give the leaves a good wash and shake off any excess water.
- Strip - kale stems are super tough and fibrous. Slice them away with a knife or rip the leaves off by running your fingers along the ribs.
- Massage or shred - either tear the leaves into large pieces and massage, or use a knife to cut into thin shreds.
Why massage kale?
If you’re a kale salad fan, you’ve probably heard of massaged kale salad. Maybe you’re thinking, what the heck? Does kale enjoy spa days where they get hot stone massages and fancy fruit water? As fun as it is imagining kale going to the spa, massaged kale isn’t quite as cute. Literally, massaged kale is kale that has been massaged (or marinated) with oil or lemon. Because kale is a tougher green, the act of using your fingertips to rub it with oil (fat) and lemon (acid) helps break it down so that it becomes silky and tender, yet crisp. Massaging breaks down the tough, fibrous cellulose and also has the added bonus of really dressing the leaves so they become extra tasty and flavorful.When to massage kale
If you’re making a kale salad with whole leaves, not thinly sliced ones like this salad, you’ll probably want to give your leaves a quick massage.Massaging alternatives
The easiest way to massage and dress kale is to pop everything into a giant container with a lid. Drizzle on the dressing, put the lid on and shake shake shake. The shaking will massage and dress the kale at the same time and you don’t have to use your hands to massage. Bonus, you can just leave the salad in the container and pop it in your fridge, if you’re making kale salad for meal prep. These containers fit this recipe perfectly. I saw Mike dressing salad like this one day and ever since, it’s been a no-brainer, my all time fave way to dress salads!Kale salad add ins
This salad is immensely customizable, try adding:- nuts and seeds - toasted pecans, slivered almonds, walnuts, pistachios, hazelnuts, toasted sesame seeds, poppy seeds
- fruit - apples, pears, peaches, oranges, strawberries, cherries, raspberries, blueberries, dried cranberries, dried blueberries, golden raisins
- protein - eggs, sliced steak, sliced pork, chicken, tofu other vegetables - diced onions, sliced radishes, shredded carrots, diced broccoli, tomatoes, avocado
- grains - quinoa, wild rice, farro, barley, chickpeas
What to serve with kale salad
I often just eat kale salad as a whole meal, but if you’re looking for mains, try these:- Ultra luxe osso buco
- Steak and kale is the new steak and fries!
- Kale is the perfect side for this lemon-y cream pasta
And if you prefer your kale cooked, try this recipes:
- Spicy bean and barley kale stew
- Burrata and kale
- Crispy kale chips
- Pork belly and kale noodles
- Kale and ricotta stuffed shells
- Dijon mushroom chicken and kale
The Best Kale Salad
Kale-ing it!
- 2 cloves garlic (crushed)
- 1/2 cup Parmigiano Reggiano cheese (finely grated, plus extra for topping)
- 1/3 cup olive oil (extra virgin preferred)
- 2 tbsp lemon juice (about 1 medium lemon)
- 1/2 tsp salt
- 1/2 tsp freshly ground pepper
- lemon zest (from the lemon before you juice it)
- 2 bunches kale (lacinato kale preferred, about 8 cups finely chopped)
Combine all the ingredients except the kale and let sit while you prepare the kale.
Prepare the kale: Give the leaves a good wash and shake off any excess water, then slice the stems away with a knife or rip the leaves off by running your fingers along the ribs. Finally, cut into 1/4" thin strips.
Pop the kale strips and the dressing into a plastic box with a lid and shake well.
Top with extra Parmigiano-Reggiano and enjoy!
I Am... Why you shouldn’t refrigerate your tomatoes
A sun-ripe, juicy tomato is one of nature’s jewels. They’re literally bursting: sweet, tart, and umami flavors flood your taste buds when you bite into them. For maximum flavor, you should never refrigerate your tomatoes. Tomato Alert! Tomatoes are in season right now!
Why you shouldn’t keep your tomatoes in the fridge
Putting whole tomatoes in the fridge changes both their taste and texture. The tomatoes become mealy and mushy, which is not what you want in a tomato. Chilling tomatoes also leads to decreased tomato flavors. When tomatoes are cold, it’s more difficult to smell them, which is a huge part of taste. Also, cold tomatoes have cold molecules, which means that our tongues don’t perceive them as intensely as when they are warm or room temperature. Imagine little tomato flavor molecules: when they’re cold, they don’t move as much and when they’re happy and warm, they zip around flooding your mouth with flavor.Science says don't refrigerate tomatoes
Can anyone be sure of anything? But just in case, we did a double blind taste test: we took two tomatoes from the same vine and left one out and one in the fridge for 4 days. Then Mike cut them up and promptly forgot which tomato was what, but luckily we wrote it down: A: Stored in the fridge, then left out to warm up to room temp before serving B: Stored at room temp, served at room temp C: Stored at room temp, then cooled in the fridge for 4 hours before serving D: Stored in the fridge, served cold. We tried them and both of us agreed the results were, from best to worst: B-C-A-D. The room temp tomato had a far sweeter taste and more solid texture, while the fridge tomato had a very watery taste and a mealy texture.The best way to store tomatoes
Keep fresh, whole tomatoes out on the countertop, unrefrigerated. You can either put them in a bowl, on a plate, or keep them loose. Keep them out of direct sunlight and don’t leave them in a bag.The one (or two) times you should refrigerate tomatoes
Cut tomatoes should always, always go in the fridge. To reactivate the flavor of cut tomatoes, simply take them out of the fridge a little bit before you’re going to eat them and let them come up to room temp so they aren’t fridge cold. If your home is hot hot, the fridge will be the best place to keep them once they start on the edge of being over ripe. Just remember to take them out and let them come to room temp before enjoying. Pro tip: if you’re going to slice or cut them, do it while they’re still cold from the fridge, then let them rest.Fun tomato recipes
Now you know all about how to store the best tomatoes, so you can go forth and cook them:- Classic Chinese Tomato Egg Stir Fry
- The Ultimate Umami Bomb Tomato Sauce
- Moroccan Lamb Meatballs in Tomato Sauce
- Easy Roast Chicken with Eggplant and Tomatoes
- The Best Way to Eat Tomatoes This Summer: BLT Burrata, Lettuce, and Tomato Sandwich
I Am... Instant Pot Rice
Confession: We gave away our fancy zojirushi rice cooker ages ago. Shocking, I know, but we almost always make rice on the stove, in a pot. That is, unless we’re making rice in an Instant Pot because Instant pot rice is a good thing. It’s no surprise that we love our Instant Pot as a pressure cooker, but did you know that the Instant Pot’s can also cook rice perfectly? It makes rice super quickly and it’s fluffy and cooked right every time. So if you want a set it and forget it kind of rice, Instant Pot rice is for you. Plus if you’re in a hurry, it’s done in about 15 minutes compared to 30 minutes for stovetop or rice cooker.
What is the water to rice ratio for cooking rice in an Instant Pot?
1 cup of white rice: 1 cup of water. That’s it, it’s just a one to one ratio of rice to water. This means that you can use any sort of measuring tool you want, just make sure the water and rice volume is equal.How to cook rice in an Instant Pot
- Rinse your rice. This is an optional step and depends on what you want from your rice. If you want the grains to be more separate with less starch (that is, stickiness) on each grain, rinse your rice a couple of times and drain very, very well. You want the rice to be practically dry so use a sieve.
- Cook on high pressure. Pop the rice with an equal amount of water into the insert of your Instant Pot. Set your pot to High Pressure for 3 minutes.
- Natural release. When the Instant Pot is done, let it naturally release for 10 minutes.
- Fluff and serve. When the 10 minutes are up, vent the Instant Pot, the open it up, fluff up the rice and enjoy!
Do I need to rinse rice before cooking it?
To be honest, this is a down to personal opinion. For us, we don’t always rinse rice because the starch of rice is what makes it cling together when you use chopsticks to scoop up a bite. Our rice is never gummy which seems to be the reason why people champion rinsing rice. Rinsing rice is kind of a leftover thing from when rice production wasn’t as regulated as it is now and people used to have to make sure nothing untoward was left in the rice they bought. Plus, Asian moms like to use the rice rinsing method as make work for their kids. If you’re rinsing rice for a good 15 minutes then you’re not getting into any trouble, is what they think. If you want to rinse your rice, go for it! But if you don’t want to, you don’t have to. If you find that your rice is too gummy or clumps together as it cooks, you’re probably going to want to rinse your rice. On a side note, if you are concerned about arsenic in rice, washing it doesn't really do all that much. In fact, the FDA concluded that washing your rice had a minimal affect on arsenic levels but reduced beneficial iron, folate, thiamine and niacin.What about brown rice?
Click here for Instant Pot brown rice instructions.What to eat with fluffy white rice
- Mapo tofu
- Oven baked sweet and sour chicken
- Oven baked sweet and sour pork
- Salted egg yolk fried chicken
- Chinese tomato egg stir fry
- Thai basil chicken
- Taiwanese fried chicken
- Vegan popcorn chicken
- Korean fried chicken
- Air fryer char siu
- Japanese soboro donburi
- Chinese BBQ pork char siu
- Garlicky mushrooms
- Coconut curry chickpea stew
- Creamy dijon mustard chicken
- Sundubu jjigae
- Gochujang honey roast chicken
Instant Pot Rice
Perfect rice in the Instant Pot every time!
- instant pot
- 1 cup white rice (see notes)
- 1 cup water
Add the rice and water to the insert of the Instant Pot.
Make sure the pressure valve is in the sealed position. Set the Instant Pot to pressure cook high for 3 minutes. When the pot is done, let it natural release for 10 minutes. Vent the pot (turn the venting knob to depressurize by releasing the pressure). Open the lid immediately, fluff and enjoy!
I Am... Hatch Chile Season is Here!
Hatch chile season is one of the most magical seasons of all. The little green chile that could comes from New Mexico and is the backbone of so many wonderful New Mexican and Southwestern dishes. Hatch season starts at the end of summer and goes into the beginning of fall and if you’ve ever visited the Southwest, you’ve definitely seen the well deserved love for Hatch green chile. It’s a strangely famous pepper considering how small the growing season and region is. They’re actually just like the grapes of the Champagne region in France – if the grapes aren’t grown in Champagne, what you make from them isn’t really champagne, it’s just sparkling wine. Similarly, you can grow Hatch chiles elsewhere but if they’re not grown in the Hatch Valley of New Mexico, they’re not real Hatch chiles and they won’t taste quite the same.
What is a Hatch chile?
Hatch chiles are a green chile pepper grown in the Hatch Valley of New Mexico. They’re sweet, smoky, long green peppers that taste amazing fresh and even more delicious when roasted. Hatch chiles come in both red and green. The red Hatch chiles are chiles that have been left to ripen longer than the younger green chiles. They come in mild, medium, spicy, and x-hot varieties.Where is Hatch chile from?
Hatch chiles are grown in the Hatch Valley of New Mexico. If it isn’t grown in Hatch, it isn’t a Hatch chile. There are actually several varieties of green chiles grown in Hatch: Big Jim, Sandia, Barker Extra Hot, and more!Why is Hatch chile special?
The limited season of Hatch chiles plus their incredible flavor has turned the humble Hatch into one of the most hyped peppers in the world. The thing is, they live up to the hype! There’s just something about Hatch chiles. They’re magic – once you taste one, especially if you have a chance to taste one in New Mexico, you’ll know what the fuss is about.What does a Hatch chile taste like?
They’re earthy, crisp, spicy, and have a bit of onion when eaten raw. When they’re roasted, they’re smoky, rich, and slightly buttery. Green chiles tend to be spicy and smoky and the red ones are more mature and earthy. They have the ideal balance between heat and sweet. When they’re roasted they’re smoky, delicious heaven.Are Hatch chiles spicy?
Hatch chiles come in mild, medium, hot, and xtra hot. They go from milder than a jalapeño to pretty darn spicy. There’s a Hatch chile out there for everyone, from people who don’t like spice to crazy spice heads.Are there red Hatch chiles?
Yes, there are! Most of the time, people refer to them as Hatch green chiles, but they come in red as well. Usually they’re harvested green but sometimes you’ll see red ones at the store as well. Red hatch chiles are chiles are harvested later than green chiles and tend to be more mature with a very minutely sweet profile with more earthiness.When is Hatch chile season?
Hatch chile season is pretty short and you’ll see lots of grocery stores saying, “Hatch season is here, it’s now or next year!” Typically they harvest in August and September. When Hatch chile season comes around, it’s time to celebrate! All the grocery stores get their roasters out and roast chiles out front and the smell of roasted chiles is incredibly enticing.Where to buy Hatch chile
They sell and ship fresh chiles online! There are also whole dried hatch chiles, jarred, or canned that are available at most grocery stores or online. They even have canned Hatch chiles at Trader Joe’s. Sometimes they even sell them fresh for a really short window at Whole Foods or other speciality food stores. If you’re lucky enough to live in Southern California, Colorado, or Texas, you’ll probably easily find them in your local grocery store. In New Mexico, they’re pretty much everywhere. We love Bristol Farms and each year we're on the lookout for the roasting day, when they flame roast the chiles for you in front of the store. You can buy them in Mild, Hot, or Extra Hot in crates or bags. You can also get Hatch chile powder in both red and green.How to roast Hatch chile at home
Roasting hatch chiles really brings out their smoky flavors. It also has the bonus of making the skins easy to remove. To roast, be sure to wash and throughly dry your chiles. From there you can roast your chiles in the oven, on the grill, on the stove, or in an air fryer. You want them to char and blister, but not burn and completely blacken because that makes the skins difficult to remove. Go for a 60-70% char.How to roast Hatch chile in the oven
Heat the oven broil. Lightly coat the chiles with a neutral oil and place the chiles in an oven safe dish. Place the dish as close as you can to the broil element at the top of the stove. Roast the peppers for 5-8 minutes, keeping an eye on the chiles. Flip the peppers as they start to blister and then continue to roast for another 5 minutes or so. As soon as the peppers are evenly roasted and the skin starts to blister and pull away from the flesh, take them out of the oven.How to roast Hatch chile on the grill
Heat the grill until very hot. Place the chiles directly on the grill above the heat source, using long handled tongs to flip and turn the chiles over direct heat until evenly blistered and slightly blackened.How to roast green chile on the stove
Place the Hatch chiles in a cast iron pan and heat over high heat, flipping the peppers occasionally to expose all sides to the heat. When the skin blisters evenly and starts to pull away from the flesh, take the chiles out of the pan. Alternatively, you can roast them directly on the element of your gas stove using long handled tongs to flip and turn until evenly charred.How to roast Hatch chiles in an air fryer
Lightly coat the chiles with a neutral oil and place them in the air fryer basket. Air fry at 450°F flipping once, for 13-15 minutes, or until evenly charred and lightly blackened.How to peel Hatch chiles
Once your chiles blister, remove them from the heat and place them in a bowl to cool. Cover the bowl with a plate so the skins gently steam as they’re cooling down. When the Hatch chiles are cool to the touch, put on a pair of disposable food safe gloves and gently pinch the skin and slide off. The skin should easily slide right off the entire chile. Discard the skin and if desired, trim off the tops and de-seed the chiles.How to freeze green chile
After you roast your Hatch chiles, you can freeze them whole. You can either freeze them peeled or unpeeled. To freeze: place the Hatch chiles in a single layer in a freezer bag. Squeeze out all of the air and seal the bag. If you freeze with the skins on, they easily peel off after defrosting. You can keep the frozen chiles in the freezer for up to a year. Defrost in the fridge overnight as needed.What if I can’t find Hatch chile?
If you can’t find fresh Hatch chiles you can always use any other green chile. Hatch chiles have a subtly sweet spicy crisp smoky taste that you will be missing but you can substitue Hatch chiles with Anaheim peppers. You can also use canned/jarred Hatch chiles.How to use Hatch chiles
You can enjoy Hatch chiles raw or roasted. Once you have them roasted, you peel off the skin and chop up the chile. You can then add it to stews, chile relleno, enchiladas, salsas, sauces, dips, on tacos, as pizza toppings, on burgers, with eggs, or with noodles. They’re incredibly versatile and add smoke, flavor, and spice.Can you eat Hatch chile raw?
You can but most people love roasting them to really enhance the smoky unique flavor of Hatch. There aren’t a lot of recipes out there featuring raw Hatch chiles. Because Hatch season is so short, roasting them is a great way to preserve the chiles so you can enjoy them year round.Can you eat the skins of Hatch chile?
The skin is completely edible but it is on the thicker side so it’s usually peeled off. After roasting and cooling, the skins slide off easily with a gentle tug.Hatch chile recipes
- Slow Cooked Hatch Chile Verde Stew – A warm and comforting hearty stew full of roasted Hatch chiles, tomatillos, chunks of tender pork, and onions and cilantro to brighten. Seriously so good with tortillas, stuffed in a burrito or enchiladas, or even on its own.
- Oven Baked Hot Hatch and Honey Chicken – This is a little riff on hot chicken, but New Mexico/Southwest style with hot Hatch chiles (get the “hot” variety). There’s a little bit of heat, a little bit of sweet, and a whole lot of deliciousness. Serve it up with some avocado for some extra over the top goodness.
- Easy 4 Ingredient Hatch Chile Salsa Verde – Chips and salsa here you come! You haven’t lived unless you’ve had Hatch chile salsa. It’s smoky, buttery, and so so delicious. This is a super versatile salsa – eat it with chips or use it as a topping for any sort of roasted or grilled meats.
- Green Chile Cheeseburger Fried Rice – Cheeseburger fried rice is one of the best things in the world, and green chile cheeseburgers are the best cheeseburgers, so: maybe the best fried rice in the world?
- Creamy Green Chile Mac and Cheese – Green chiles and cheese just go together like, well, mac and cheese. Smoky roasted Hatch chiles and creamy, dreamy stovetop mac are a match made in heaven.
- Double Green Chile Cheeseburger – You haven’t lived until you’ve had a green chile cheeseburger! They’re beloved in the Southwest and there’s even a green chile cheeseburger trail through New Mexico that’s sanctioned by the New Mexico tourism board.
- Green chile wontons – Green chile wontons are a thing in New Mexico, there are green chile wonton at all the Chinese food places. You can make them 2 ways: in wonton soup or deep fried with CHEESE. They’re addictive and so good.
How to roast green chile
The most celebrated green chile of all time
- 1 lb fresh green chile (preferably Hatch)
- neutral oil (as needed)
Heat the oven to 550°F/Broil/Broil High and set your rack 4-6 inches from the top element (usually this is the highest your rack can go). Lightly coat the chiles with a neutral oil and place the chiles in an oven safe dish or on a rimmed baking sheet.
Roast the peppers for 4-8 minutes. Every oven is different, so check back every two minutes. Flip the peppers as soon they start to blister and then continue to roast until the other side is blistered, another 4-8 minutes.
Remove the chiles from the oven and place them in a bowl or baking dish. Cover tightly and sweat the chiles for 10-15 minutes or until cool enough to touch.
When the Hatch chiles are cool to the touch, put on a pair of disposable food safe gloves and gently pinch the skin and slide off. The skin should easily slide right off the entire chile. Discard the skin and trim off the tops. De-seed the chiles if desired. Chiles will last about 3-5 days in the fridge, so use immediately or freeze according to the instructions in the notes below.
To freeze: place the Hatch chiles in a single layer in a freezer bag. Squeeze out all of the air and seal the bag. If you freeze with the skins on, they easily peel off after defrosting. You can keep the frozen chiles in the freezer for up to a year. Defrost in the fridge overnight as needed.
I Am... Teriyaki Chicken
Teriyaki chicken is the ultimate comfort food. Teriyaki chicken is one of my faves. This is a a teriyaki chicken bowl to take you to Tokyo. There’s something about that sweet and savory sauce on chicken that gets me every time. A really good bowl of teriyaki chicken reminds me of eating skewer after skewer of yakitori in the narrow back alleys of Tokyo.
What is teriyaki chicken?
Teriyaki is a cooking technique used in Japanese food – foods are brushed with a glaze of sake, marin, soy sauce, and sugar, then either grilled or broiled. Teriyaki means glazed and grilled - teri meaning shiny/glazed and yaki meaning grilled. In Japan, traditional teriyaki chicken isn’t as saucy as we know it in North America – it’s simply glazed chicken.How to make teriyaki chicken
- Cook the chicken. Lightly pat the chicken dry and cook in a dry pan over medium heat. Medium heat will slowly render out the chicken fat from the skin and confit the chicken, making it incredibly juicy and moist. When the skin is crispy and brown and the chicken is mostly cooked through, flip it over to cook the other side.
- Make the sauce. While the chicken is crisping up, make the sauce by combining sake, mirin, soy, and sugar in a small pot. Simmer to slightly reduce then whisk in a cornstarch slurry to thicken. Set aside.
- Serve. After the chicken is cooked, slice it up and make it rain teriyaki sauce. Enjoy with fluffy white rice, cucumbers, and toasted sesame seeds!
What is teriyaki sauce?
Teriyaki sauce is a simple Japanese sauce made from just 4 ingredients: sake, mirin, soy, and sugar. Traditionally it’s on the thinner side, but still thick enough to glaze. Classic teriyaki sauce thickens naturally because the sugars caramelize. Teriyaki sauce is incredibly easy to make at home and once you make it once, you’ll never get store bough teriyaki sauce again. You can use it with stir fries and for chicken teriyaki, of course.Teriyaki chicken ingredients
For teriyaki sauce you’ll need: soy sauce, sake, mirin, and sugar. Sake, mirin, and soy are three backbone ingredients of Japanese cooking.- Soy Sauce – I’m pretty sure you have a bottle of soy sauce in your pantry. It adds umami, a glorious brown sheen, and is delicious. If you can, try to use Japanese soy sauce for this dish. There are a ton of different soy sauces out there, but as a general rule, use the soy sauce from the country you’re cooking from, they all differ in salt content, flavor, and how their brewed. Kikkoman is an generations-old Japanese brand that is found in most grocery stores and it is naturally brewed.
- Sake – Sake is Japanese rice wine. It adds umami and a natural sweetness. Just like wine is used in French cooking to add an extra layer of aroma and flavor, sake is used in Japanese cooking – almost in every sauce. They sell cooking sake at Asian grocery stores, or if you’re feeling flush, you can use the nice sake you have for drinking. Buy a bottle and you won’t regret it, it’ll take your Japanese cooking to another level.
- Mirin – Mirin is Japanese sweet rice wine and the other ingredient that is key in Japanese cooking. Compared to sake, it has a lower alcohol content and higher sugar content that occurs naturally from fermentation. It’s used as a seasoning and glazing agent. They sell mirin in the Asian aisle and at Asian grocery stores.
What is mirin
Lots of people on the internet will tell you that the mirin you buy isn’t real mirin. What they’re referring to is two different types of mirin: hon mirin and mirin seasoning. Hon mirin is “real” mirin: brewed from sticky rice, koji, and sochu. You’ll find this kind of mirin imported and on the expensive side. The mirin you see at regular grocery stores is usually aji-mirin or kotteri mirin. It’s technically not mirin because it has a very low alcohol content and gets its sweetness from sugars instead of natural brewing. In the end, if you’re not making a high end dish, I think it doesn’t really matter. It’s kind of like how they tell you to cook with a decent wine, but not the best bottle. Aji-mirin is kind of like that decent wine. You can buy it online or in the Asian aisle of any grocery store.Thighs vs breasts
Traditionally, teriyaki chicken is made with boneless skin on chicken legs (both thigh and drumstick). The skin crisps up nicely and keeps everything juicy. For ease, we’re going to use boneless skin on thighs, which are really easy to find at the grocery store. You can also use chicken breasts, but they are a lot leaner and will most likely dry out before you get a good sear on the skin because they’re so thick. If you’re going to use breasts, I recommend cutting them up into bite sized pieces, cooking them just until they’re cooked through, then tossing them with the teriyaki sauce.Variations
Instant pot teriyaki chicken
You’re in luck! We have an instant pot teriyaki chicken recipe right here. It’s not the crispy kind of chicken teriyaki, it’s more saucy but it’s just as good and has loads of sweet and savory teriyaki sauce. Essentially, all you do is add the sauce ingredients and thighs to the pot, set the pressure on high for 7 minutes, quick release, make a quick cornstarch slurry, thicken the sauce, and you’re done! Click here for the recipe and more details.Grilled teriyaki chicken
To grill teriyaki chicken: grill the thighs, skin side down over medium heat until golden and crispy. Flip and cook on the other side. Remove from the grill. Make the sauce in a pan by adding the soy, mirin, sake, and sugar and bringing to a gentle simmer. Whisk 2 teaspoons cornstarch with 1 tablespoon water and whisk into the sauce. Bring to a simmer and let thicken slightly. Spoon onto the grilled chicken.Teriyaki chicken stir fry
For teriyaki chicken stir fry: cook 1-2 inch pieces of chicken in a frying pan over medium high heat until cooked through. Add the sauce ingredients and bring to a simmer. Stir in the cornstarch slurry and let the sauce thicken and enjoy.Baked teriyaki chicken
Bake the the chicken thighs in a oven safe baking sheet with the sauce ingredients, including the cornstarch slurry, at 375°F until cooked though, 30-40 minutes.Crock pot teriyaki chicken
Place chicken thighs in the crock pot along with the sauce ingredients, minus the cornstarch slurry. Cover and cook on high for 4-5 hours or on low for 8 hours. In the last hour of cooking, whisk up the cornstarch slurry and stir into the crock pot.One pot teriyaki chicken
You can cook the chicken and the sauce in one pan. Cook the thighs, in a dry pan, over medium heat until the skin is brown and crispy, about 15-20 minutes. Drain off any excess fat and then flip the chicken. Add the sauce ingredients and bring to a simmer. Stir in the cornstarch slurry and let the sauce thicken, then enjoy!Tips and Tricks
- Dry the chicken skin. Pat the skin dry with a paper towel so the skin has the best chance of browning and crisping up. Moisture is the enemy of crispy, so make sure to dry your chicken skin as much as possible.
- Start in a cold pan. Use a non-stick pan so the chicken doesn’t stick and releases easily. We’re not cooking at high heat here so a non-stick pan is perfect for this. Staring in a cold pan means that the fat will render out slowly and the skin will brown while the chicken cooks.
- Cook the sauce and the chicken seperately. If you cook the sauce and chicken separately, the chicken skin will stay nice and crisp and you’ll have a ton of sauce to spoon on afterwards. Be sure to let the chicken cool a bit before adding the sauce for maximum crispiness!
Teriyaki Chicken Recipe
You only need 6 ingredients to make the best teriyaki chicken of your life.
- 4 boneless, skin-on chicken thighs (see notes)
- 2 tbsp soy sauce (Japanese preferred)
- 2 tbsp mirin
- 2 tbsp sake
- 1 tbsp sugar
- 1 tsp cornstarch (optional, see notes)
Add the chicken, skin side down to a dry, non-stick pan. The chicken will render out enough fat that you don’t need to add any extra. Turn the heat on to medium and cook until the skin is brown and crispy, about 15-20 minutes, then flip.
Meanwhile, make the sauce: in a small sauce pan, add the soy, mirin, sake, and sugar and bring to a gentle simmer. Whisk the cornstarch with 1 tablespoon water and whisk into the sauce. Bring to a simmer and let thicken slightly. Set aside.
When the chicken skin is brown and crispy, flip and cook the other side for 5 minutes and check to make sure the chicken is cooked through. Rest on a cutting board for five minutes, then slice into strips and serve with teriyaki sauce with rice, cucumbers, green onions and toasted sesame seeds.
You probably won't be able to find boneless skin-on thighs. If you can't, bone-in skin-on are just as tasty (maybe even better!) - you'll just need to eat with a knife and fork instead of chopsticks.
You don’t need to add cornstarch to your teriyaki sauce – it does however, speed up the reduction time and gives you a thick, glossy sauce.


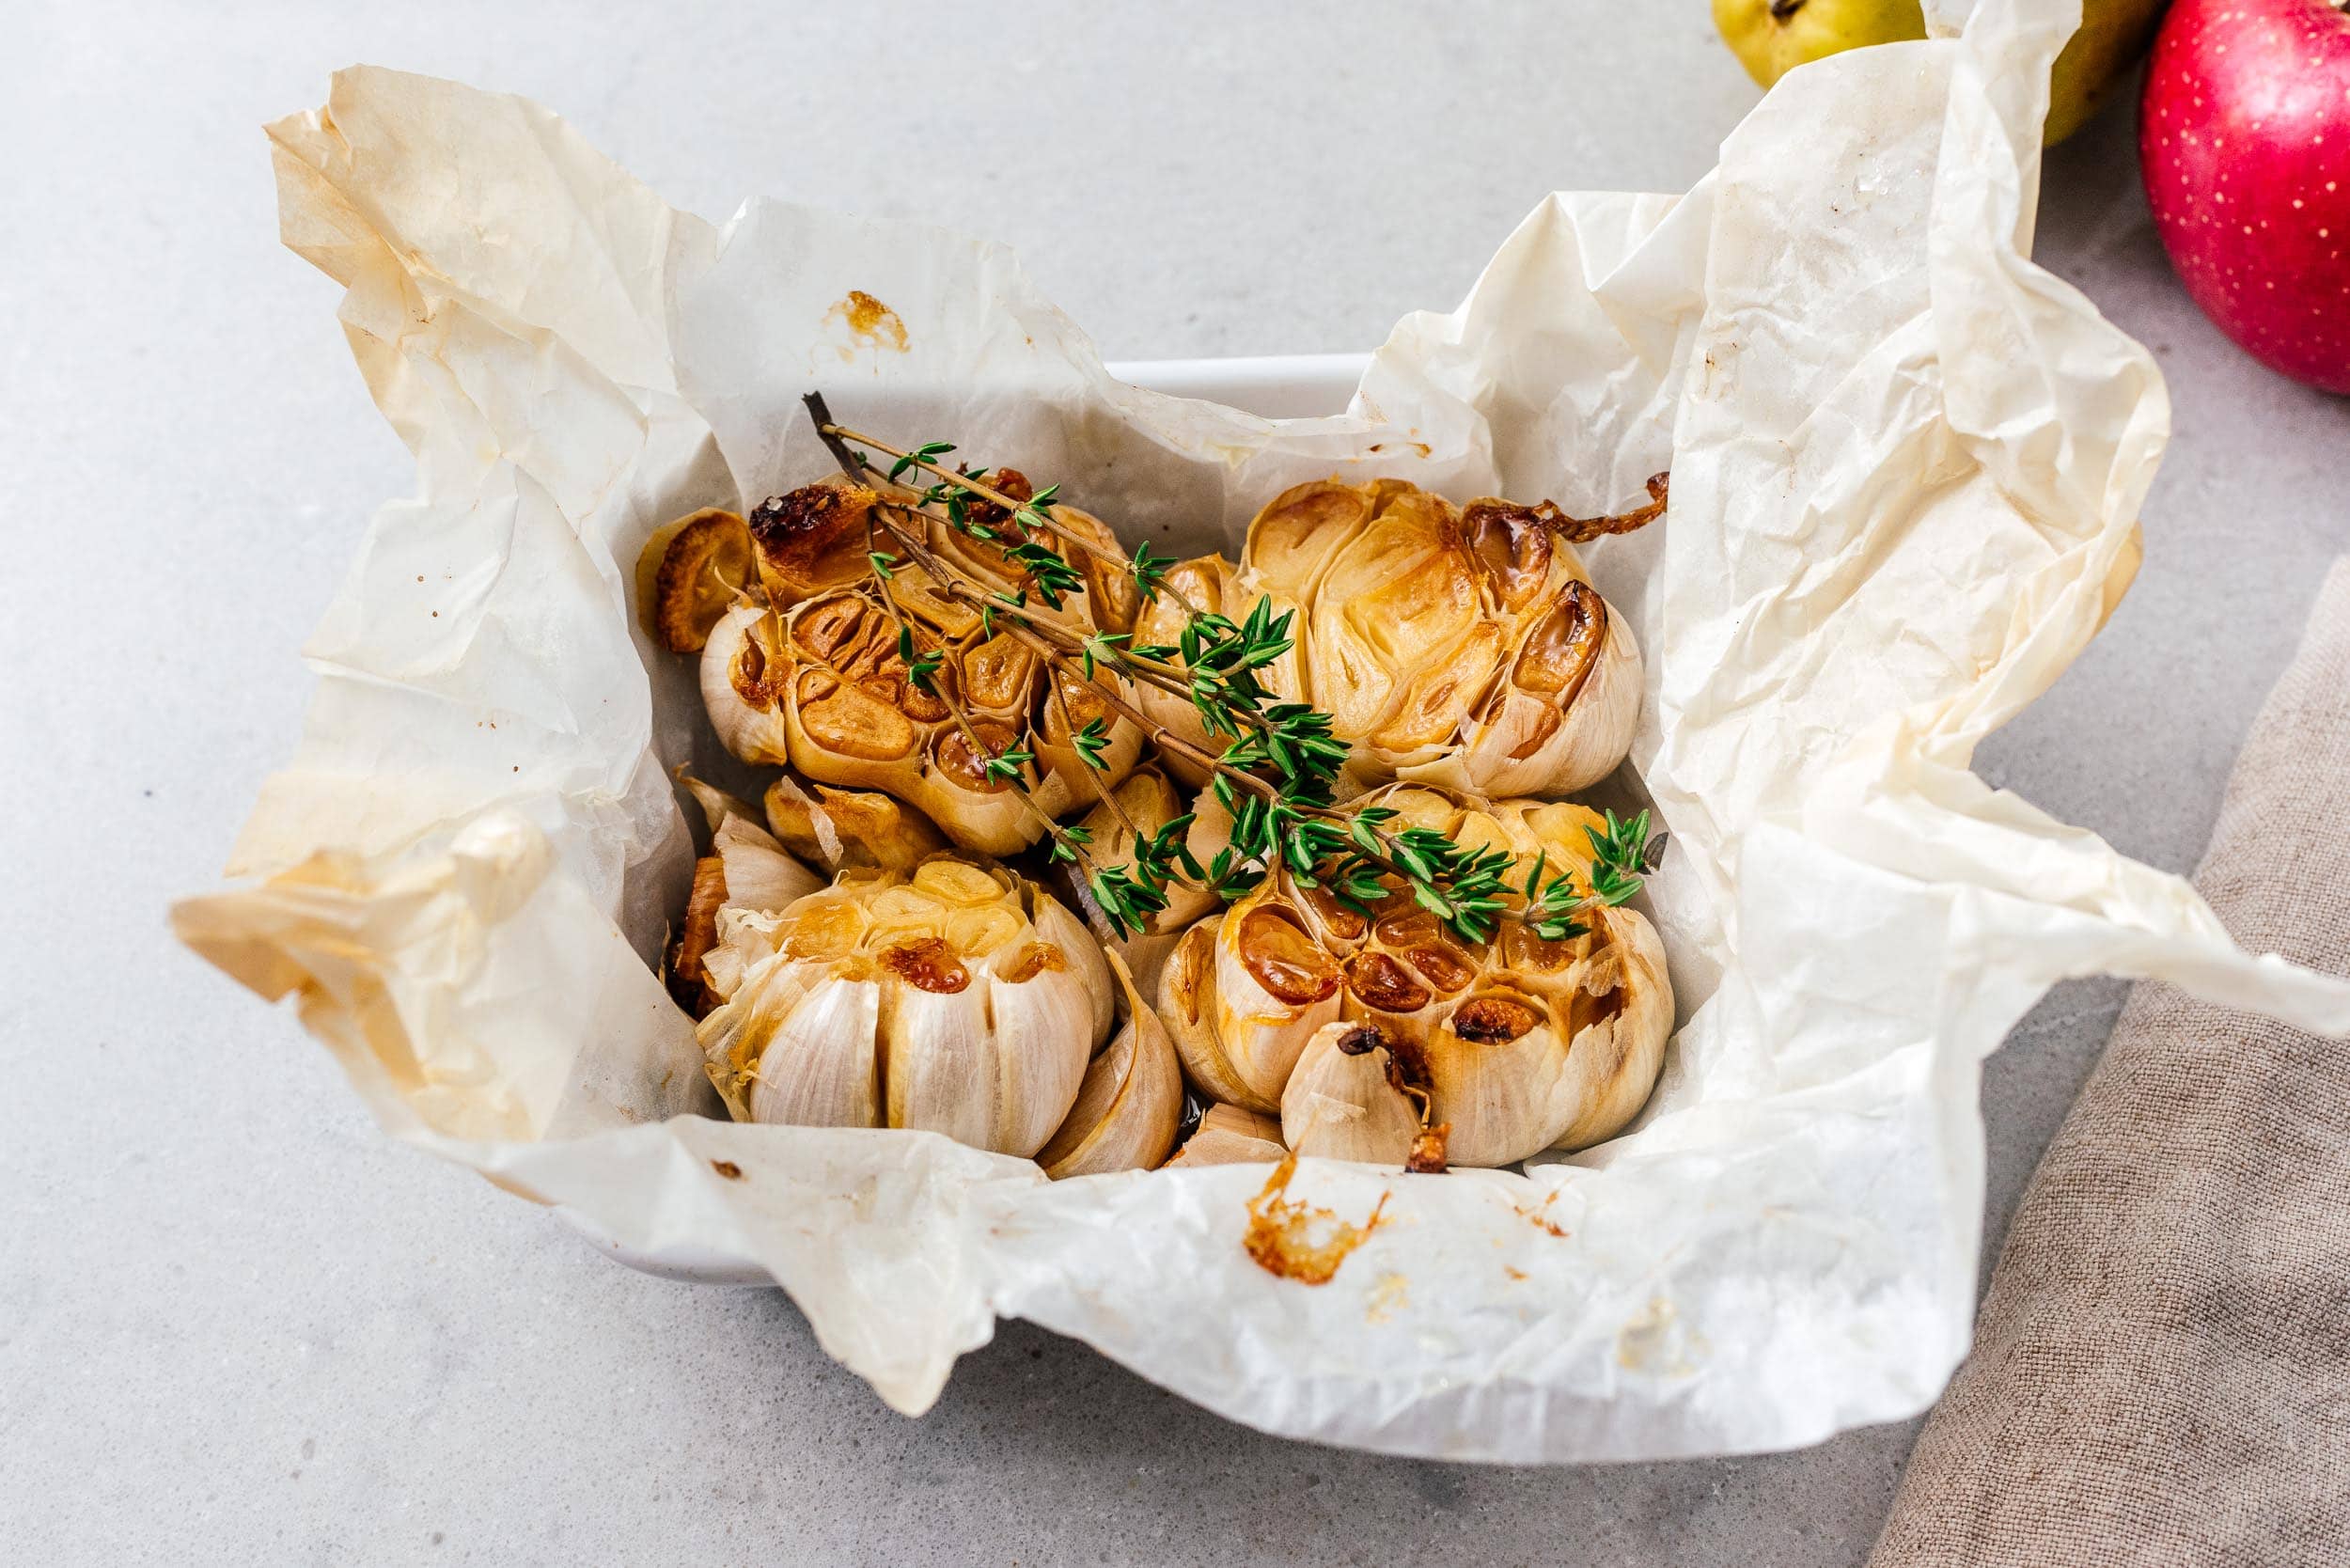
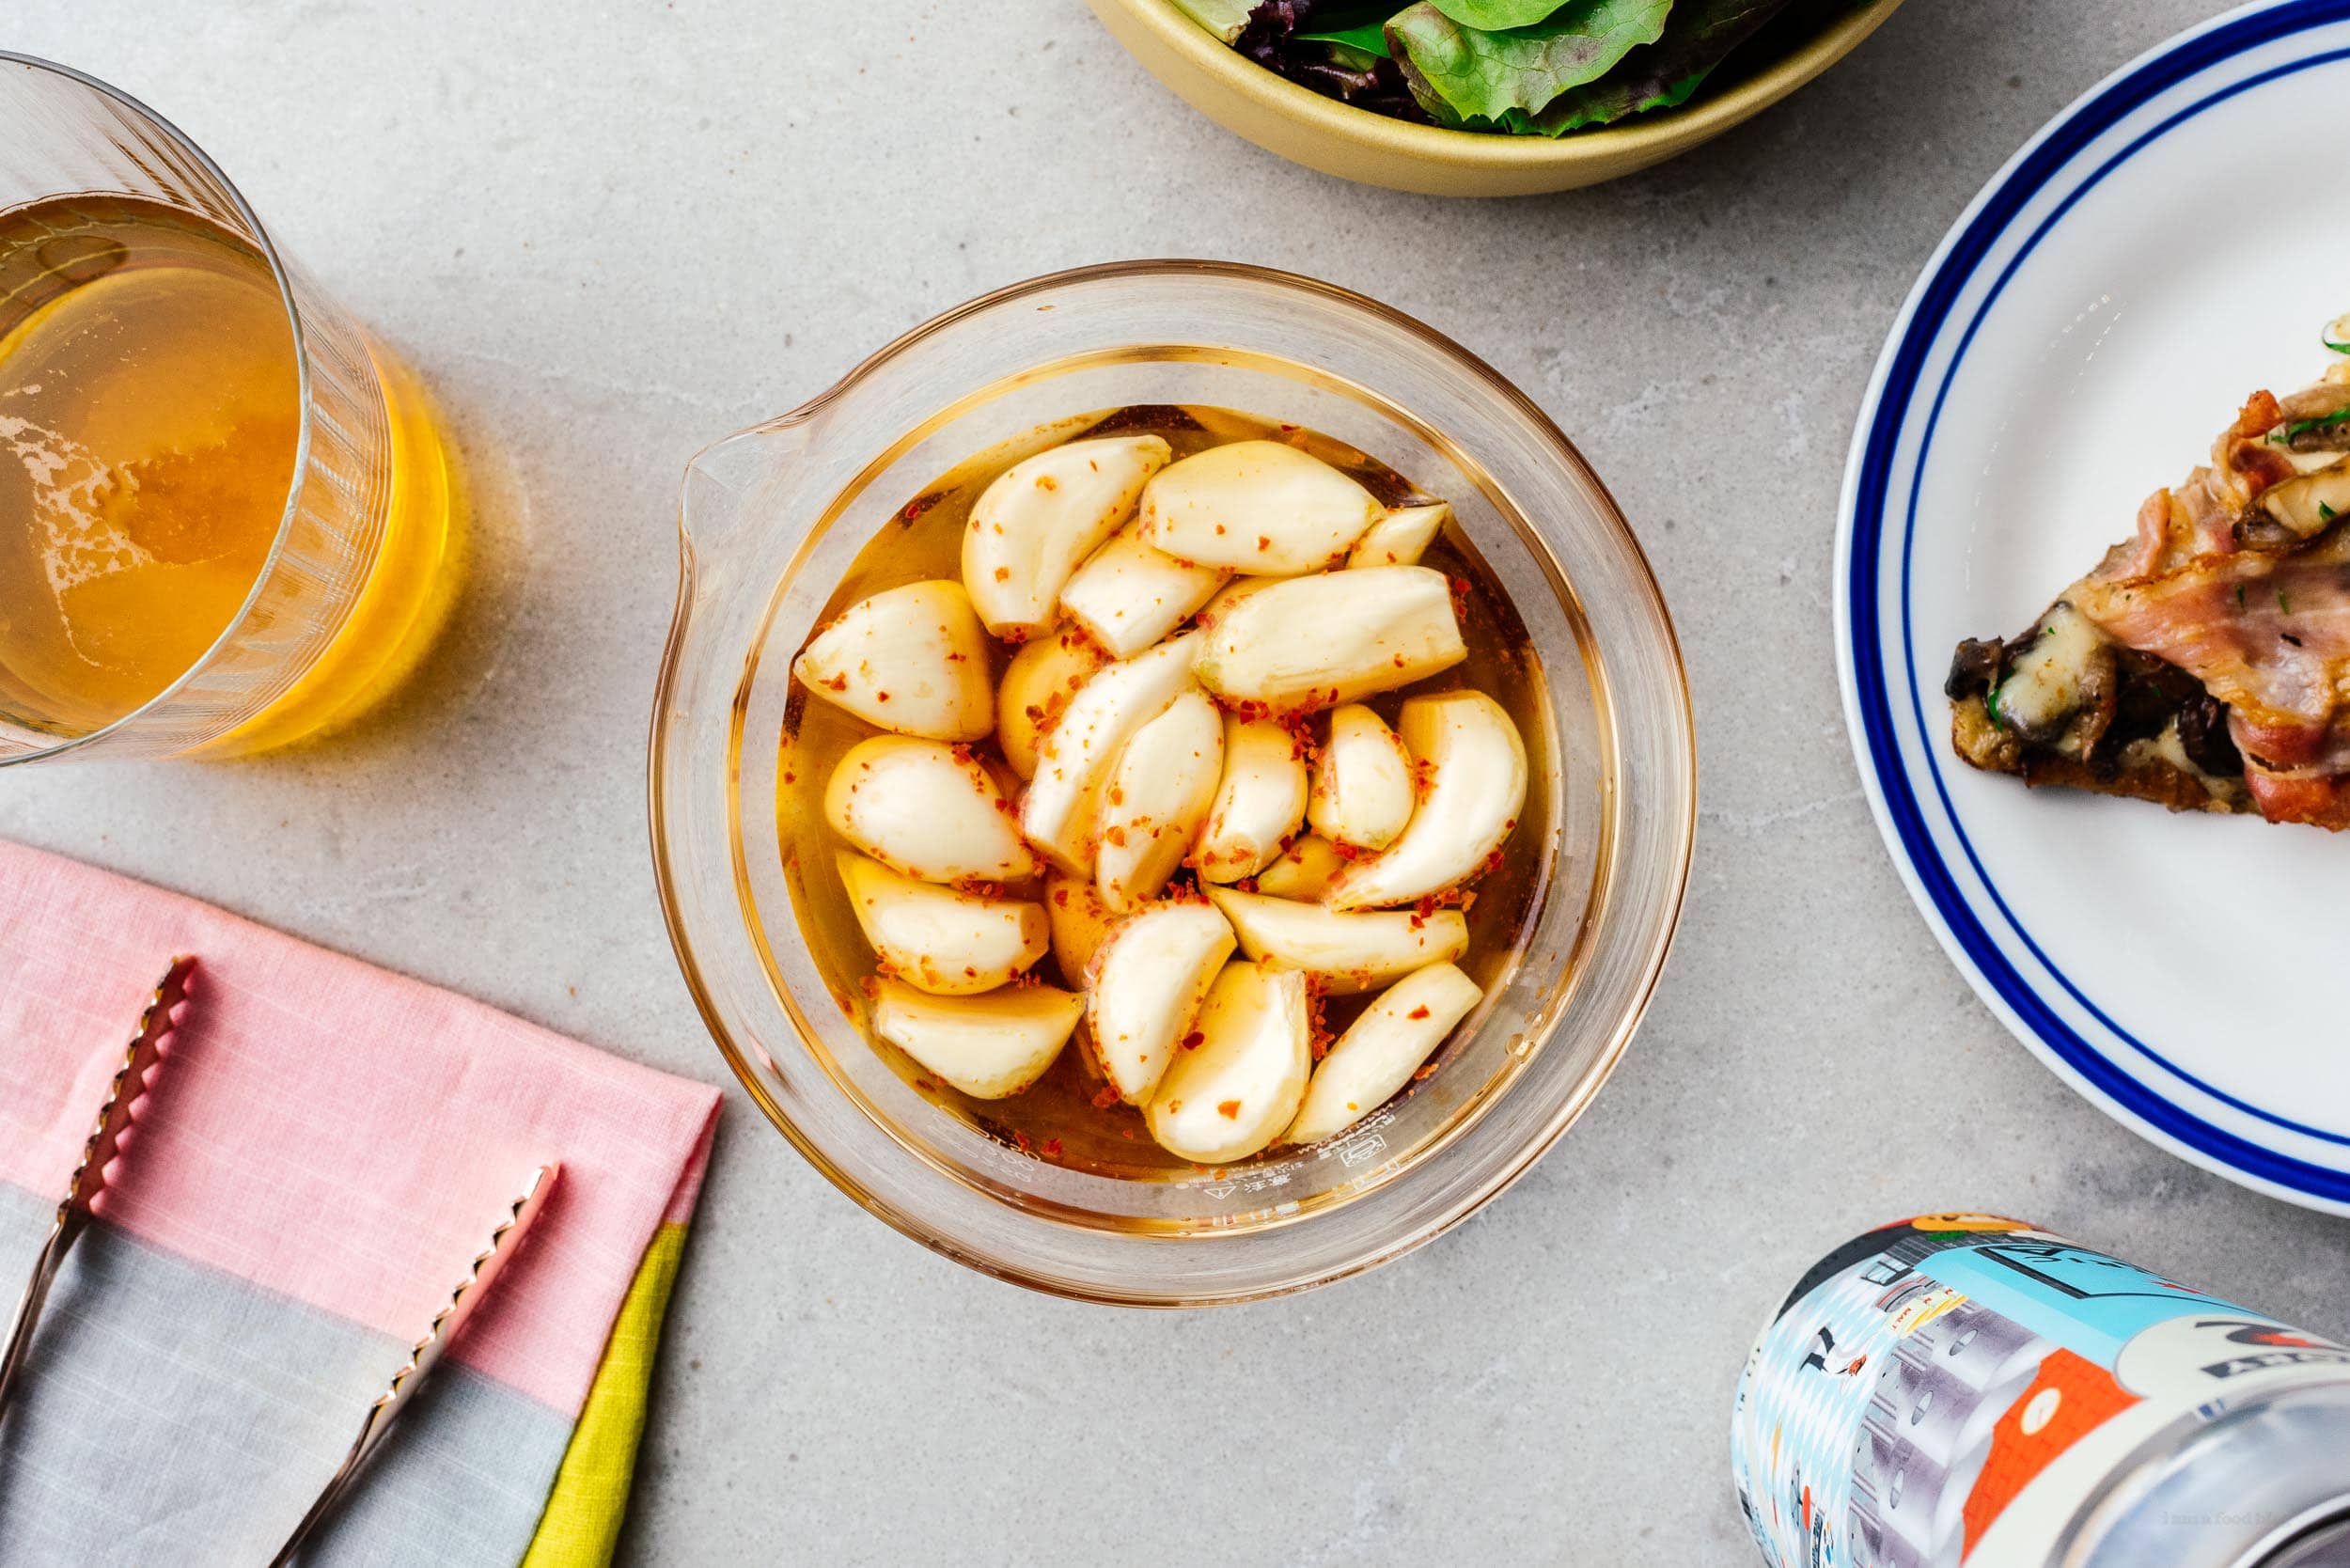
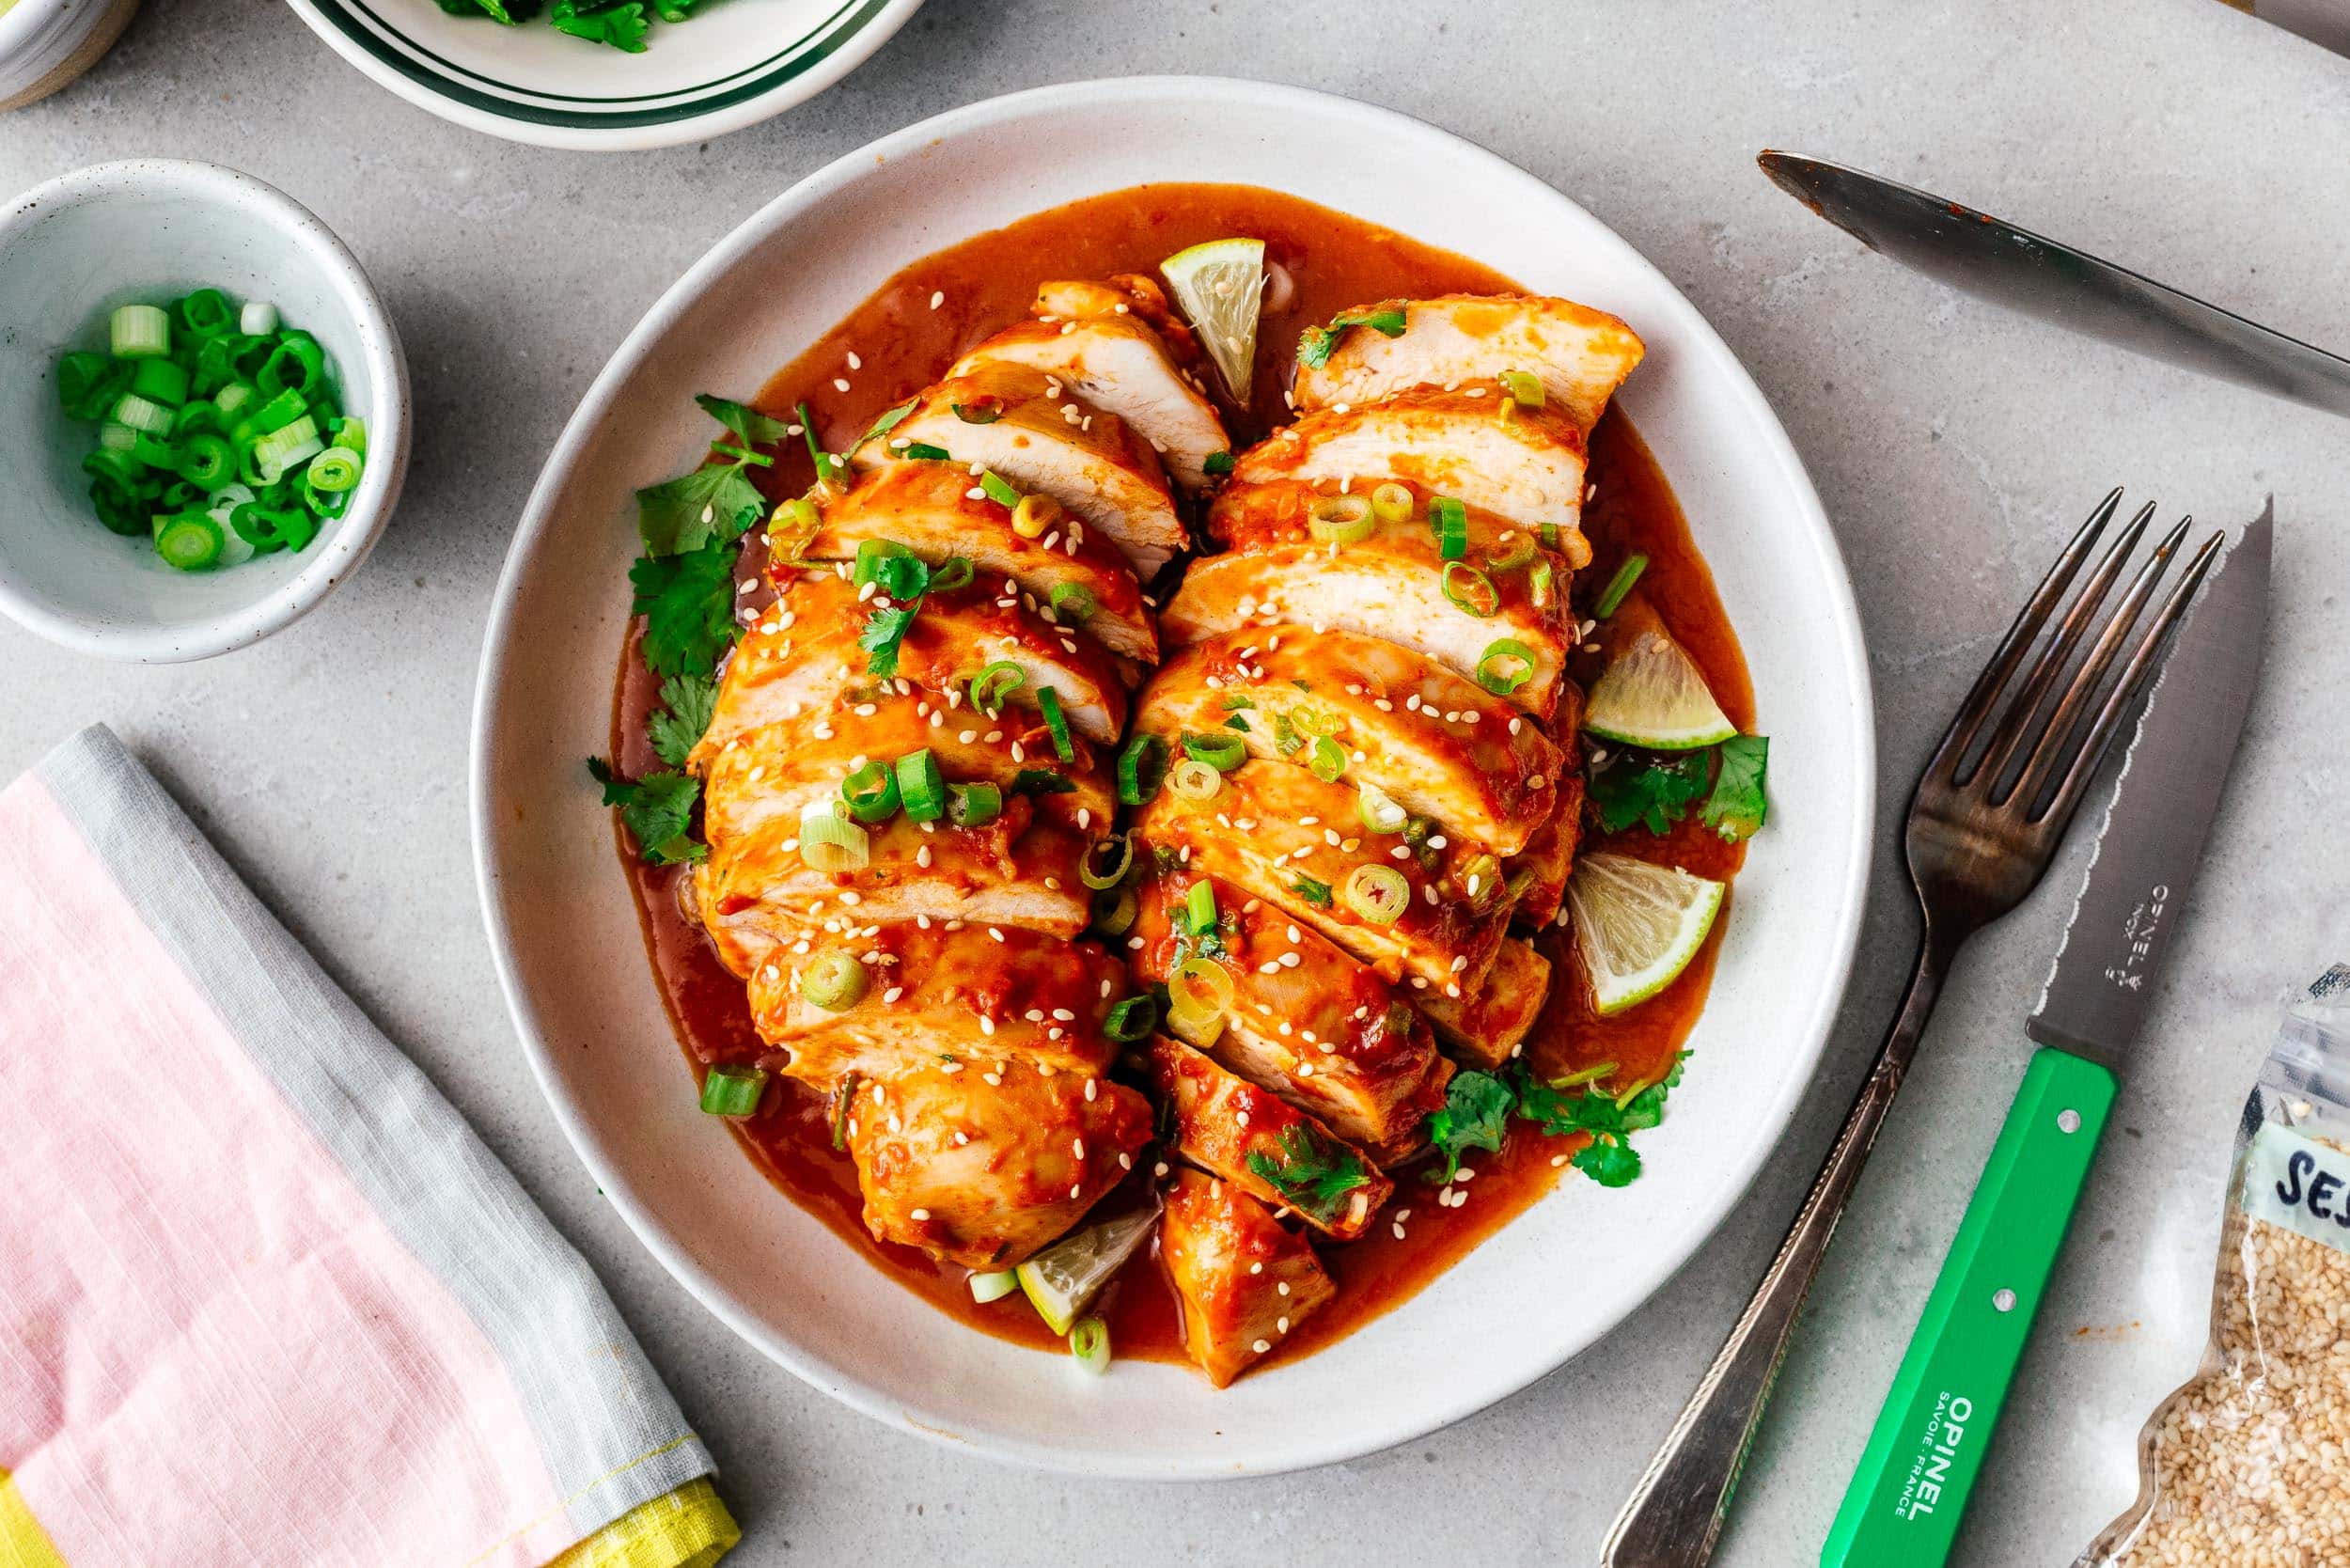
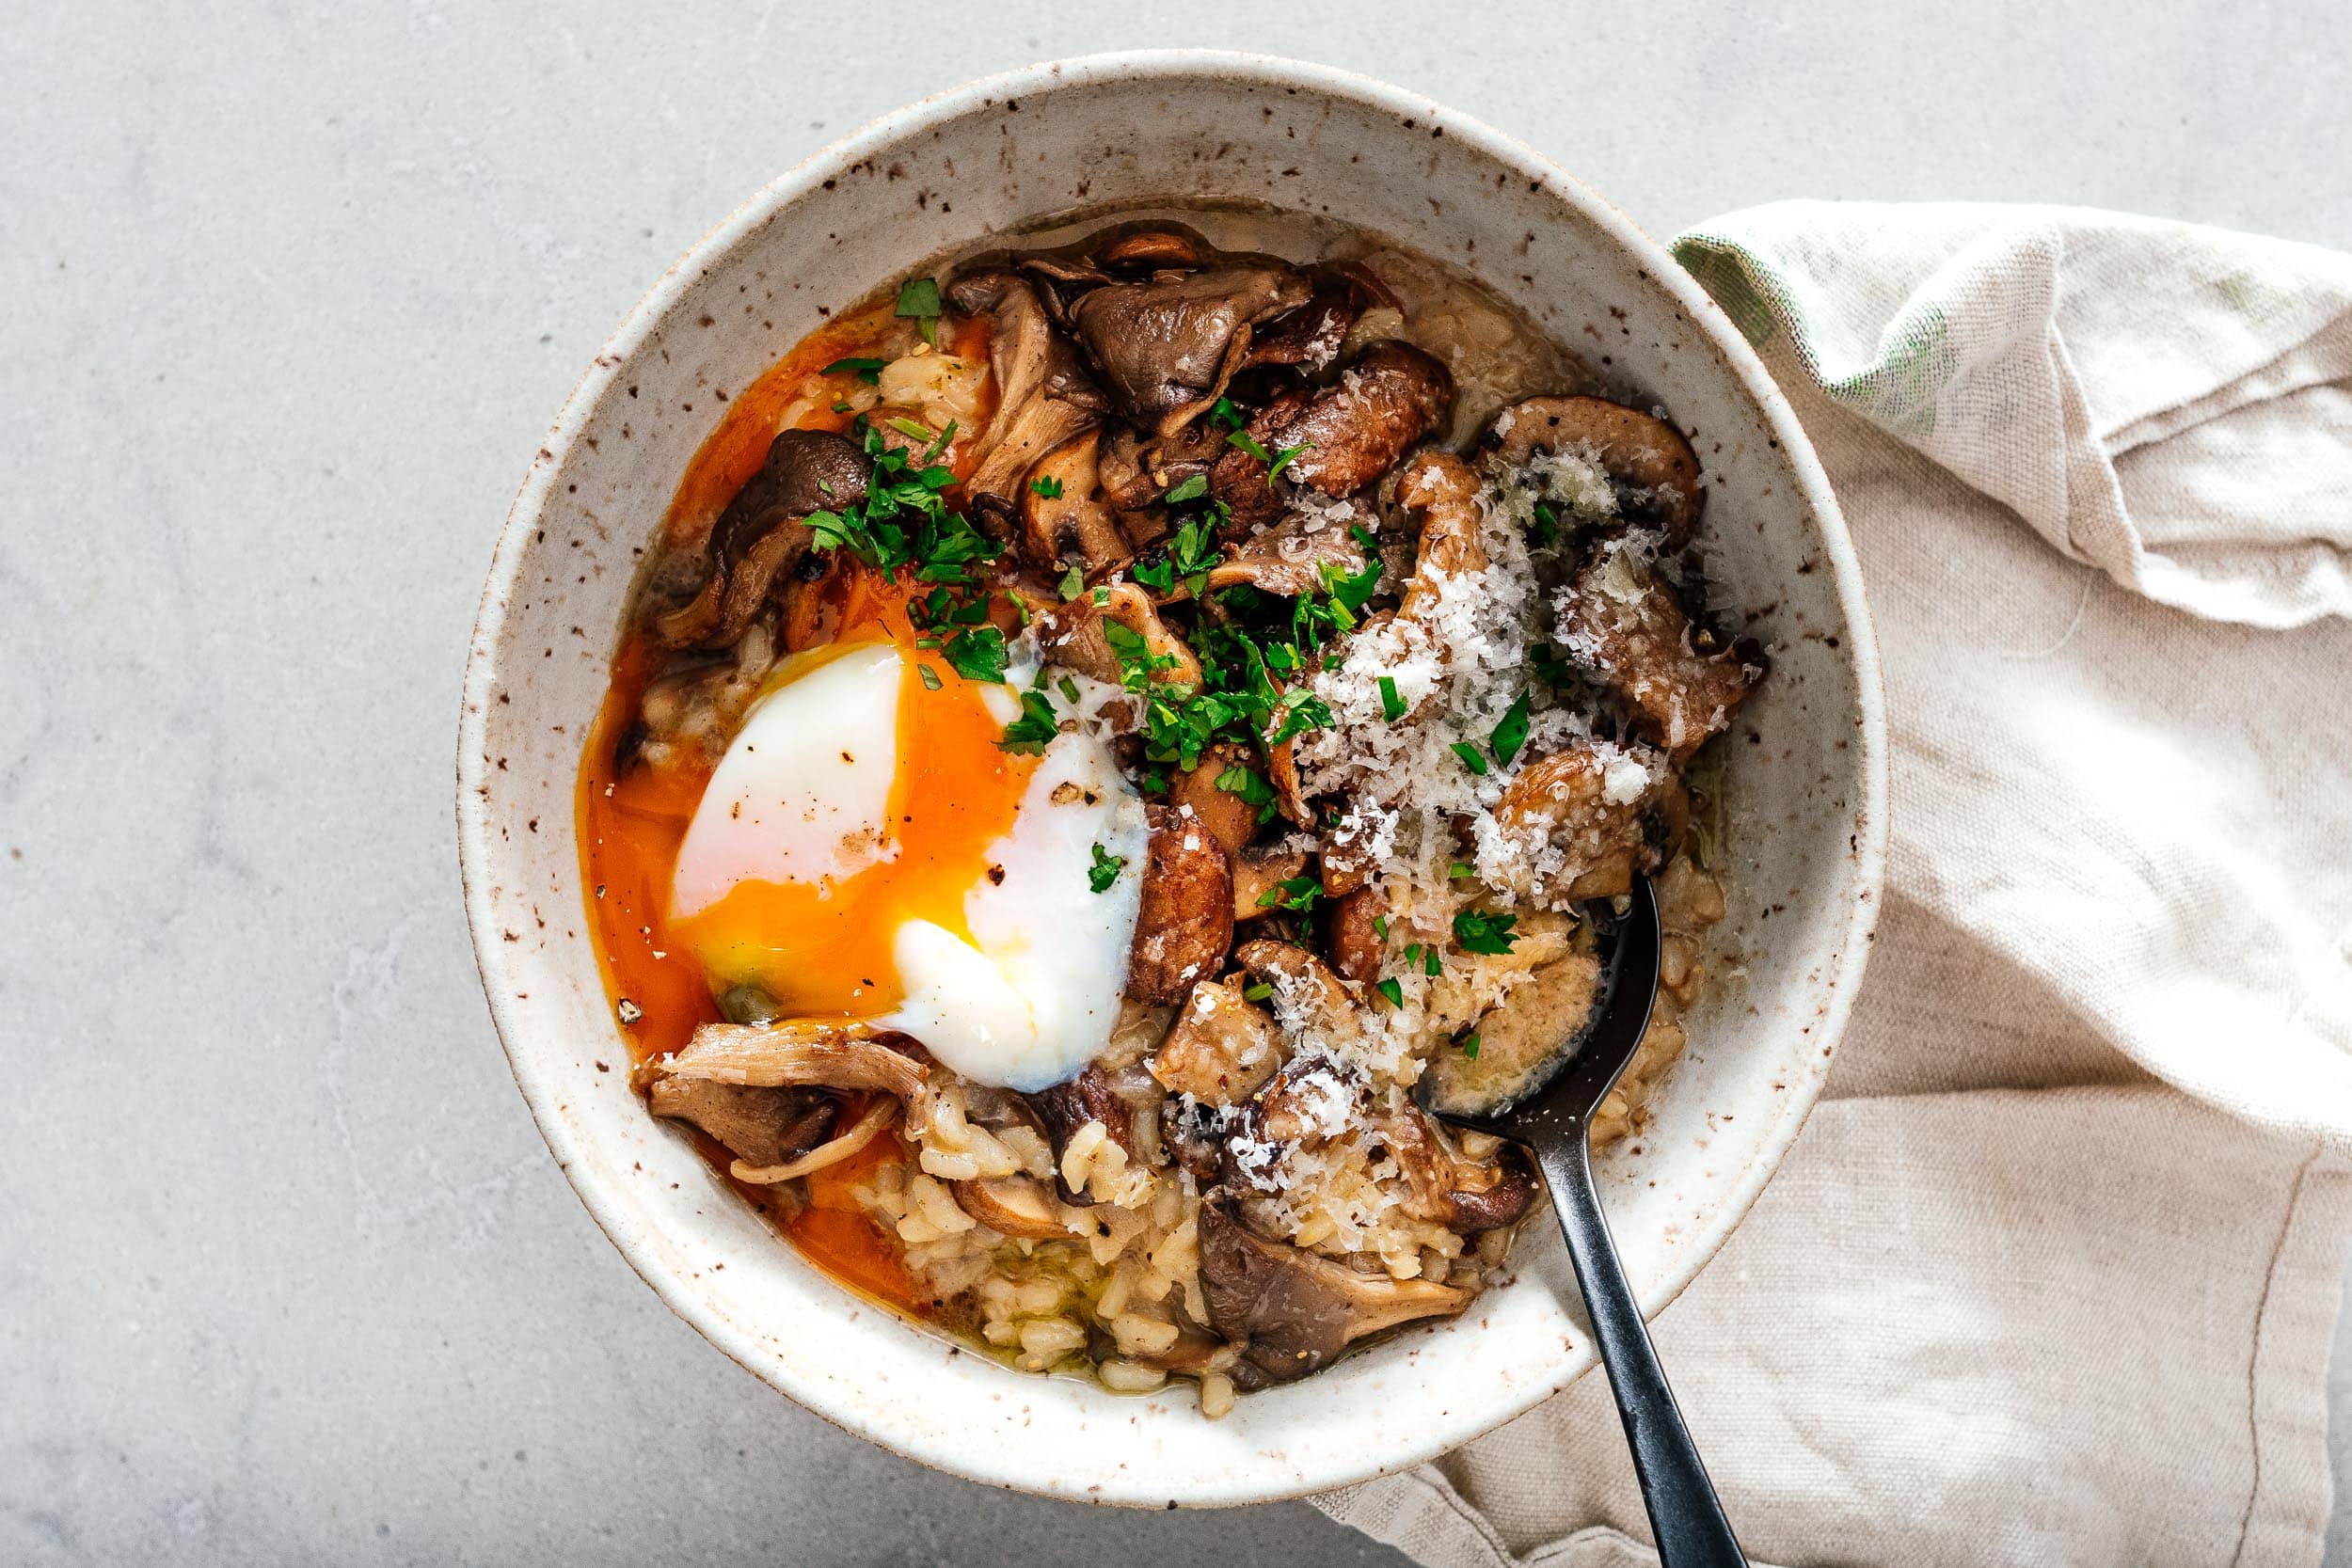
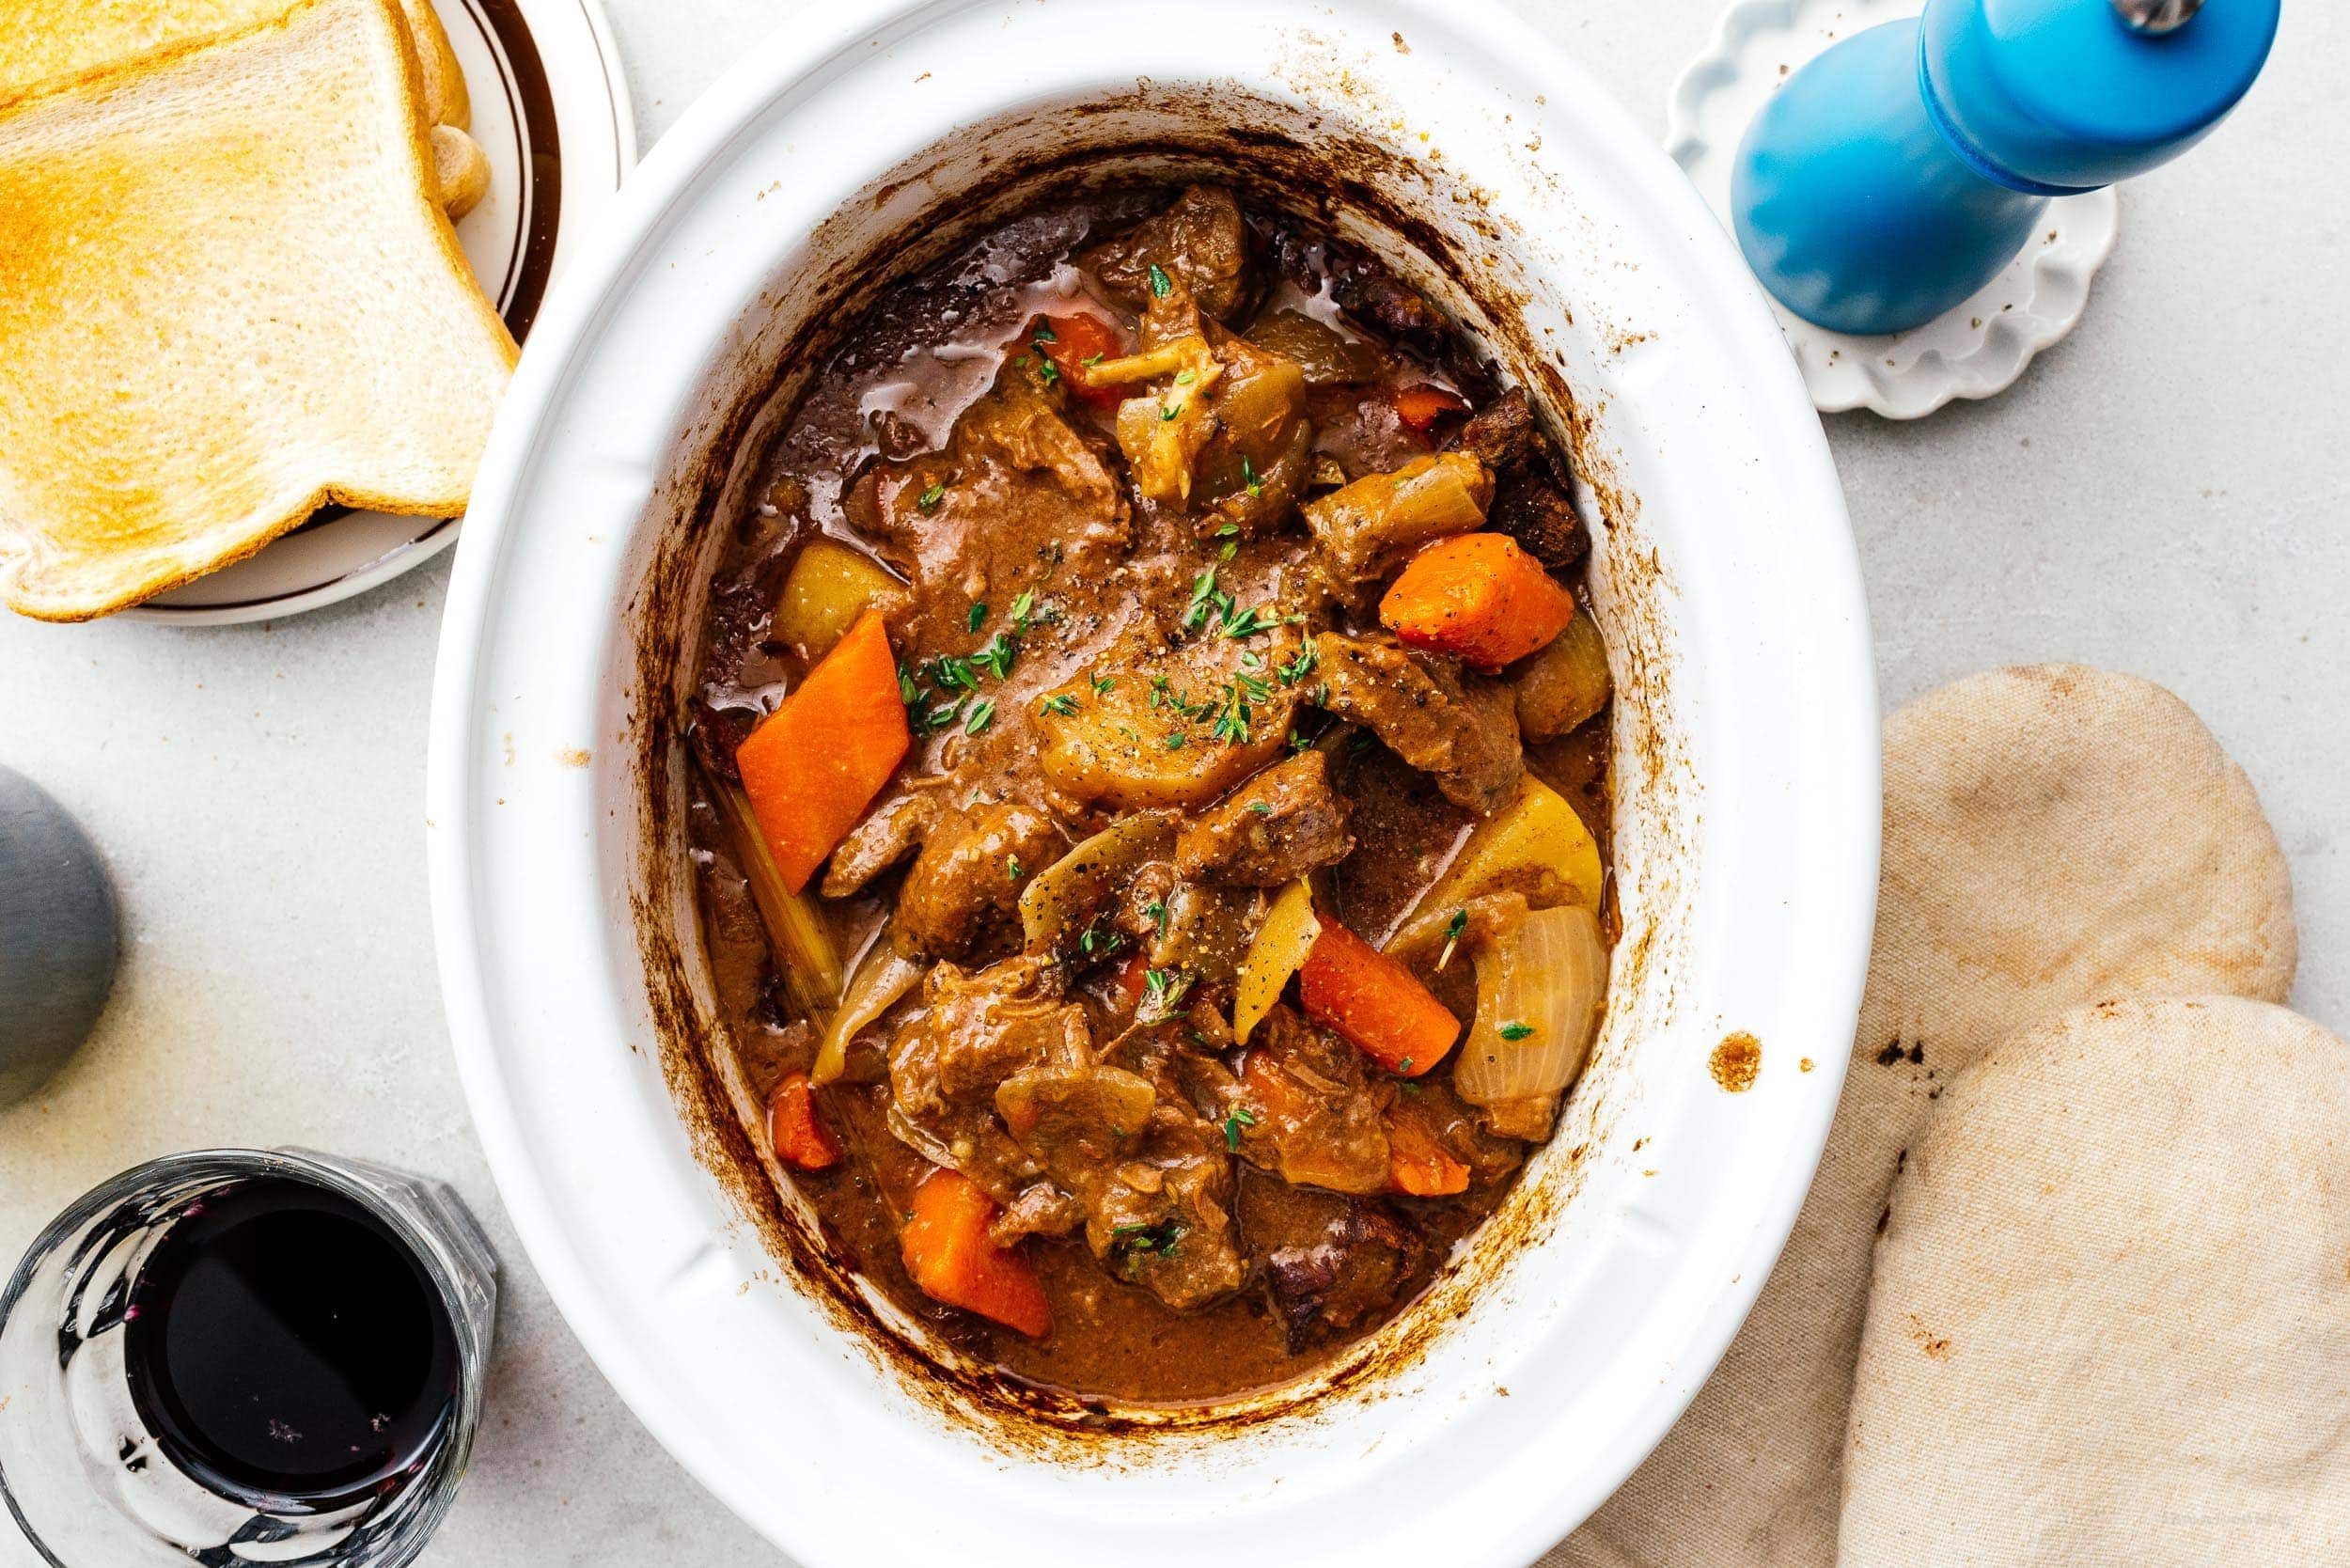
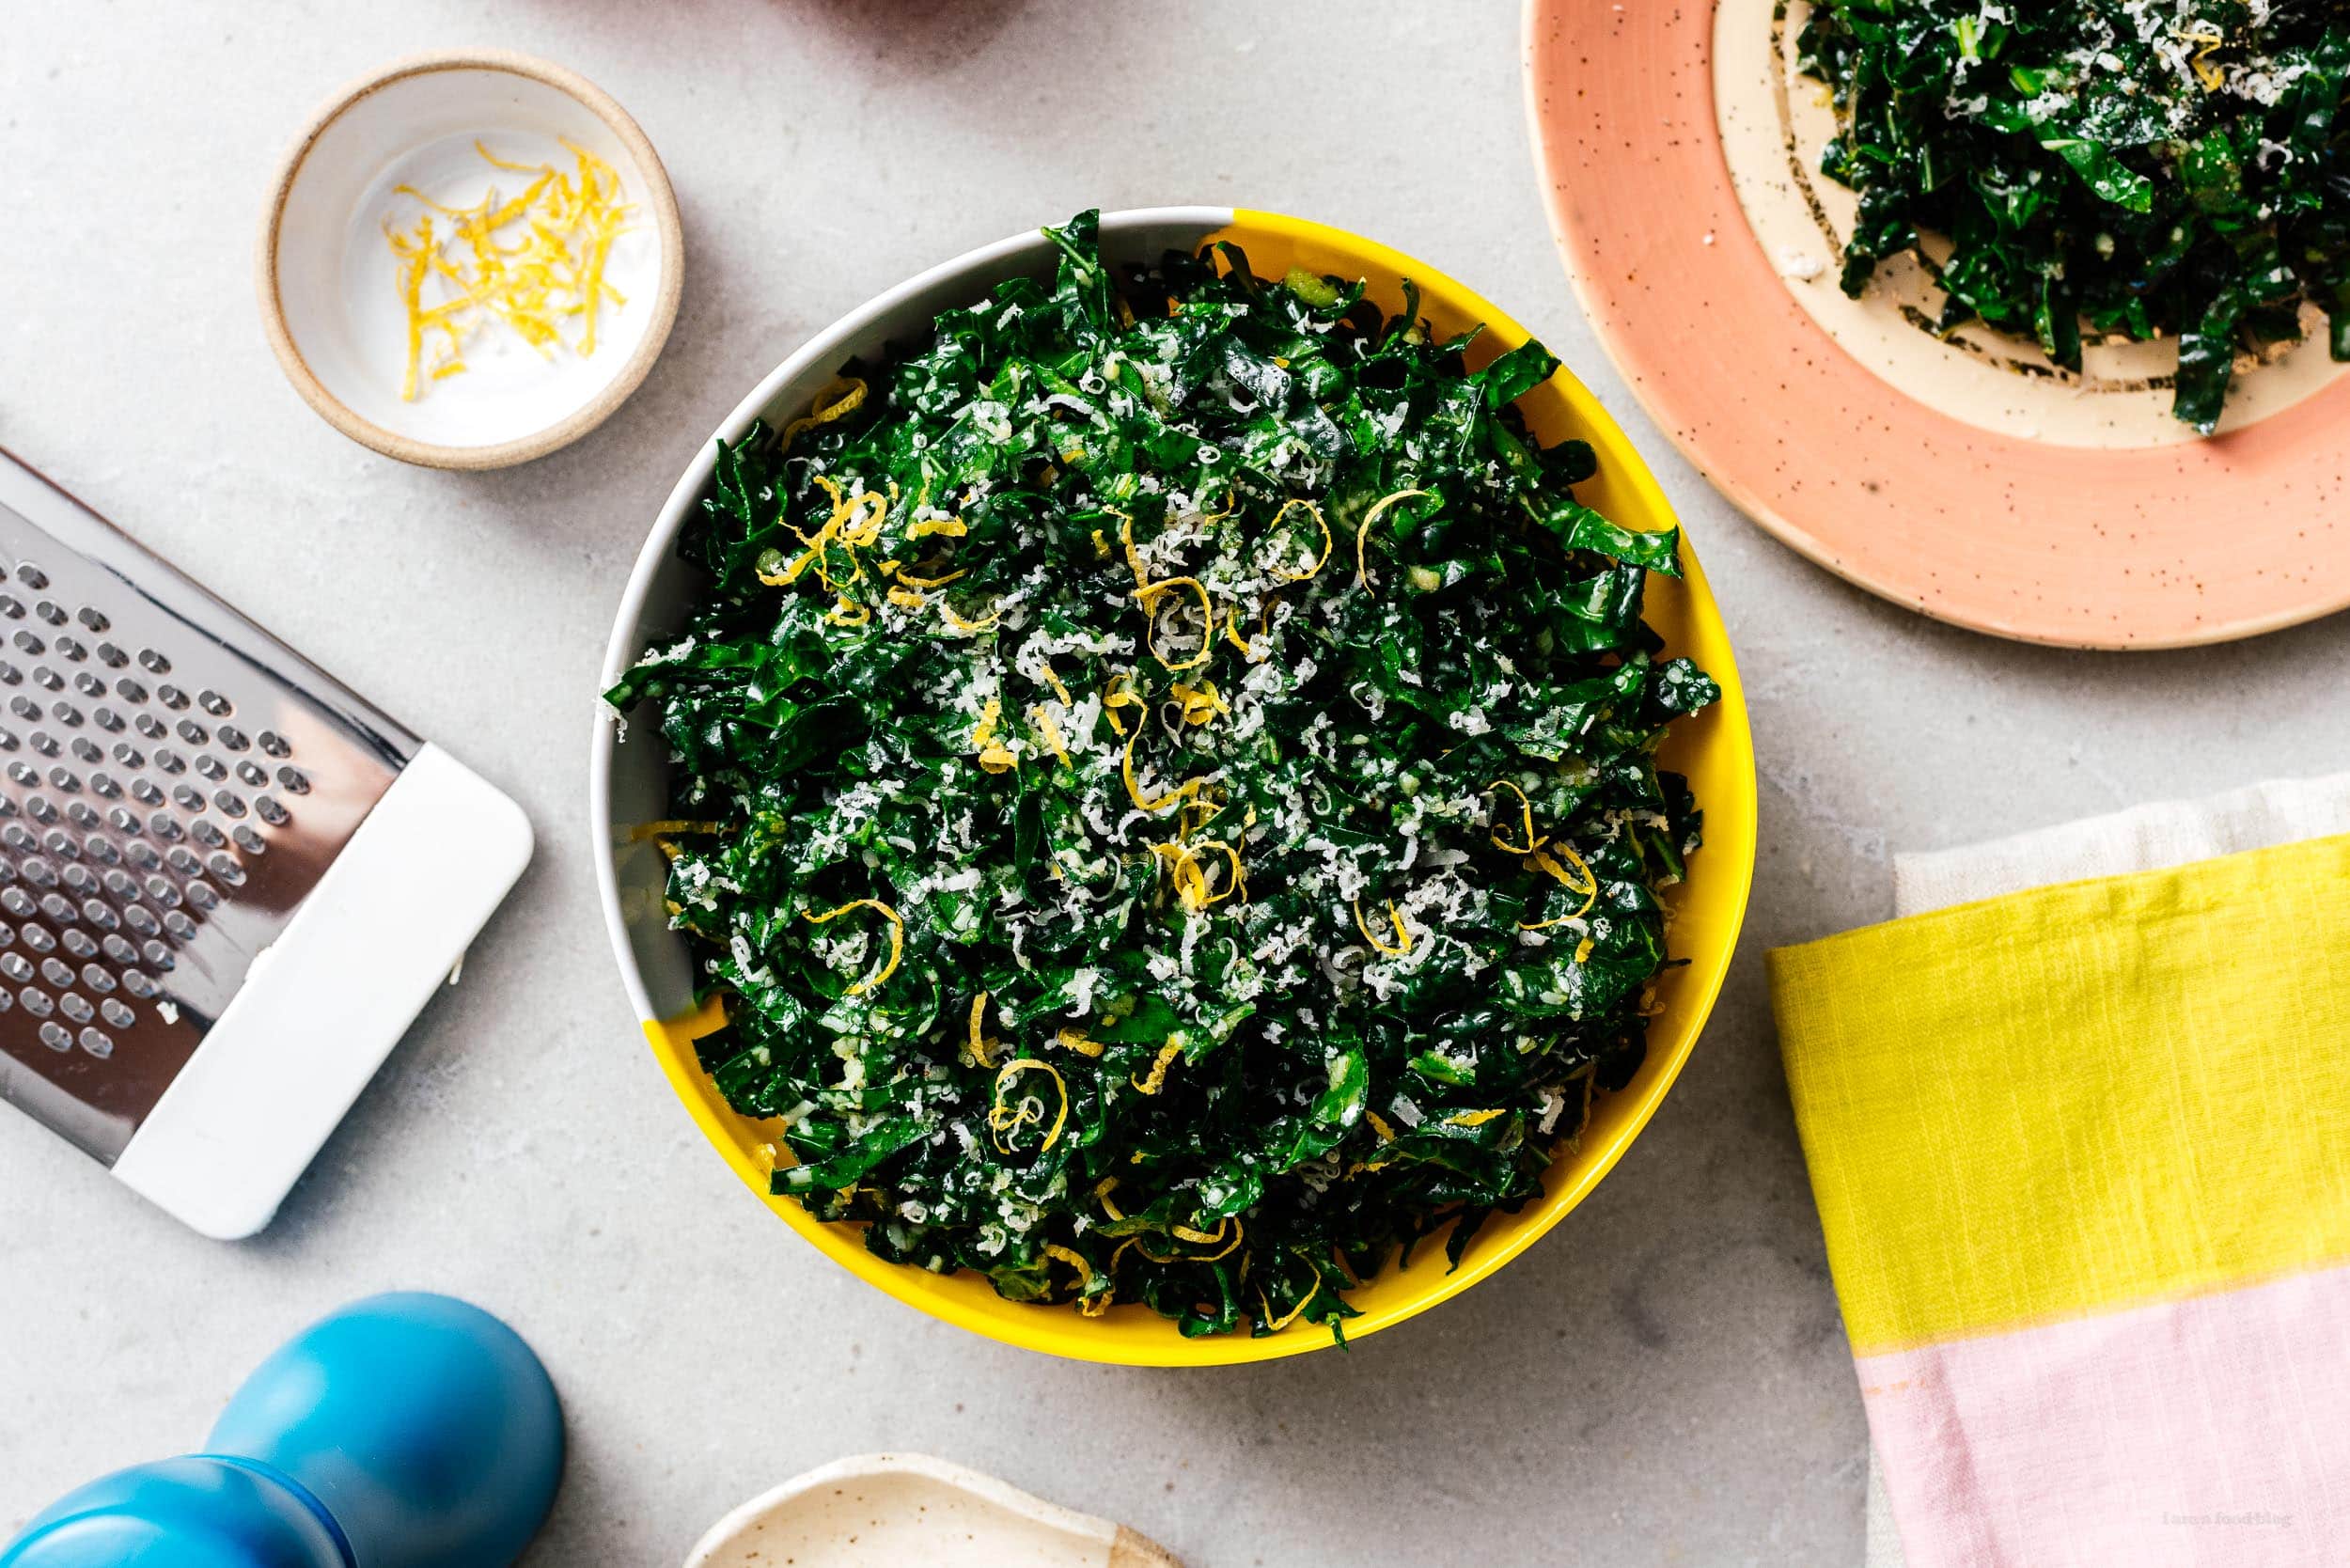
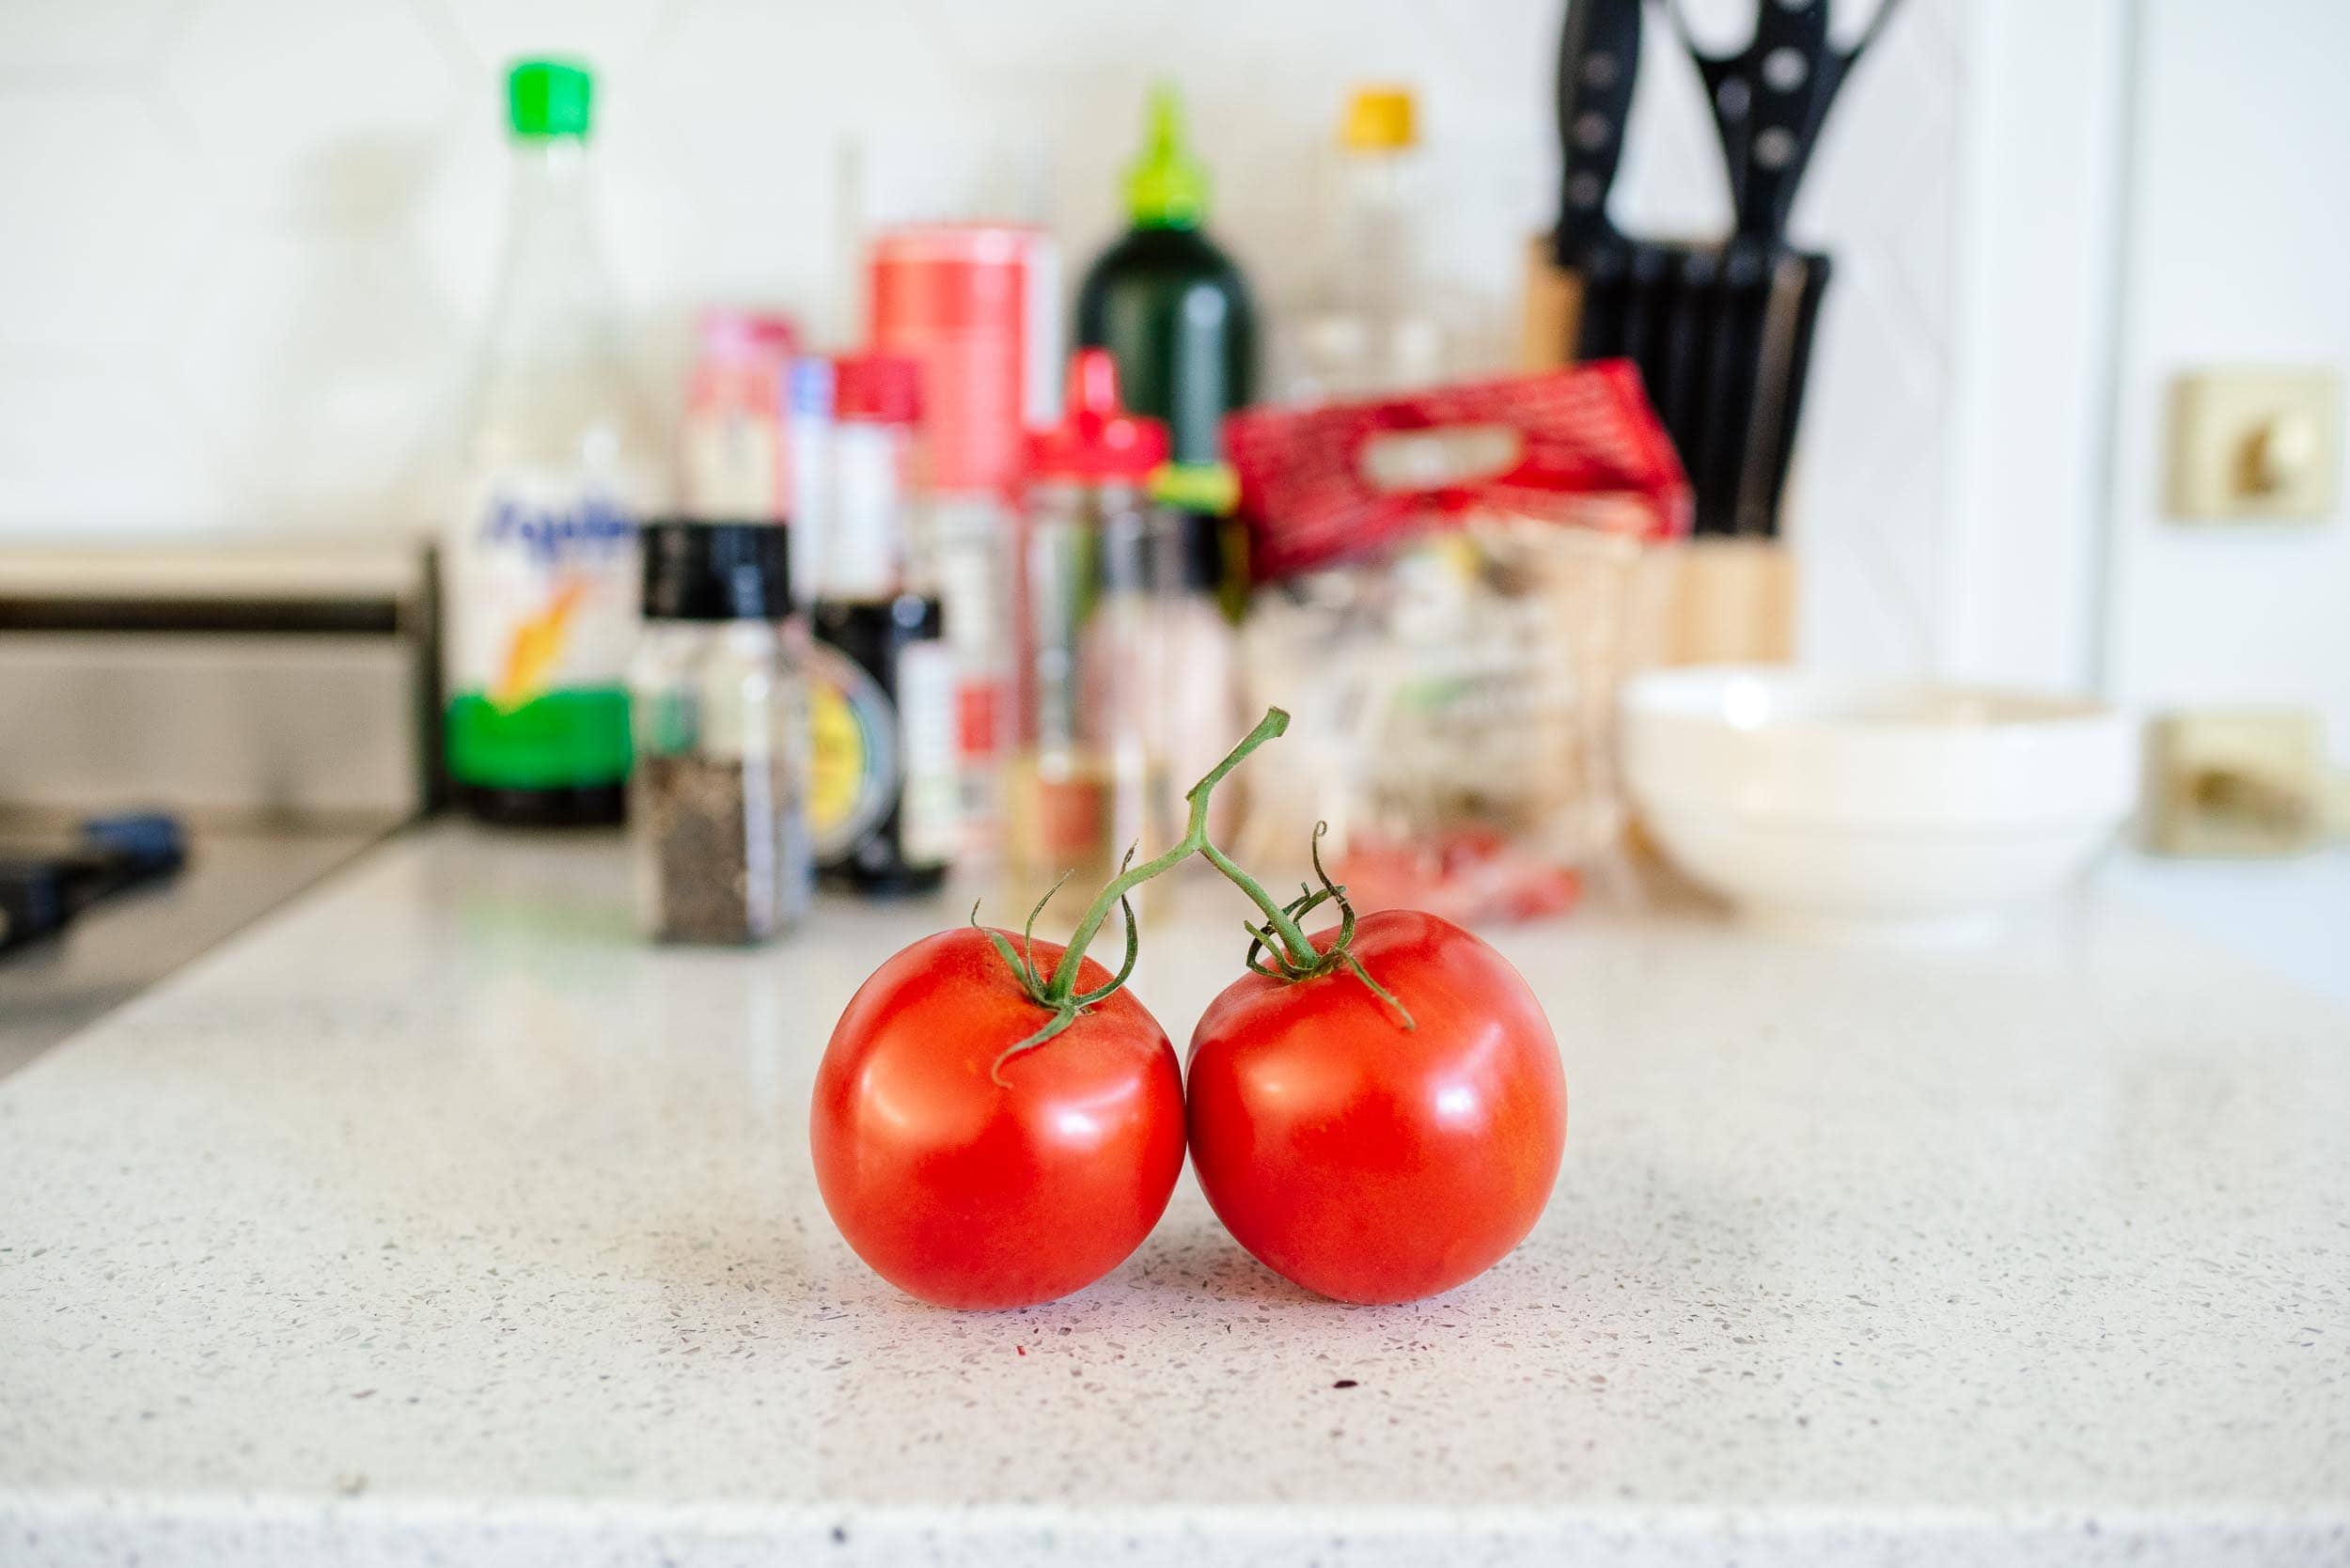
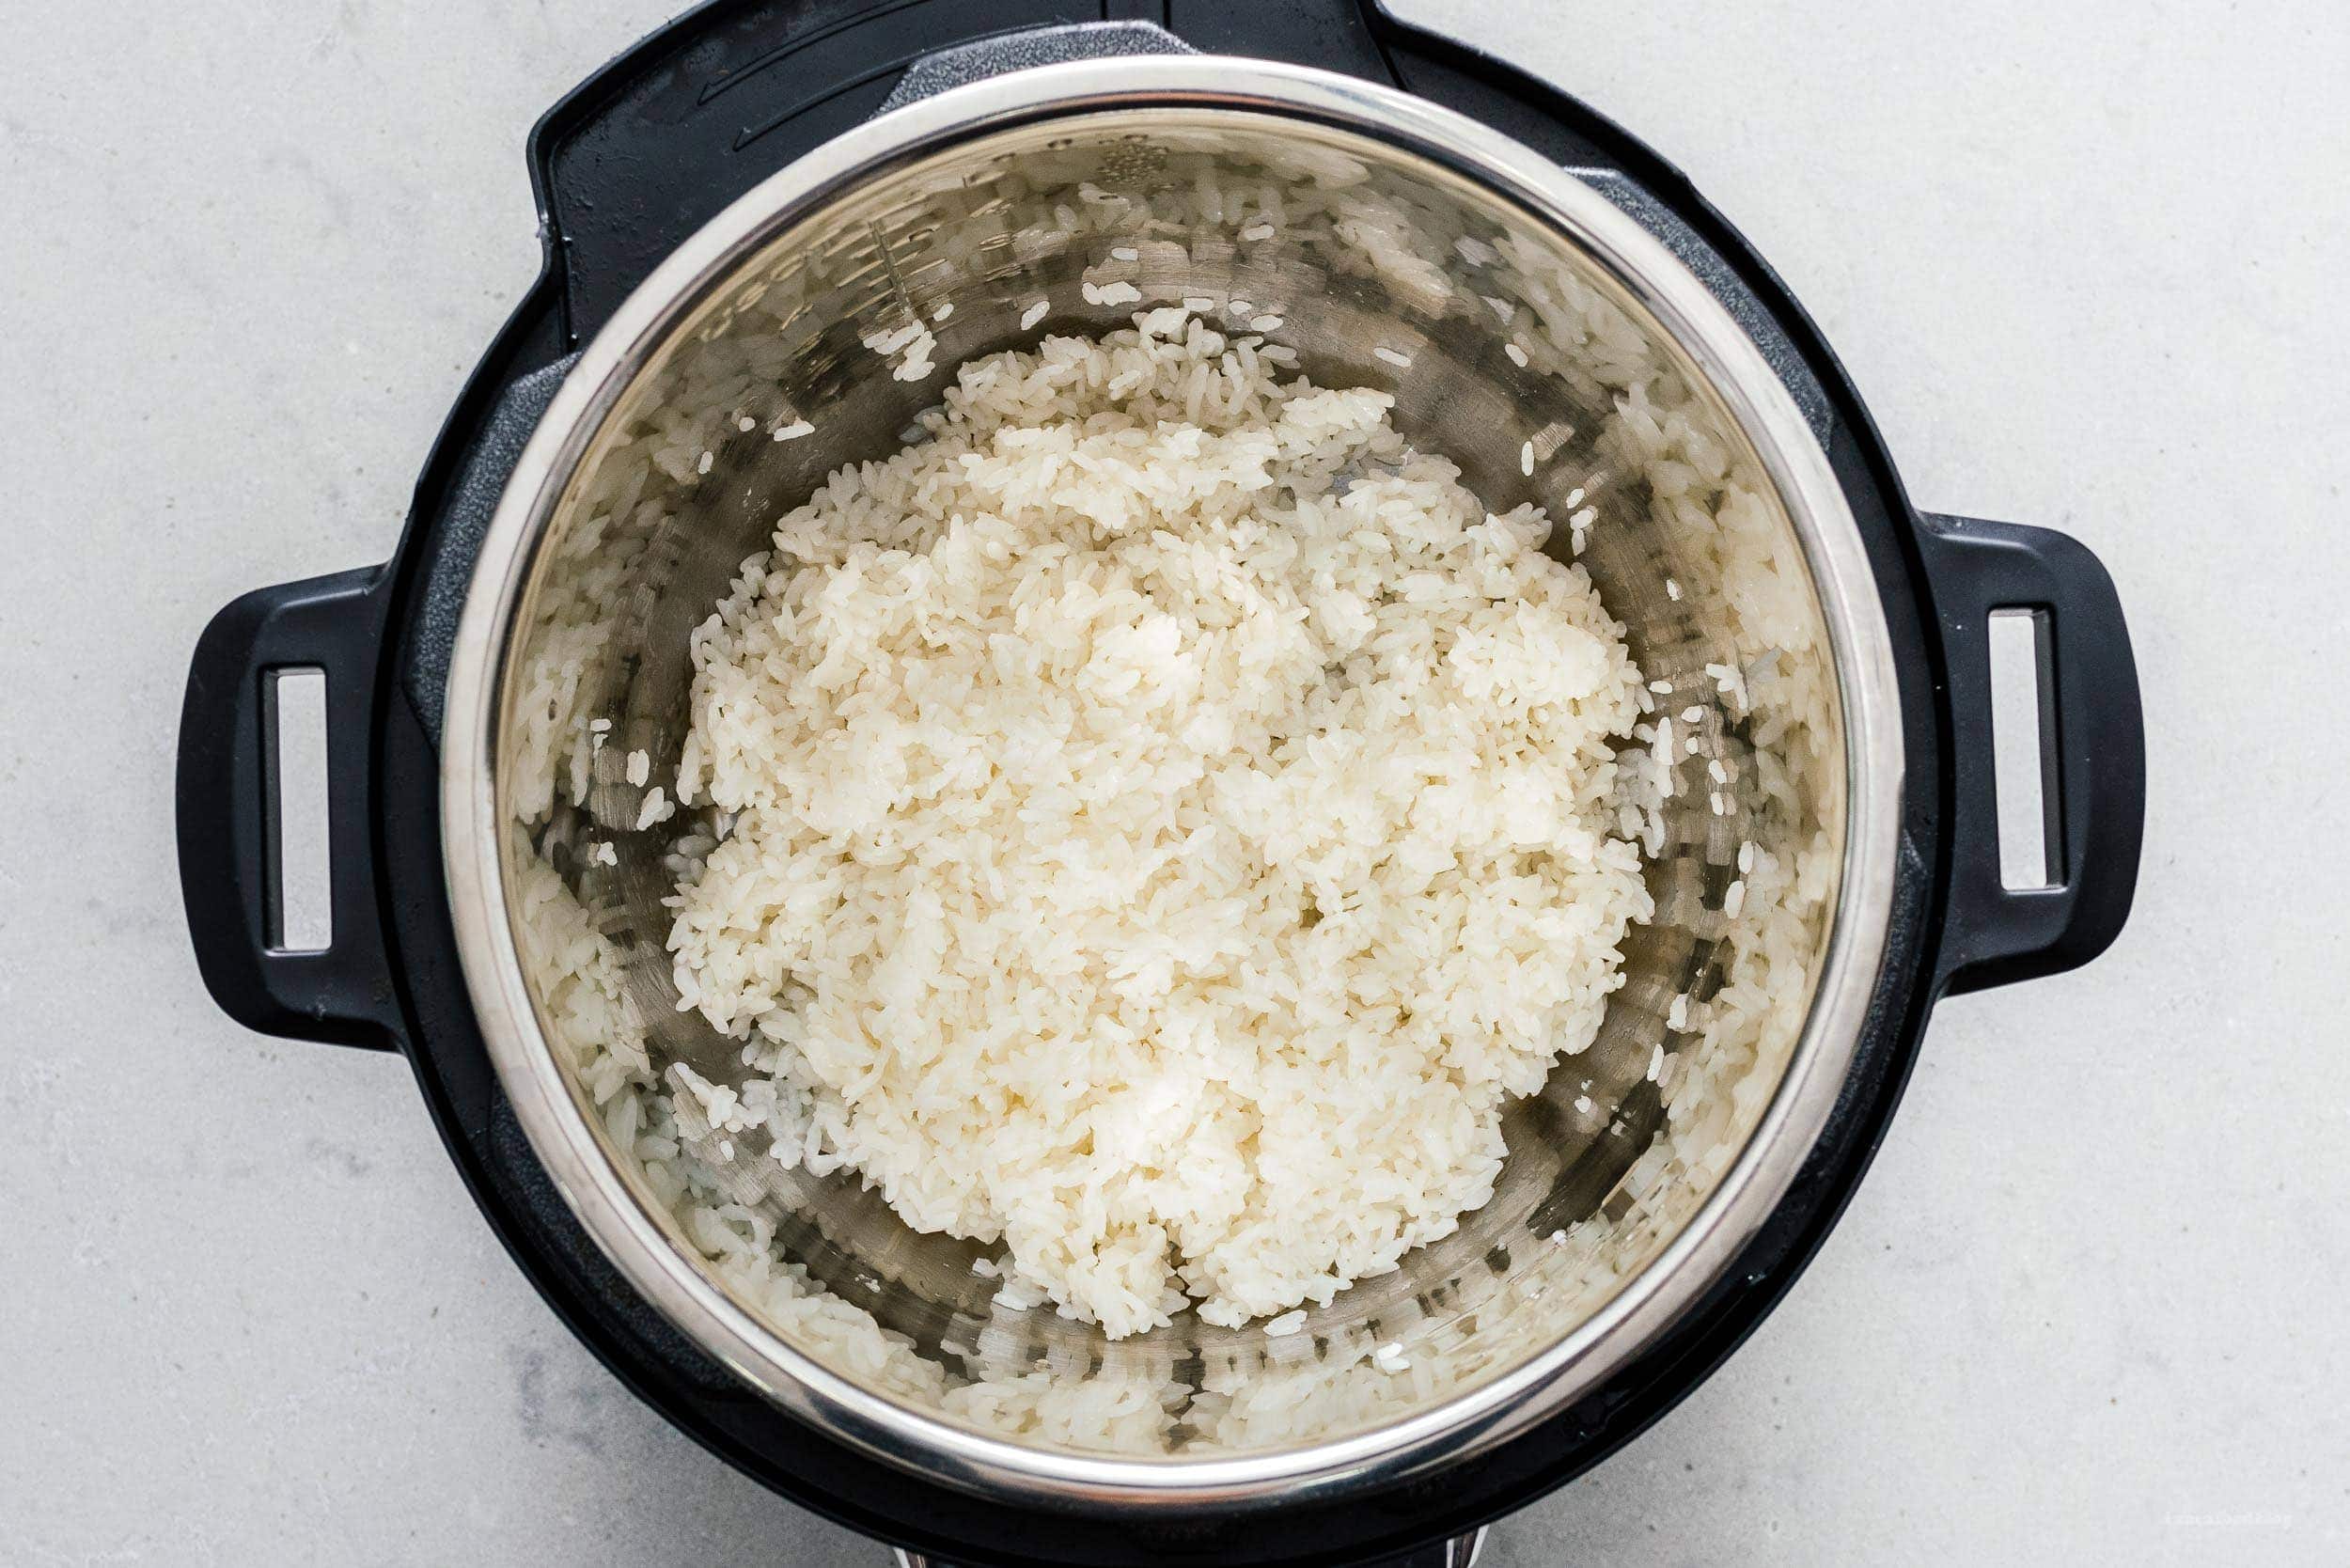
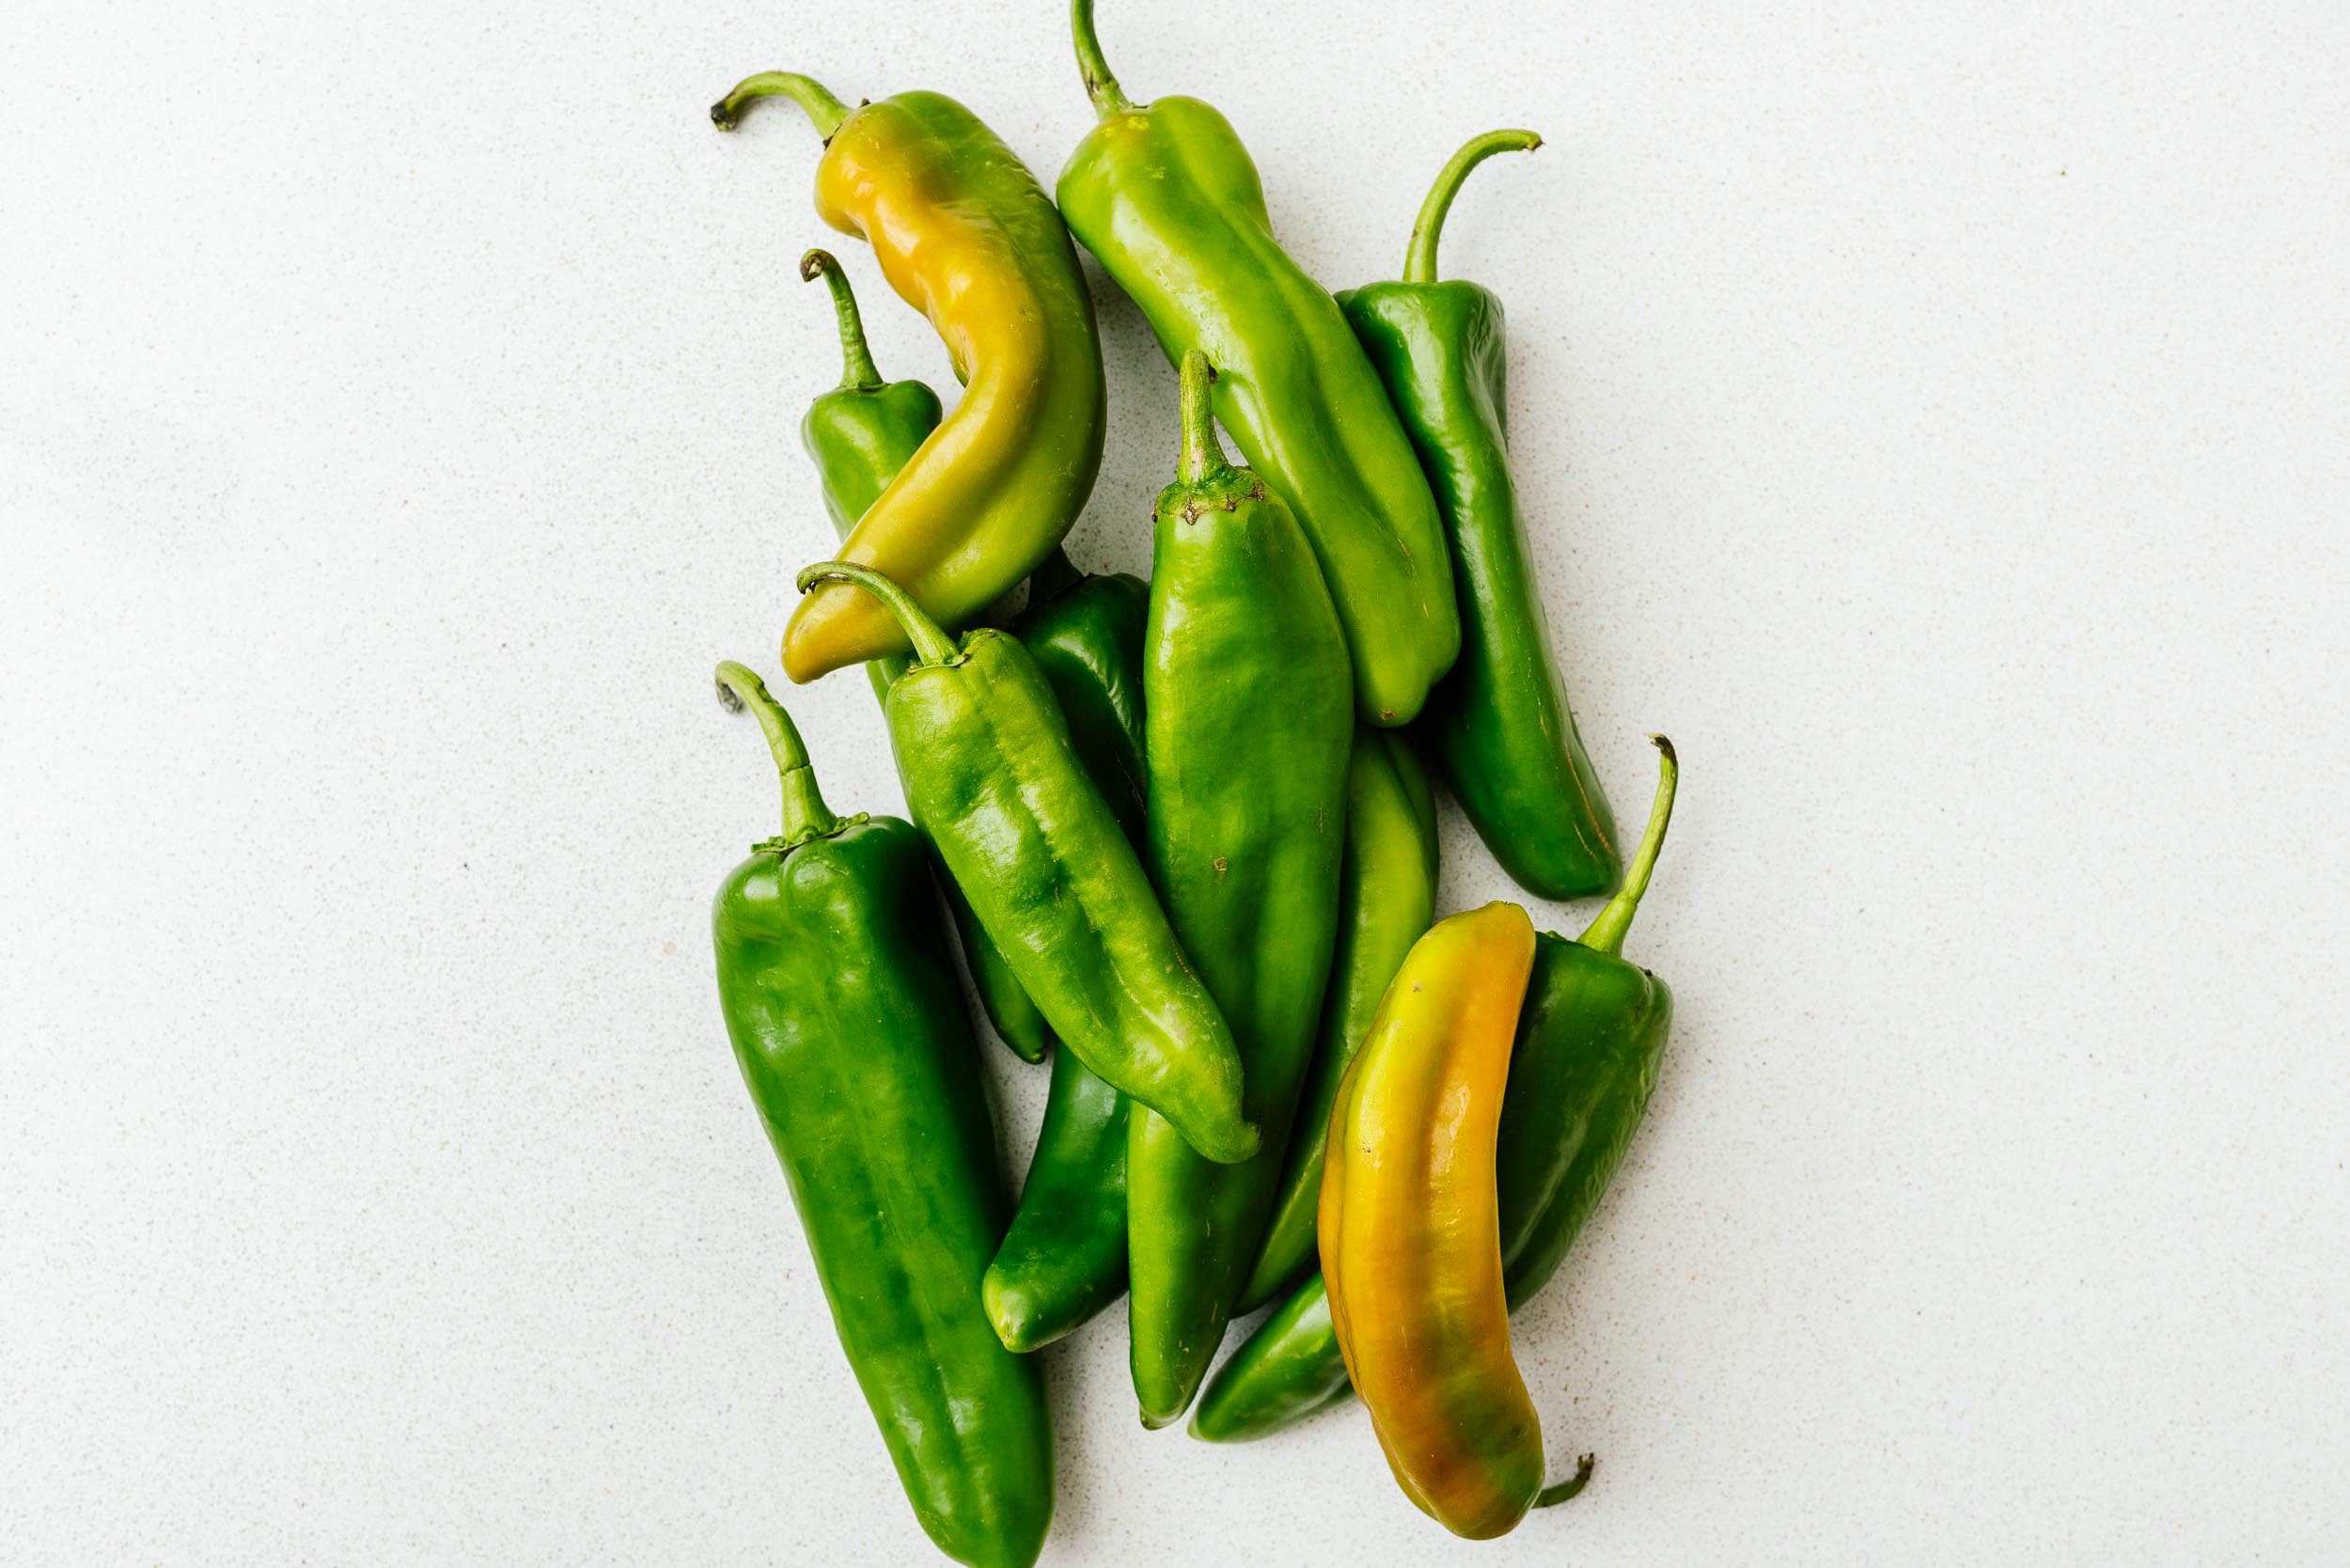
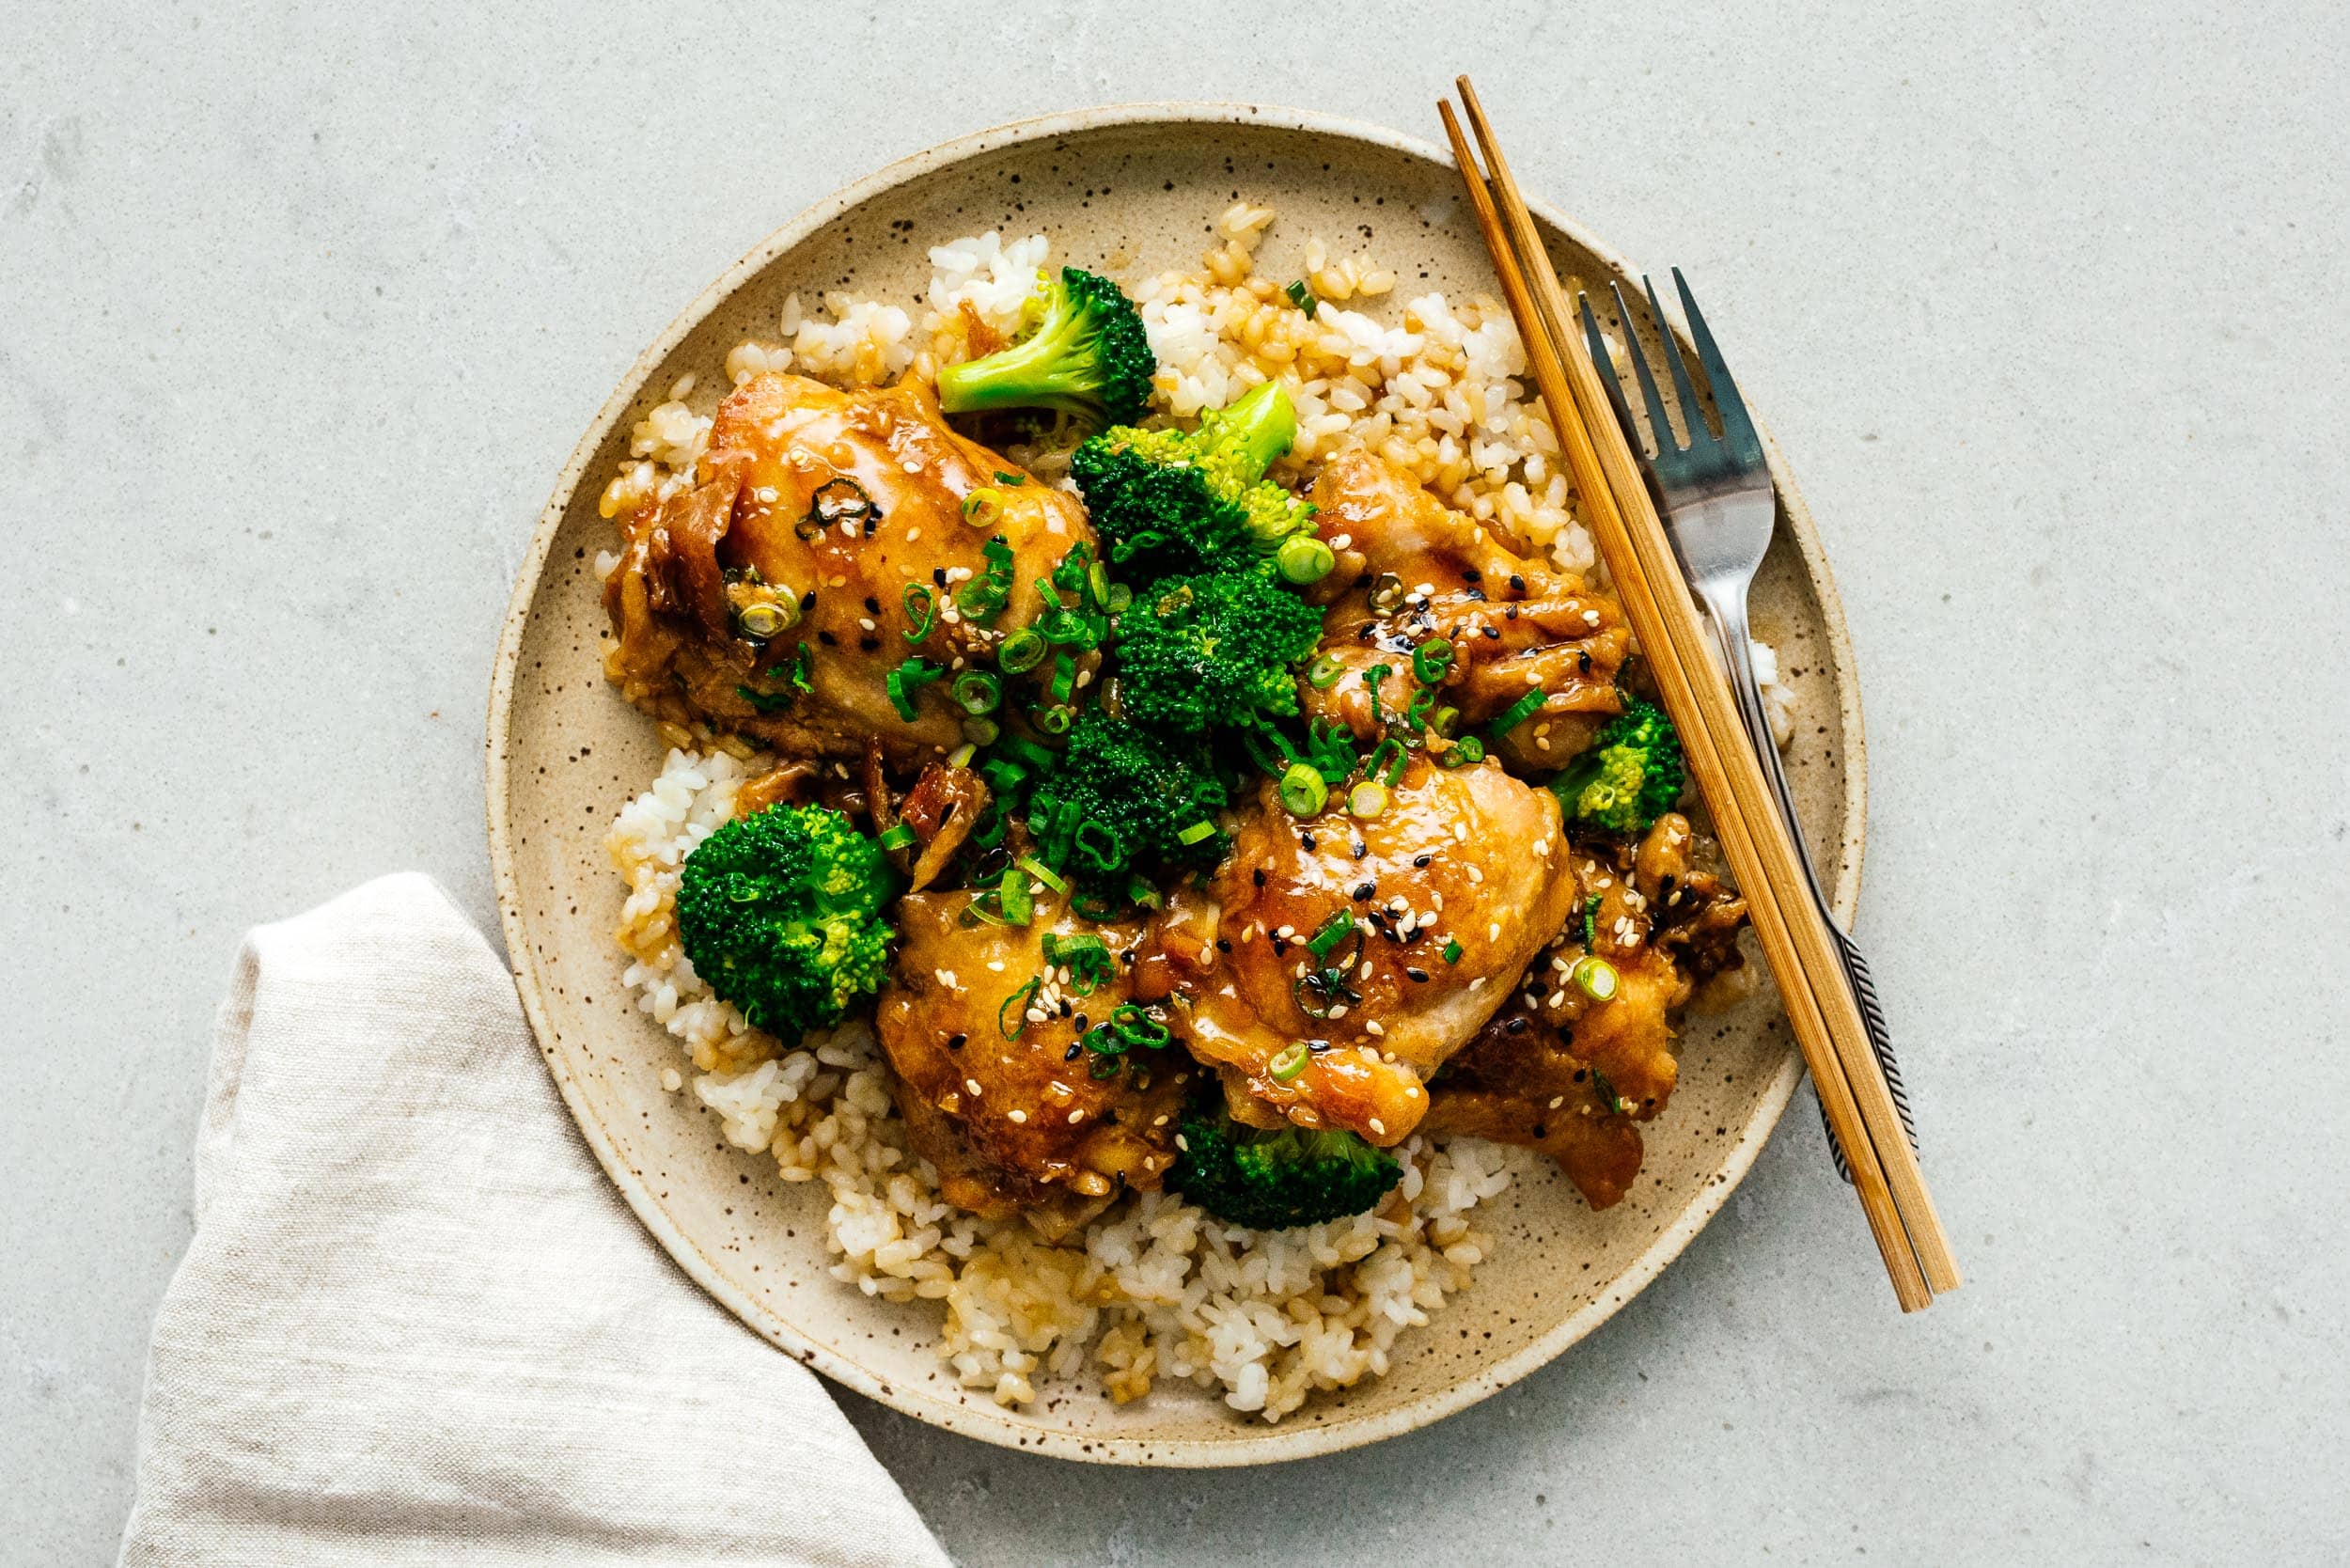

 2015 Holiday Giveaway
 One-Pot Lemon Scallop Pea Spaghetti
 Beer Battered Onion Rings, Jalapeno Aioli
 2014 Holiday Gift Guide and a Giveaway
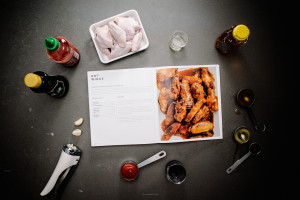 Easy Gourmet Hot Wings and a Giveaway!
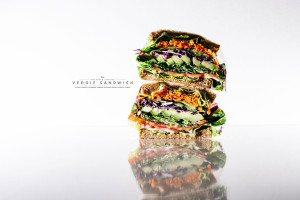 The Ultimate Veggie Sandwich
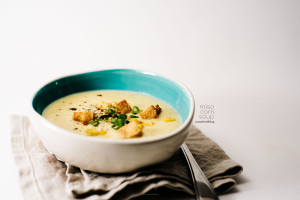 Vegan(!) Creamy Corn Soup Recipe
 Sunday Brunch: Grilled Cheese Eggs Benny